Copyright
This book is released under GFDL https://www.gnu.org/licenses/fdl-1.3.html.
Author
This book was written by Karthikeyan.A.K. You can reach me at mindaslab@protonmail.com or via WhatsApp, Signal, or Telegram at +91 8428050777.
Prerequisite
There is one thing though, you must be familiar with using computers. I would suggest one to be familiar with Ubuntu GNU/Linux, you can get it here https://ubuntu.com. Install it on a computer, learn to use it, and get familiar with GNU/Linux. To get familiar with GNU/Linux one may visit and learn from http://linuxjourney.com.
Why this book?
For unknown reason very smart programmers are using Clojure, I haven’t figured out why. The writing of this book is to figure out why. My last job was in a medical coding company where we maintained 3 Rails app, I got to code in two of them, one had 0.1+ million lines of code, was headed by a guy who knew how to code and was maintained okay, other one had 0.2+ million lines of code, had no test, headed by a guy who did not know how to code but could just do politics, that project was headed by people who did not know how to write maintainable software and senior developers in the project had to bear the brunt of history. It showed me how screwed Rails app can get if left unattended, so I want to search for something that’s more idiot-proof.
When I first met Ruby on Rails, I was very sure PHP will be the king of web page making, and it’s true even today, but Rails changed my life and made me more productive. I will not say that with Rails we cannot handle massive projects, in my present job extremely skilled people and me are doing just that, but then this book is just a search, a very similar search I did in my PHP days when I got a hint of the power of Ruby, and this book is to document my search, to see if Clojure is good enough or not.
Another reason why I am going into Clojure is because of Clojure Script. If I can use the same language on both client and server side and if its not dreaded JavaScript, who wouldn’t want to explore such language? Lisp seems to be a very old language and Clojure seems to be a Lisp dialect for the present day. Somehow the inventors of Lisp seem to have struck the right balance early on, and I need to find out what it is.
I have lots of Data Science ideas, and looks like Clojure is fast and powerful enough to be used in those fields too (at least for personal use). I want to explore that too, though I wonder if JVM ever runs on GPU for fast computation.
One negative I find is JVM. Java is controlled by Oracle, and it’s an evil enterprise like Microsoft and Apple. That’s the only negative I have, but let’s see how things go.
Where to get help
If you are new to programming, or even if you are a seasoned programmer, chances are you could be stuck and may need help from time to time. For Clojure people these channels listed in this chapter may help.
Local communities
Its better to search for local Clojure and GNU/Linux communities and become friends with them. If you can find one, consider joining them. Those are the best ways to get help. One may look here https://clojure.org/community/user_groups for nearby group.
Clojure website
The Clojure website may be a good starting point to browse for help if you have the time and patience. One may visit it here https://clojure.org/.
Clojure forum
The official Clojure forum is here https://ask.clojure.org/, one may join it and start asking questions. Some of my initial doubts were cleared by this forum.
Clojure has a second forum here https://clojureverse.org/, it’s called Clojureverse this one too seems to be popular.
Reddit also has a Clojure community. If you are a reddit user, one may find the community here https://www.reddit.com/r/Clojure/.
Getting this book
One can get this book here https://clojure-book.gitlab.io/.
1. Installing Stuff
| Watch the video for this section here: https://yu7.in/clj-installing-stuff |
1.1. Clojure
Clojure works on all operating systems. You can install Clojure by following the link here: https://clojure.org/guides/install_clojure. Once installed, it is time for us to check the Clojure REPL. (To learn what a REPL is, check out https://en.wikipedia.org/wiki/Read%E2%80%93eval%E2%80%93print_loop). Type clj in your terminal, and you should see something like this:
$ clj
Clojure 1.10.2
user=>
That’s the Clojure REPL. Now type (println "Hello World") in it as shown below and press ENTER.
$ clj
Clojure 1.10.2
user=> (println "Hello World")
You will see Hello World printed out as shown:
$ clj
Clojure 1.10.2
user=> (println "Hello World")
Hello World
nil
user=>
There is also a nil after Hello World. Don’t worry too much about that; we will see what that is later. After the nil, you will see user⇒ once again, which means Clojure is waiting for you to type another command for it to execute.
If you want to exit the Clojure REPL, press CTRL+D. You will get back to your terminal prompt.
1.2. Leiningen

Leiningen is a tool that automates tasks like setting up a Clojure project. Please refer to its website https://leiningen.org/ and install it. Once installed, type lein repl in your terminal, and you should see this:
$ lein repl
nREPL server started on port 64285 on host 127.0.0.1 - nrepl://127.0.0.1:64285
REPL-y 0.4.4, nREPL 0.8.3
Clojure 1.10.1
OpenJDK 64-Bit Server VM 1.8.0_152-release-1056-b12
    Docs: (doc function-name-here)
          (find-doc "part-of-name-here")
  Source: (source function-name-here)
 Javadoc: (javadoc java-object-or-class-here)
    Exit: Control+D or (exit) or (quit)
 Results: Stored in vars *1, *2, *3, an exception in *e

user=>
Press CTRL+D to exit. All is well, and you have successfully installed Leiningen.
Open or create the file ~/.lein/profiles.clj and add the following content to it:
{:repl {:plugins [[cider/cider-nrepl "0.47.0"]]}}1.3. Configuring IDE
1.3.1. Installing VSCodium
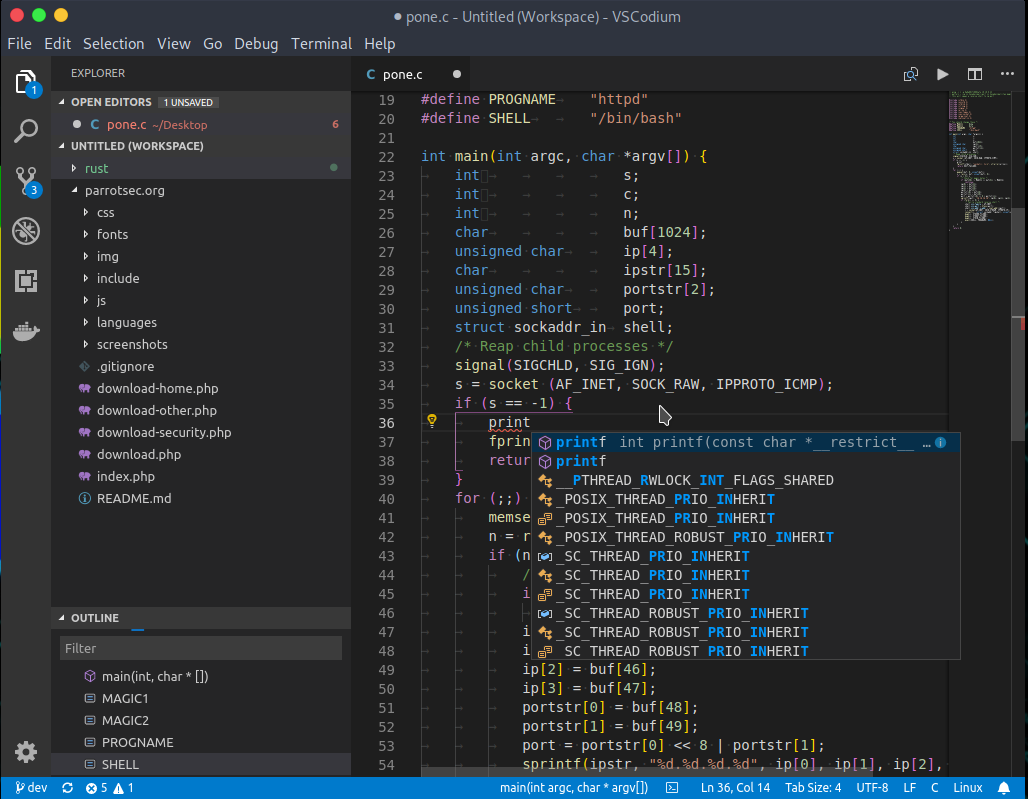
You could use any IDE, but since this is my book, I will take the liberty of suggesting VSCodium. This IDE takes the editor made by Microsoft and removes the telemetry and tracking. You can get the IDE and find installation instructions at https://vscodium.com/.
1.3.2. Calva

To use Clojure in VSCodium, there is an excellent extension called Calva. You can learn about it at https://calva.io. Go to VSCodium extensions and install it by searching for it:
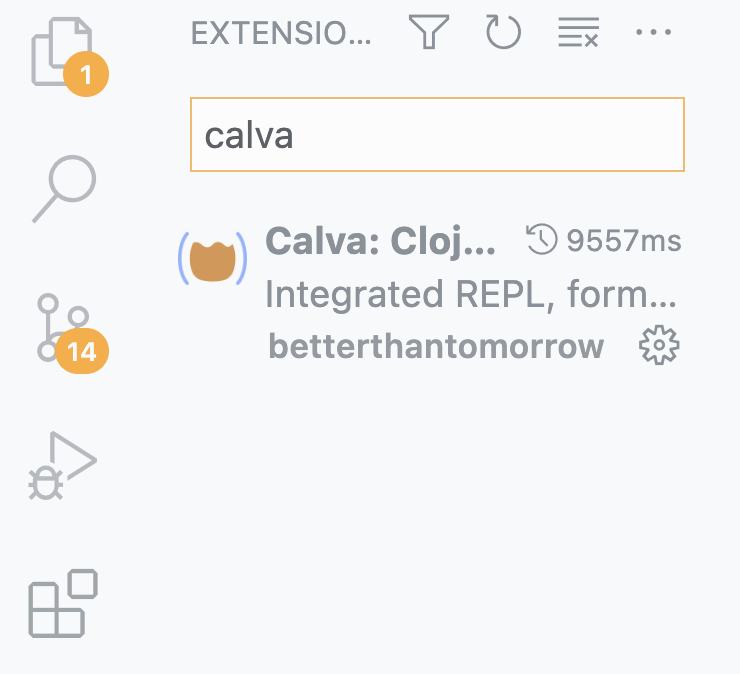
You can get started with Calva with the excellent guides and videos at https://calva.io/getting-started/.
1.3.3. Modify user settings JSON
In VSCodium, open the user settings JSON file by pressing CTRL+SHIFT+P (or CMD+SHIFT+P on macOS) and type "settings json". You should see options like this:
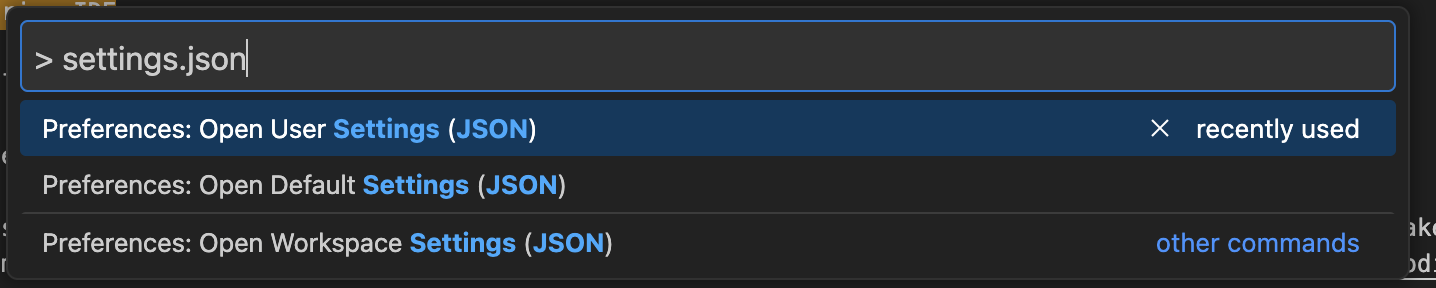
Select Preferences: Open User Settings (JSON) and press ENTER. You will see a JSON file with content similar to this:
{
    "git.confirmSync": false
}
Add the following settings:
"calva.outputDestinations": {
   "evalResults": "repl-window",
   "evalOutput": "repl-window"
}
to the end of the JSON object, so it looks like this:
{
    "git.confirmSync": false,
    "calva.outputDestinations": {
        "evalResults": "repl-window",
        "evalOutput": "repl-window"
    }
}
Save it. You are all set.
2. Hosted Language
| Watch the video for this section here: https://yu7.in/clj-hosted-language |
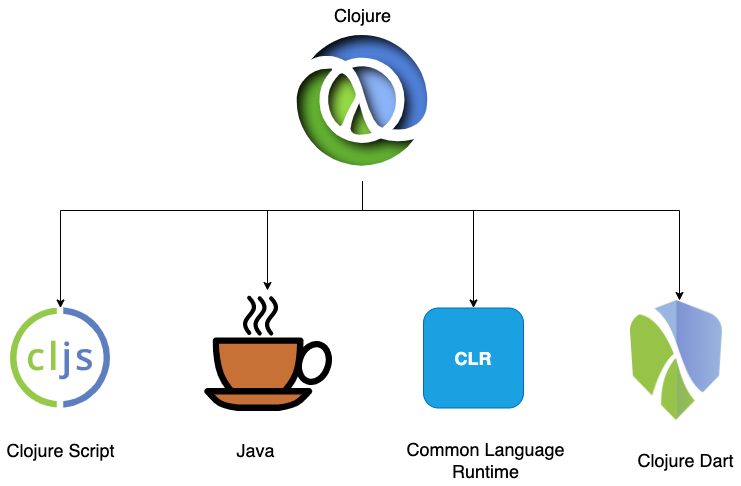
Clojure is a hosted language, which means it is not compiled directly to machine code that runs on a processor or an operating system. Clojure was initially designed to run on the Java Runtime Environment (JRE), compiling to JVM bytecode. Since Clojure is hosted, developers found ways to compile Clojure to JavaScript, which led to the creation of ClojureScript (https://clojurescript.org/). Clojure can also compile to the Common Language Runtime (https://clojure.org/about/clojureclr)—the target environment for the .NET family of languages. Additionally, it compiles to Dart via ClojureDart (https://github.com/Tensegritics/ClojureDart). Thus, by learning Clojure, one can target multiple platforms.
Note that Clojure does not promise "Write Once, Run Anywhere" (WORA) like Java does. Instead, you may need to modify your code when targeting different platforms. What you do get, however, is a uniform Clojure syntax across all of them.
As a web developer, I can write the backend in any language I like, but for the frontend, I am often forced to use JavaScript. With Clojure, however, I can write both the frontend and backend in Clojure, avoiding the cognitive load that comes with switching languages.
3. First Steps
3.1. REPL
When I first started studying Clojure, I was introduced to REPL-driven development. I didn’t understand what it was in my early days; even if you don’t get it yet, don’t worry, you eventually will. In this section, let’s get a taste of REPL-driven development.
3.1.1. REPL in Terminal
In your terminal, type clj and you will see something like this:
$ clj
Clojure 1.11.1
user=>
The Clojure 1.11.1 indicates that Clojure version 1.11.1 is installed on your machine, and user⇒ is the prompt where Clojure is waiting for your input. Type (println "Hello World") as shown and press Enter:
$ clj
Clojure 1.11.1
user=> (println "Hello World")
Hello World
nil
user=>
You will see the output Hello World followed by nil. Then, you are prompted again at user⇒.
You can now press CTRL+D to exit the REPL.
So what actually happened when you typed clj? First, Clojure prompted you with user⇒. After you entered the code and pressed Enter, the Clojure REPL Read and Evaluated it, determined that you wanted to print Hello World, Printed Hello World (and the return value nil), and then Looped back to the prompt user⇒.
3.1.2. REPL in VSCodium
We have seen the REPL in action in the terminal; now let’s see it in VSCodium. Create a folder named code and open it with VSCodium. Now create a file named hello_world.clj in it with the following content:
;; hello_world.clj

(println "Hello World")
Now in terminal cd into code/ and type lein repl
$ lein repl
nREPL server started on port 52897 on host 127.0.0.1 - nrepl://127.0.0.1:52897
REPL-y 0.4.4, nREPL 0.8.3
Clojure 1.10.1
OpenJDK 64-Bit Server VM 1.8.0_152-release-1056-b12
    Docs: (doc function-name-here)
          (find-doc "part-of-name-here")
  Source: (source function-name-here)
 Javadoc: (javadoc java-object-or-class-here)
    Exit: Control+D or (exit) or (quit)
 Results: Stored in vars *1, *2, *3, an exception in *e

user=>
lein is short for Leiningen; you might remember installing it and checking if it launched. The repl command tells lein to start a REPL. You will see output similar to what is shown above. Note the nrepl://127.0.0.1:52897 in the output; this means a REPL server is running at IP 127.0.0.1 [1] on port [2] 52897. Note down 127.0.0.1:52897. The port number may vary in your case.
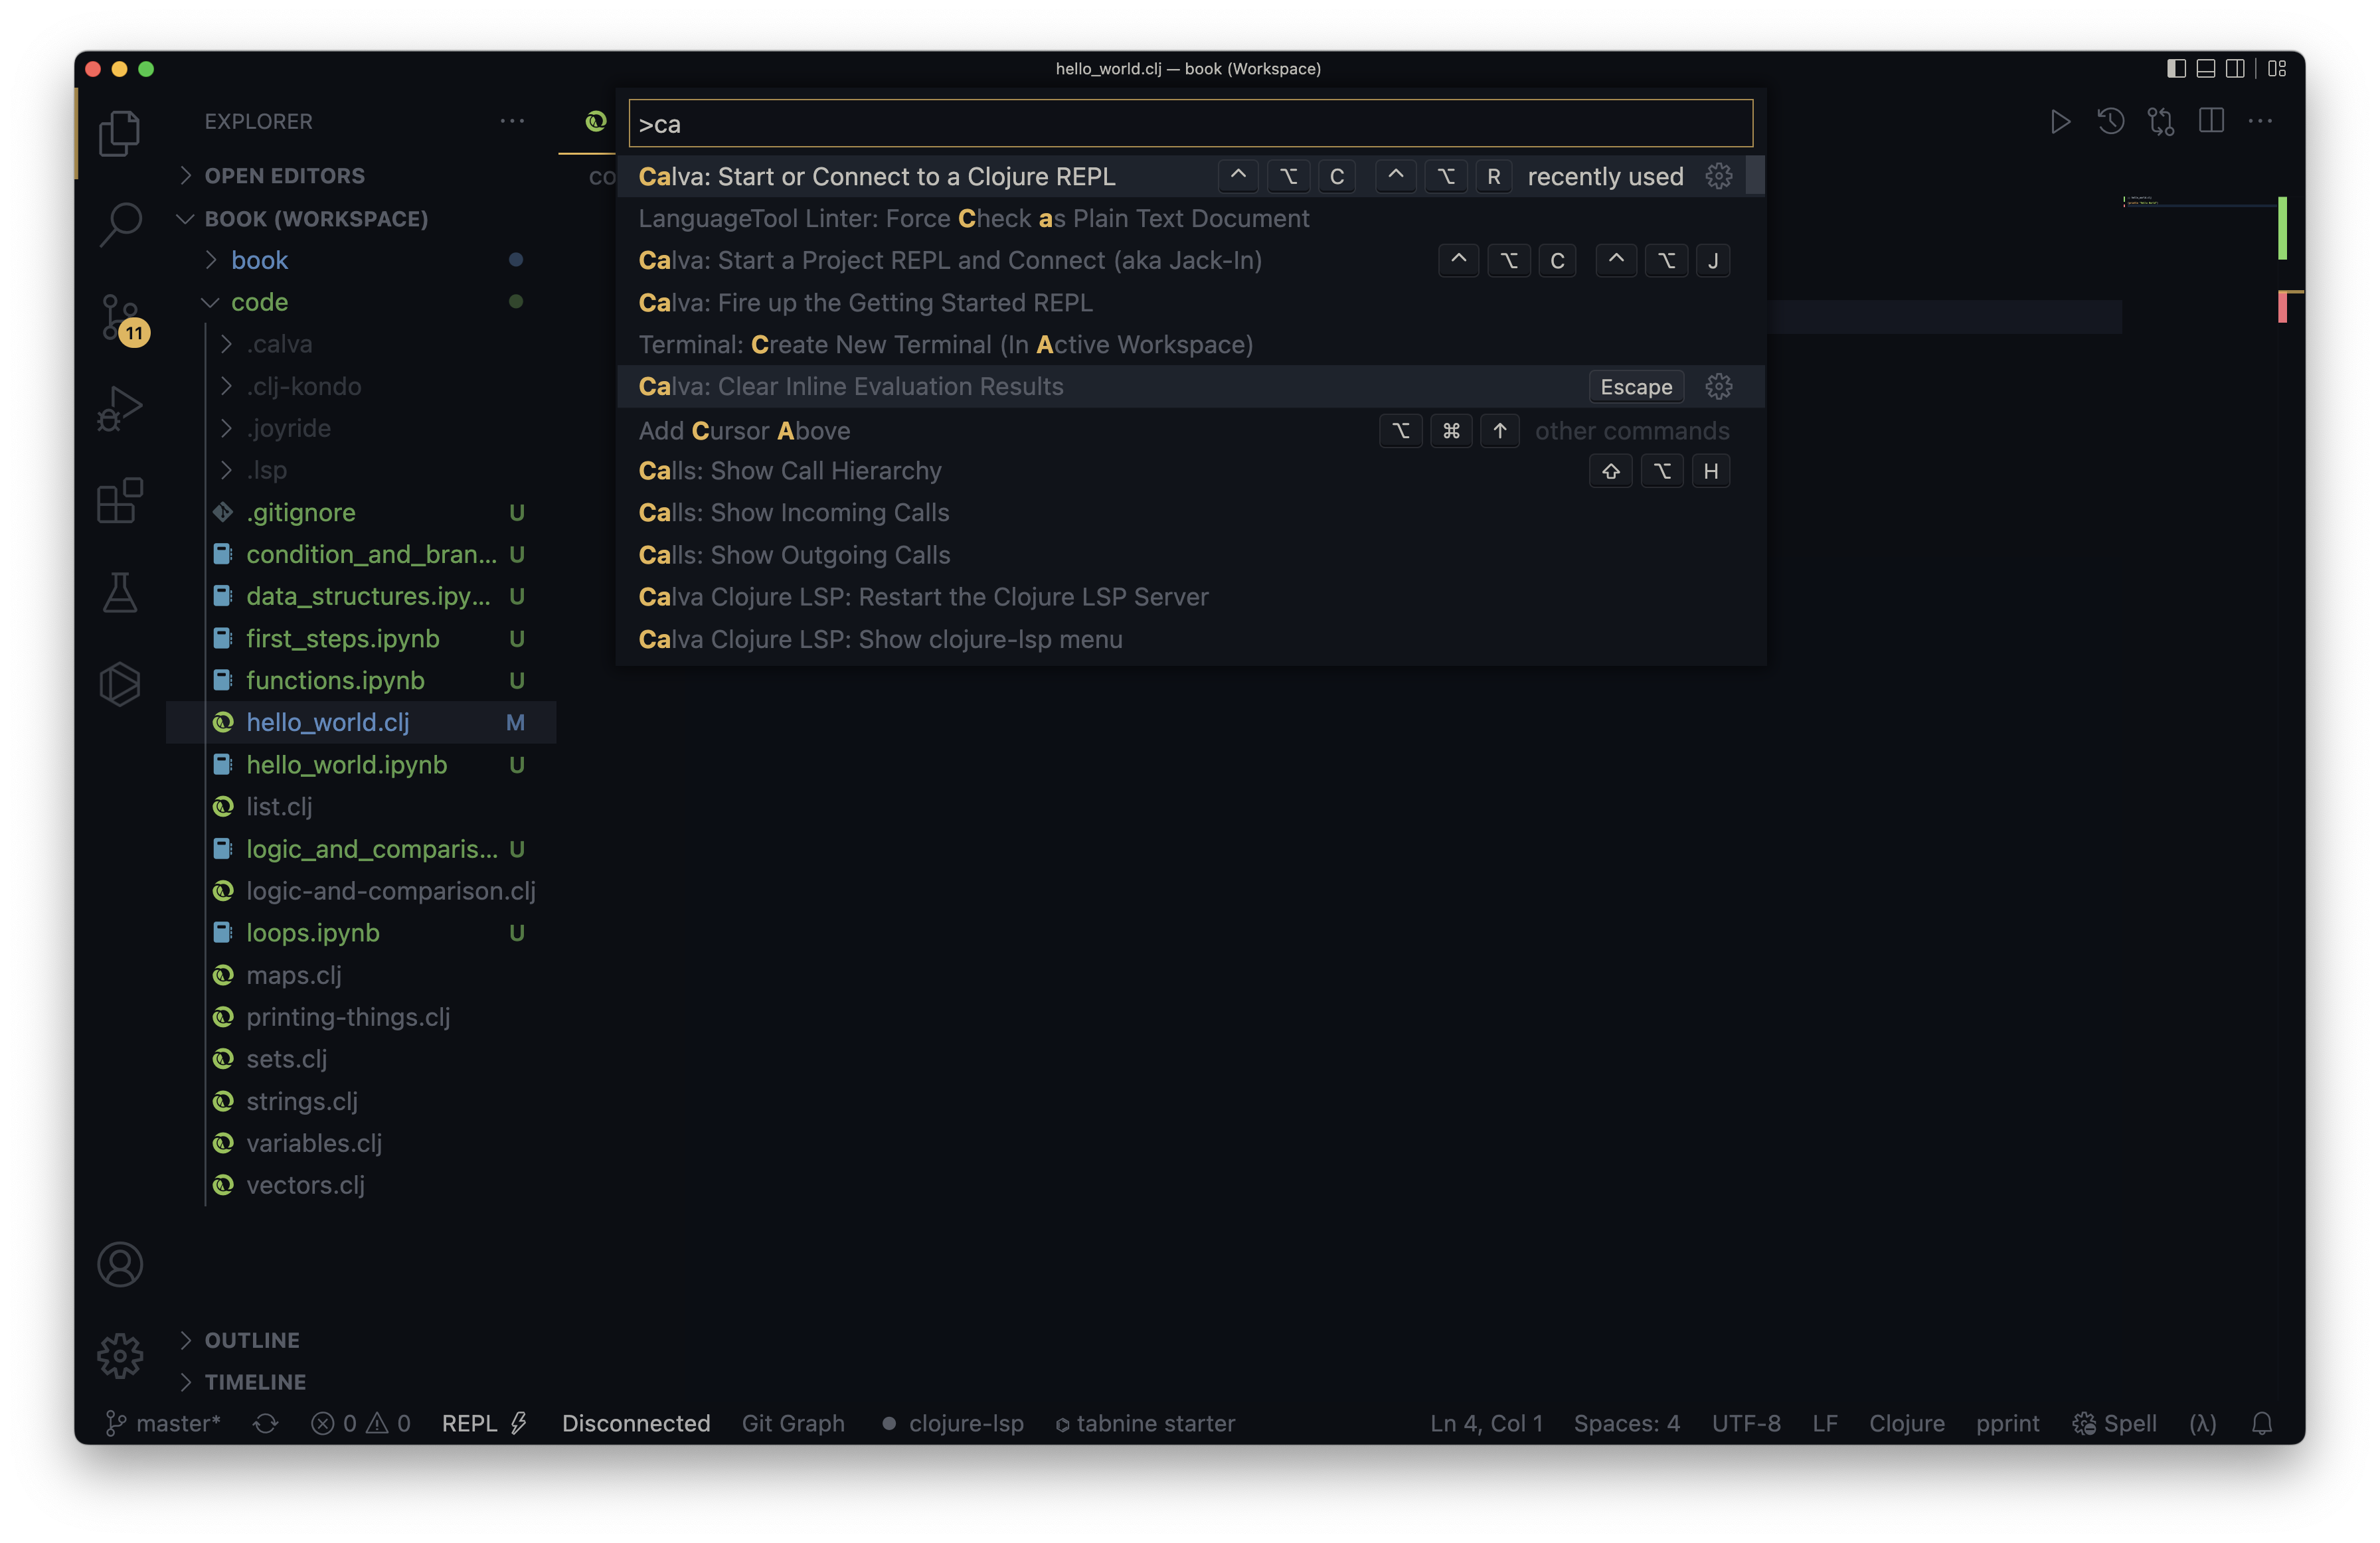
In VSCodium, press CTRL+P if you are on GNU/Linux, or command+P if you are on Mac and type >, which allows you to enter commands for VSCodium to execute. Try typing Calva: Start or connect to a Clojure REPL. As you type, VSCodium will suggest the option; press ENTER or click it.
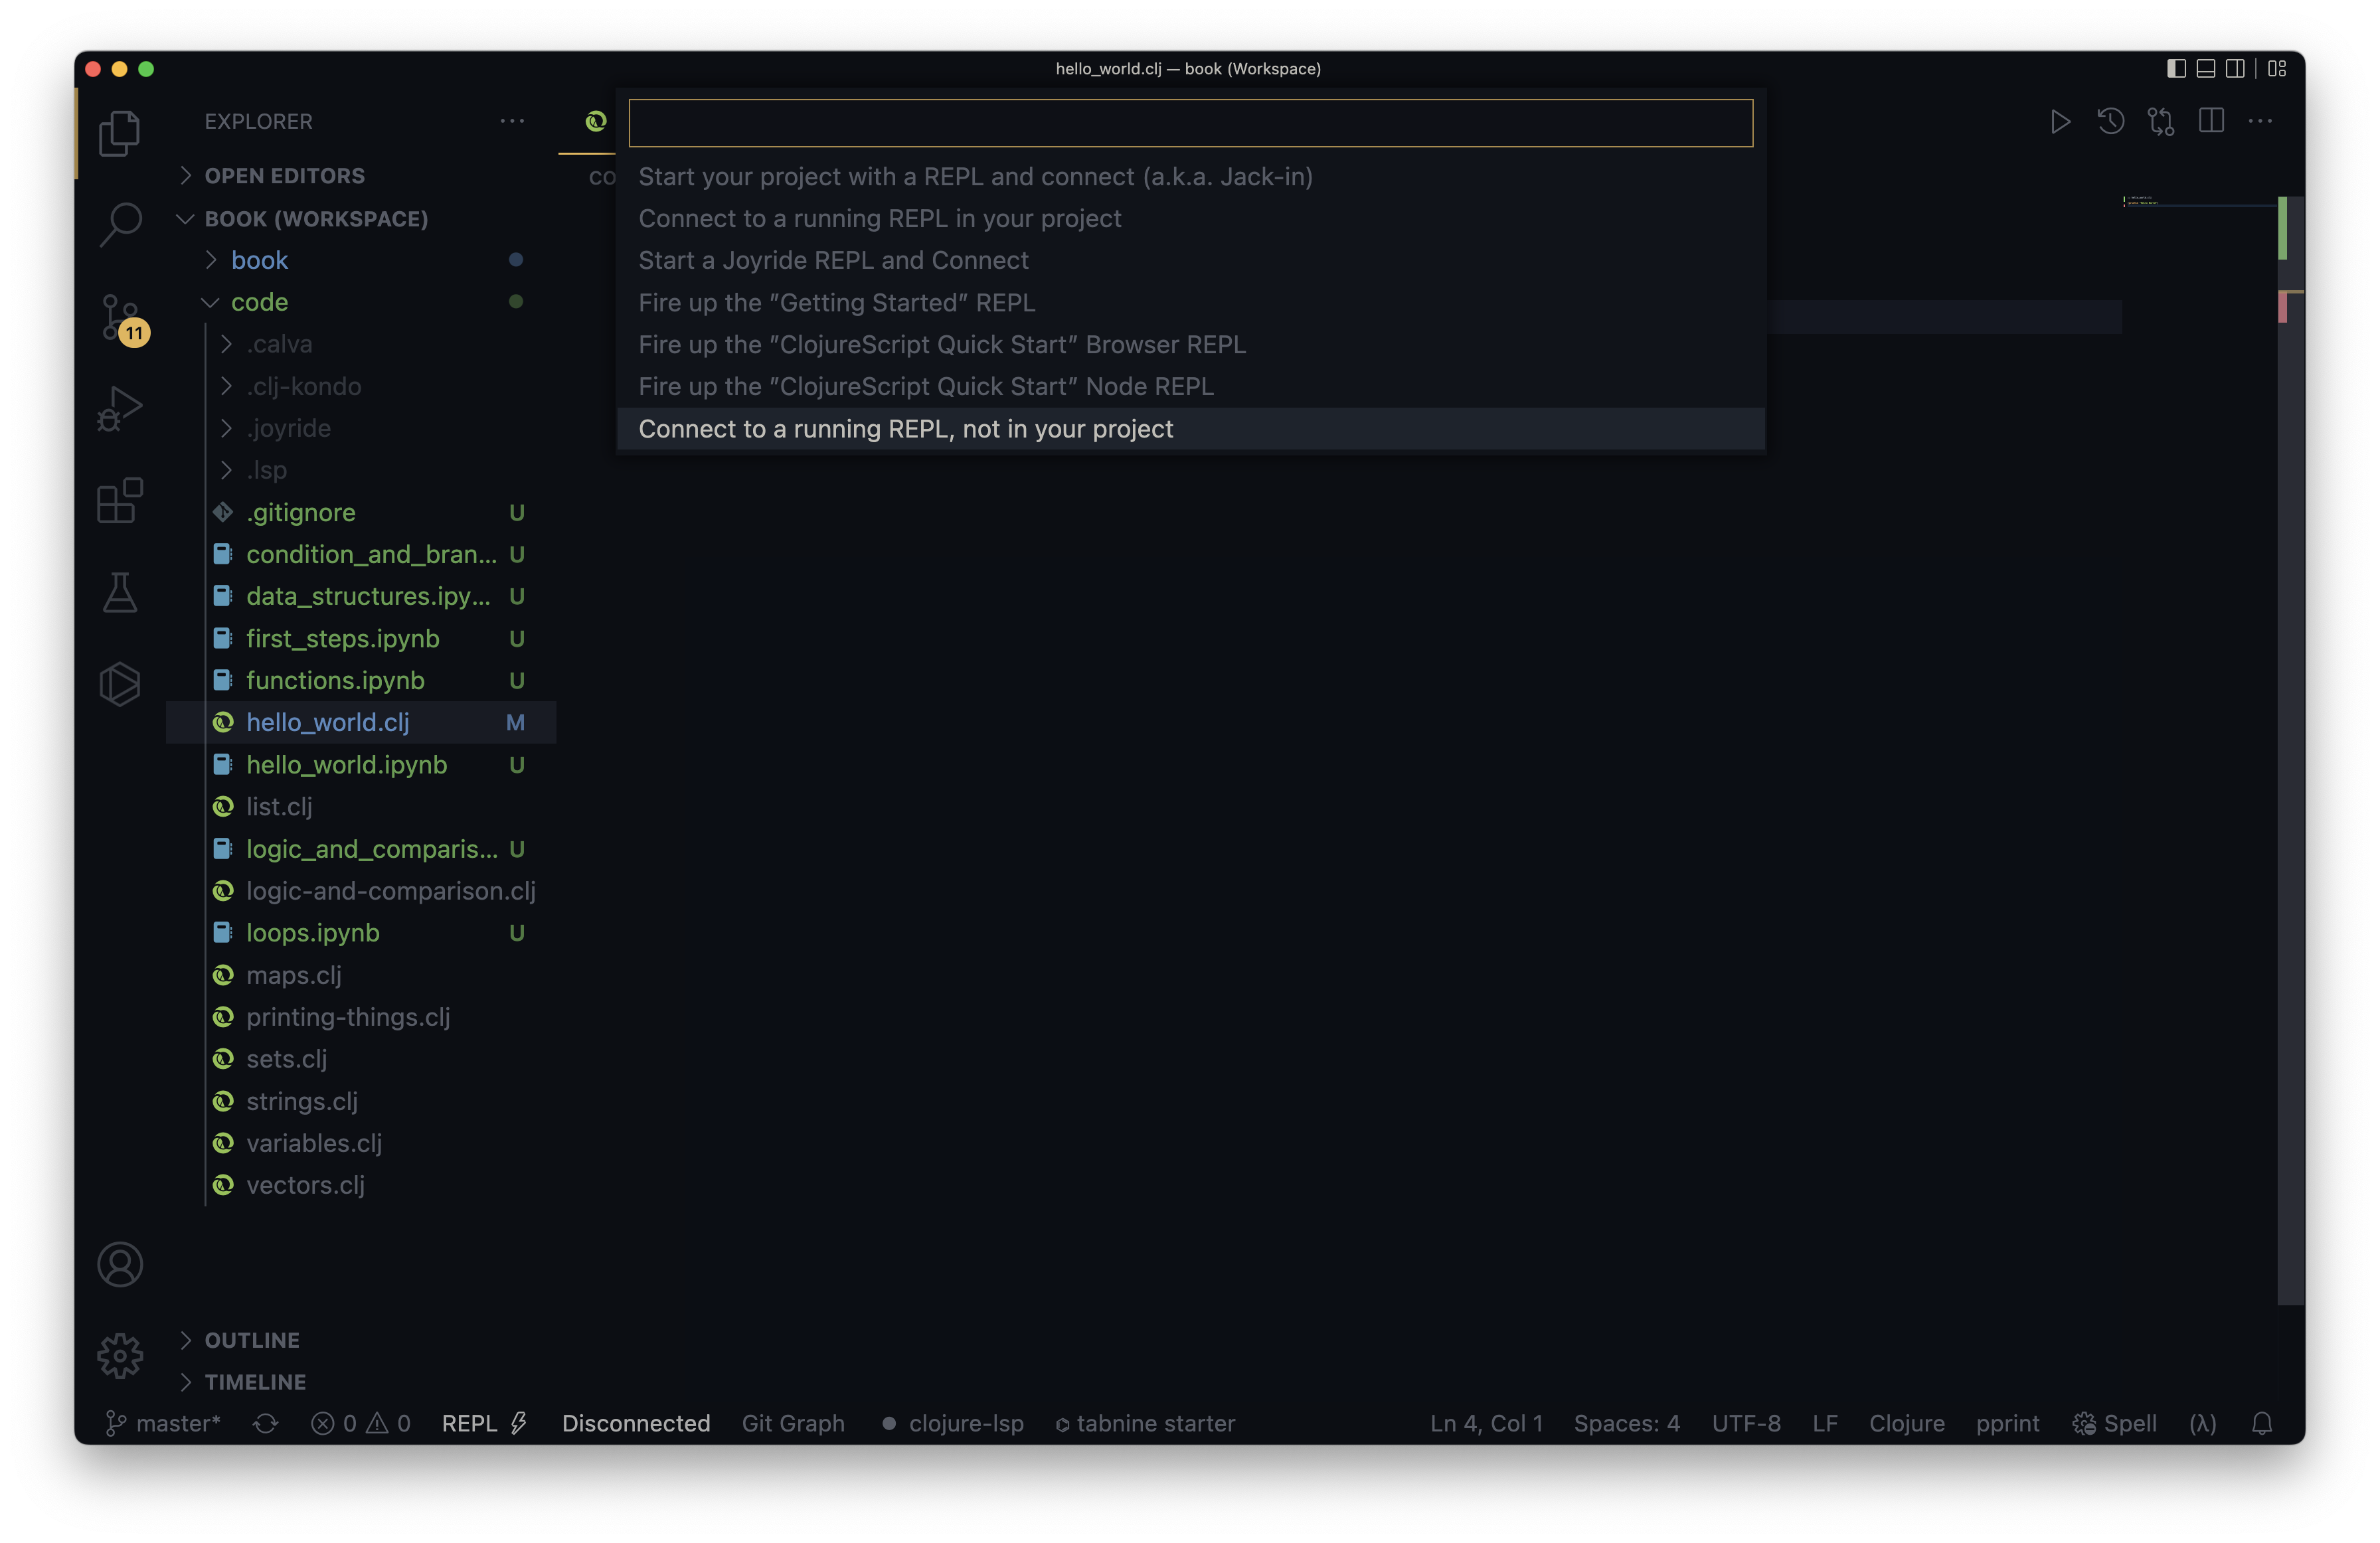
VSCodium will present another menu; select Connect to a running REPL, not in your project.
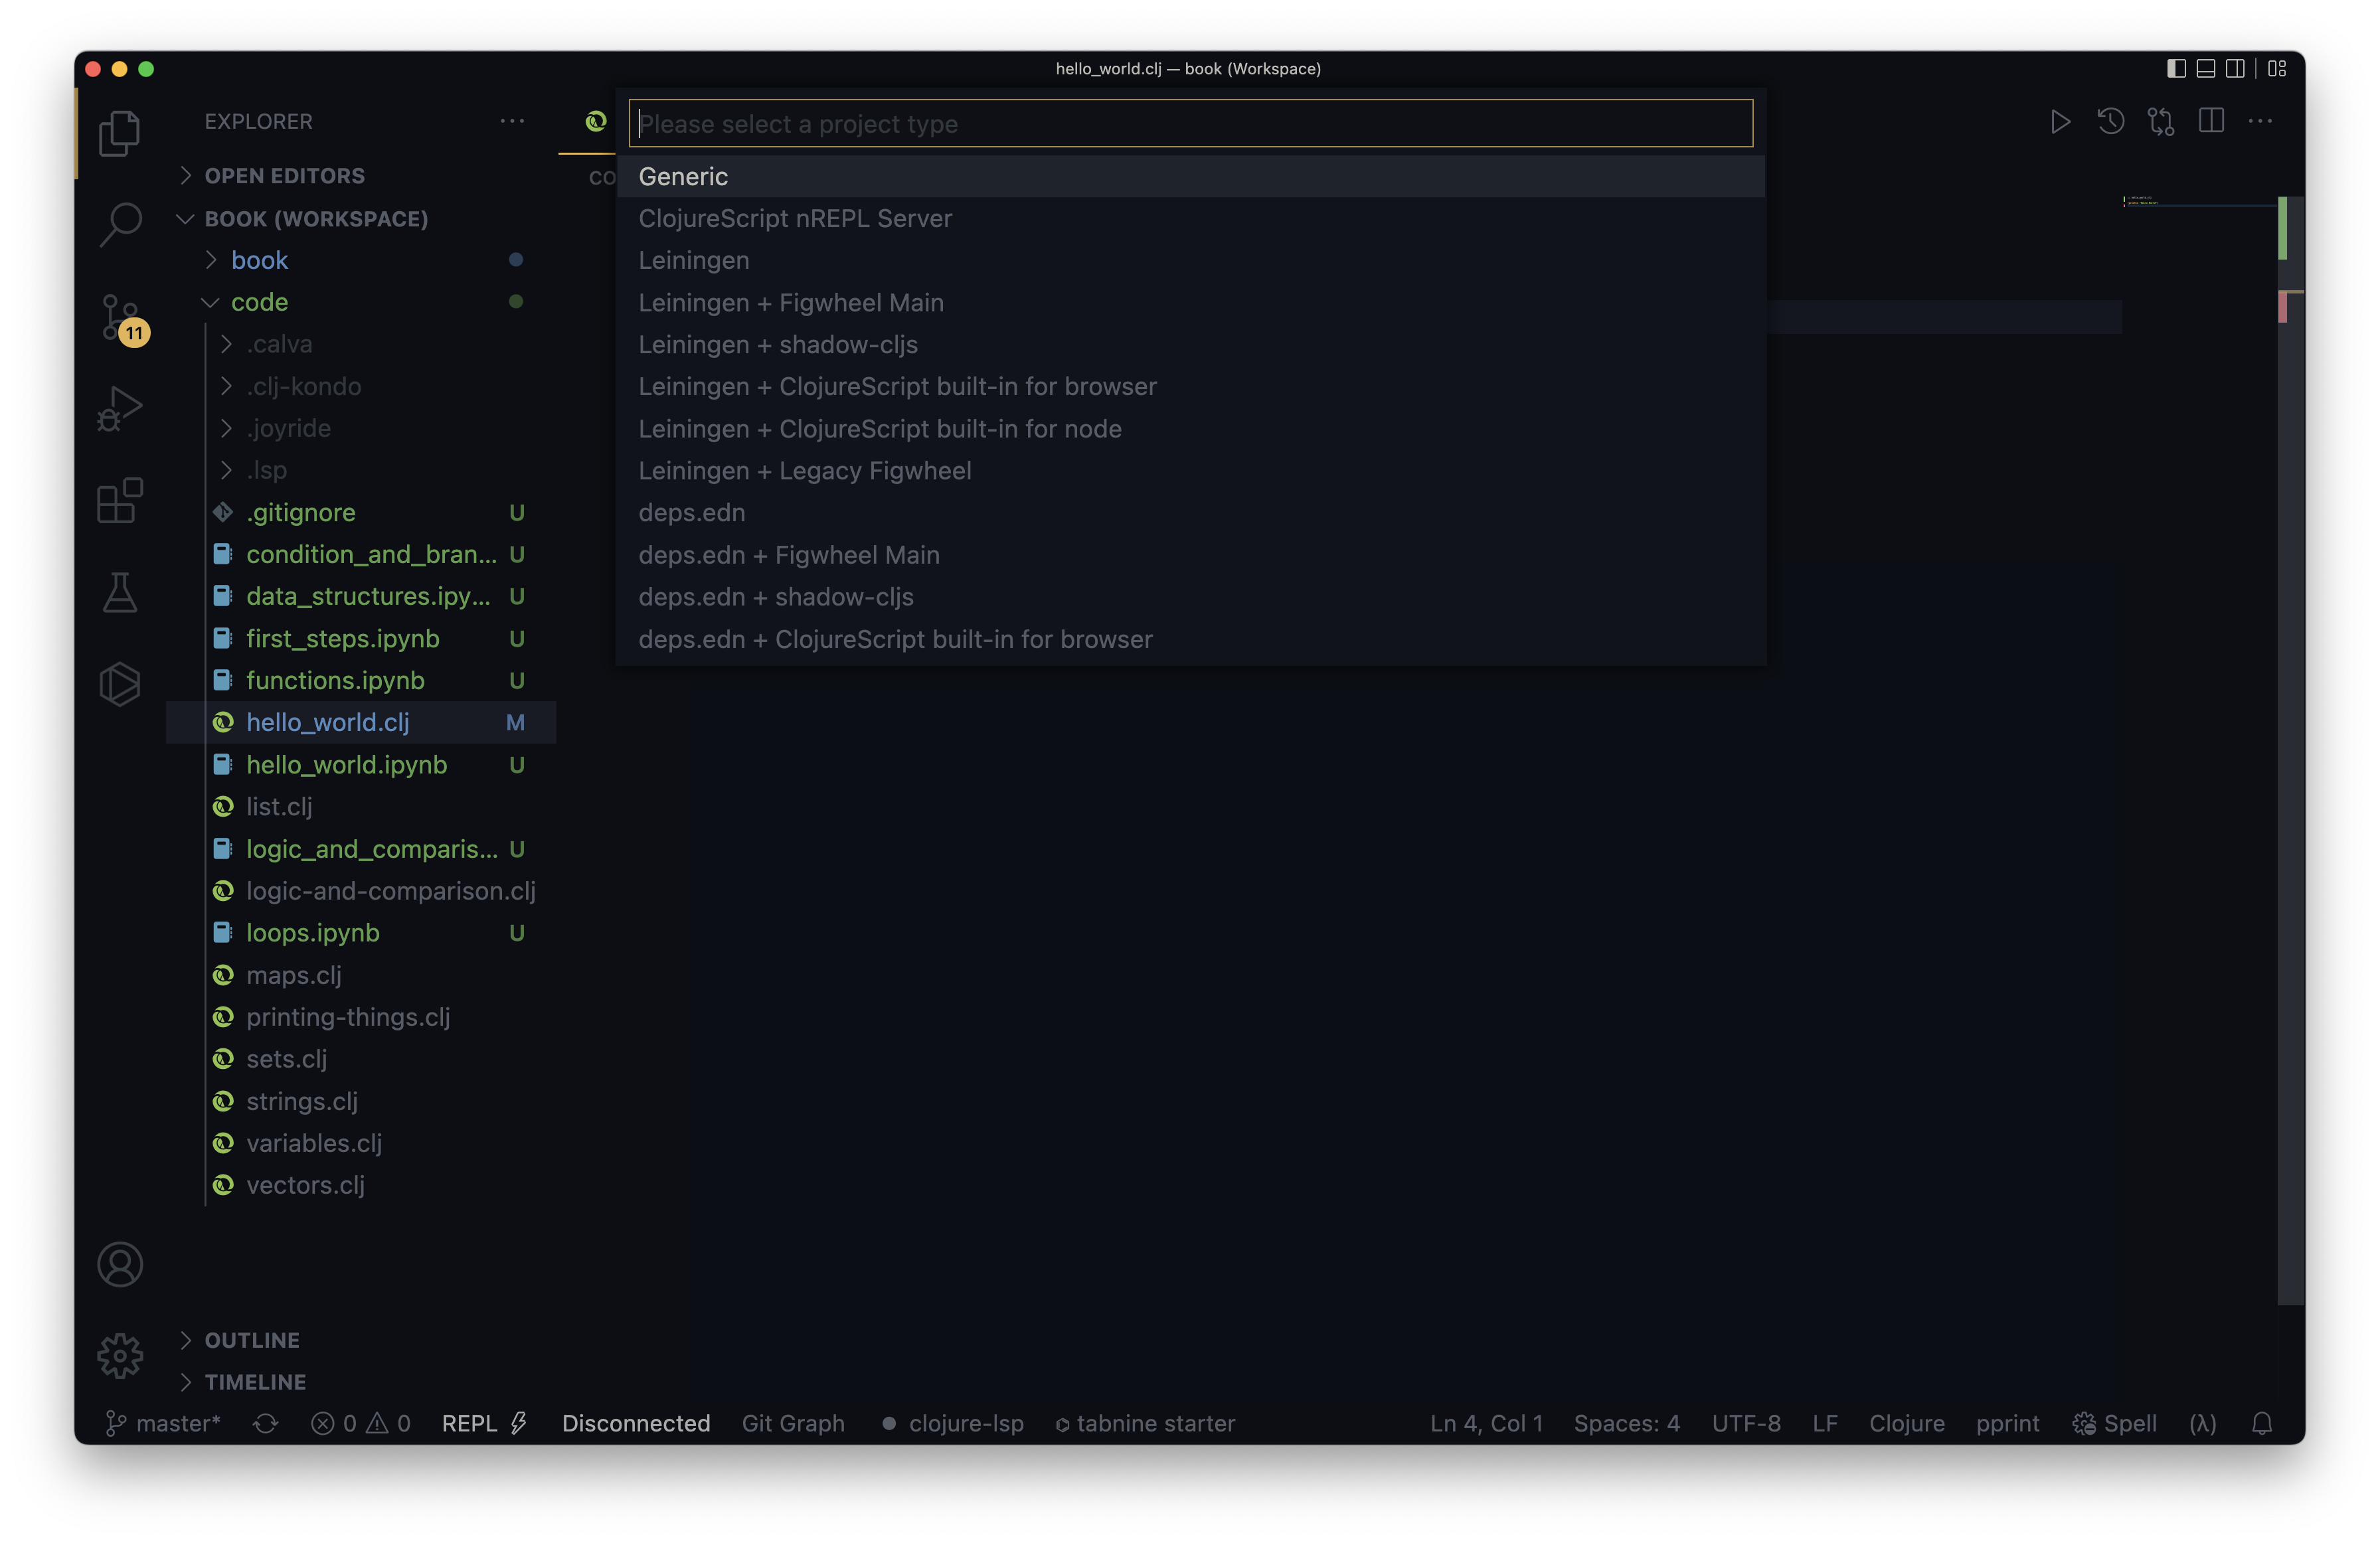
From the options, select Generic. You will then be prompted for the IP and port number where your REPL is running.
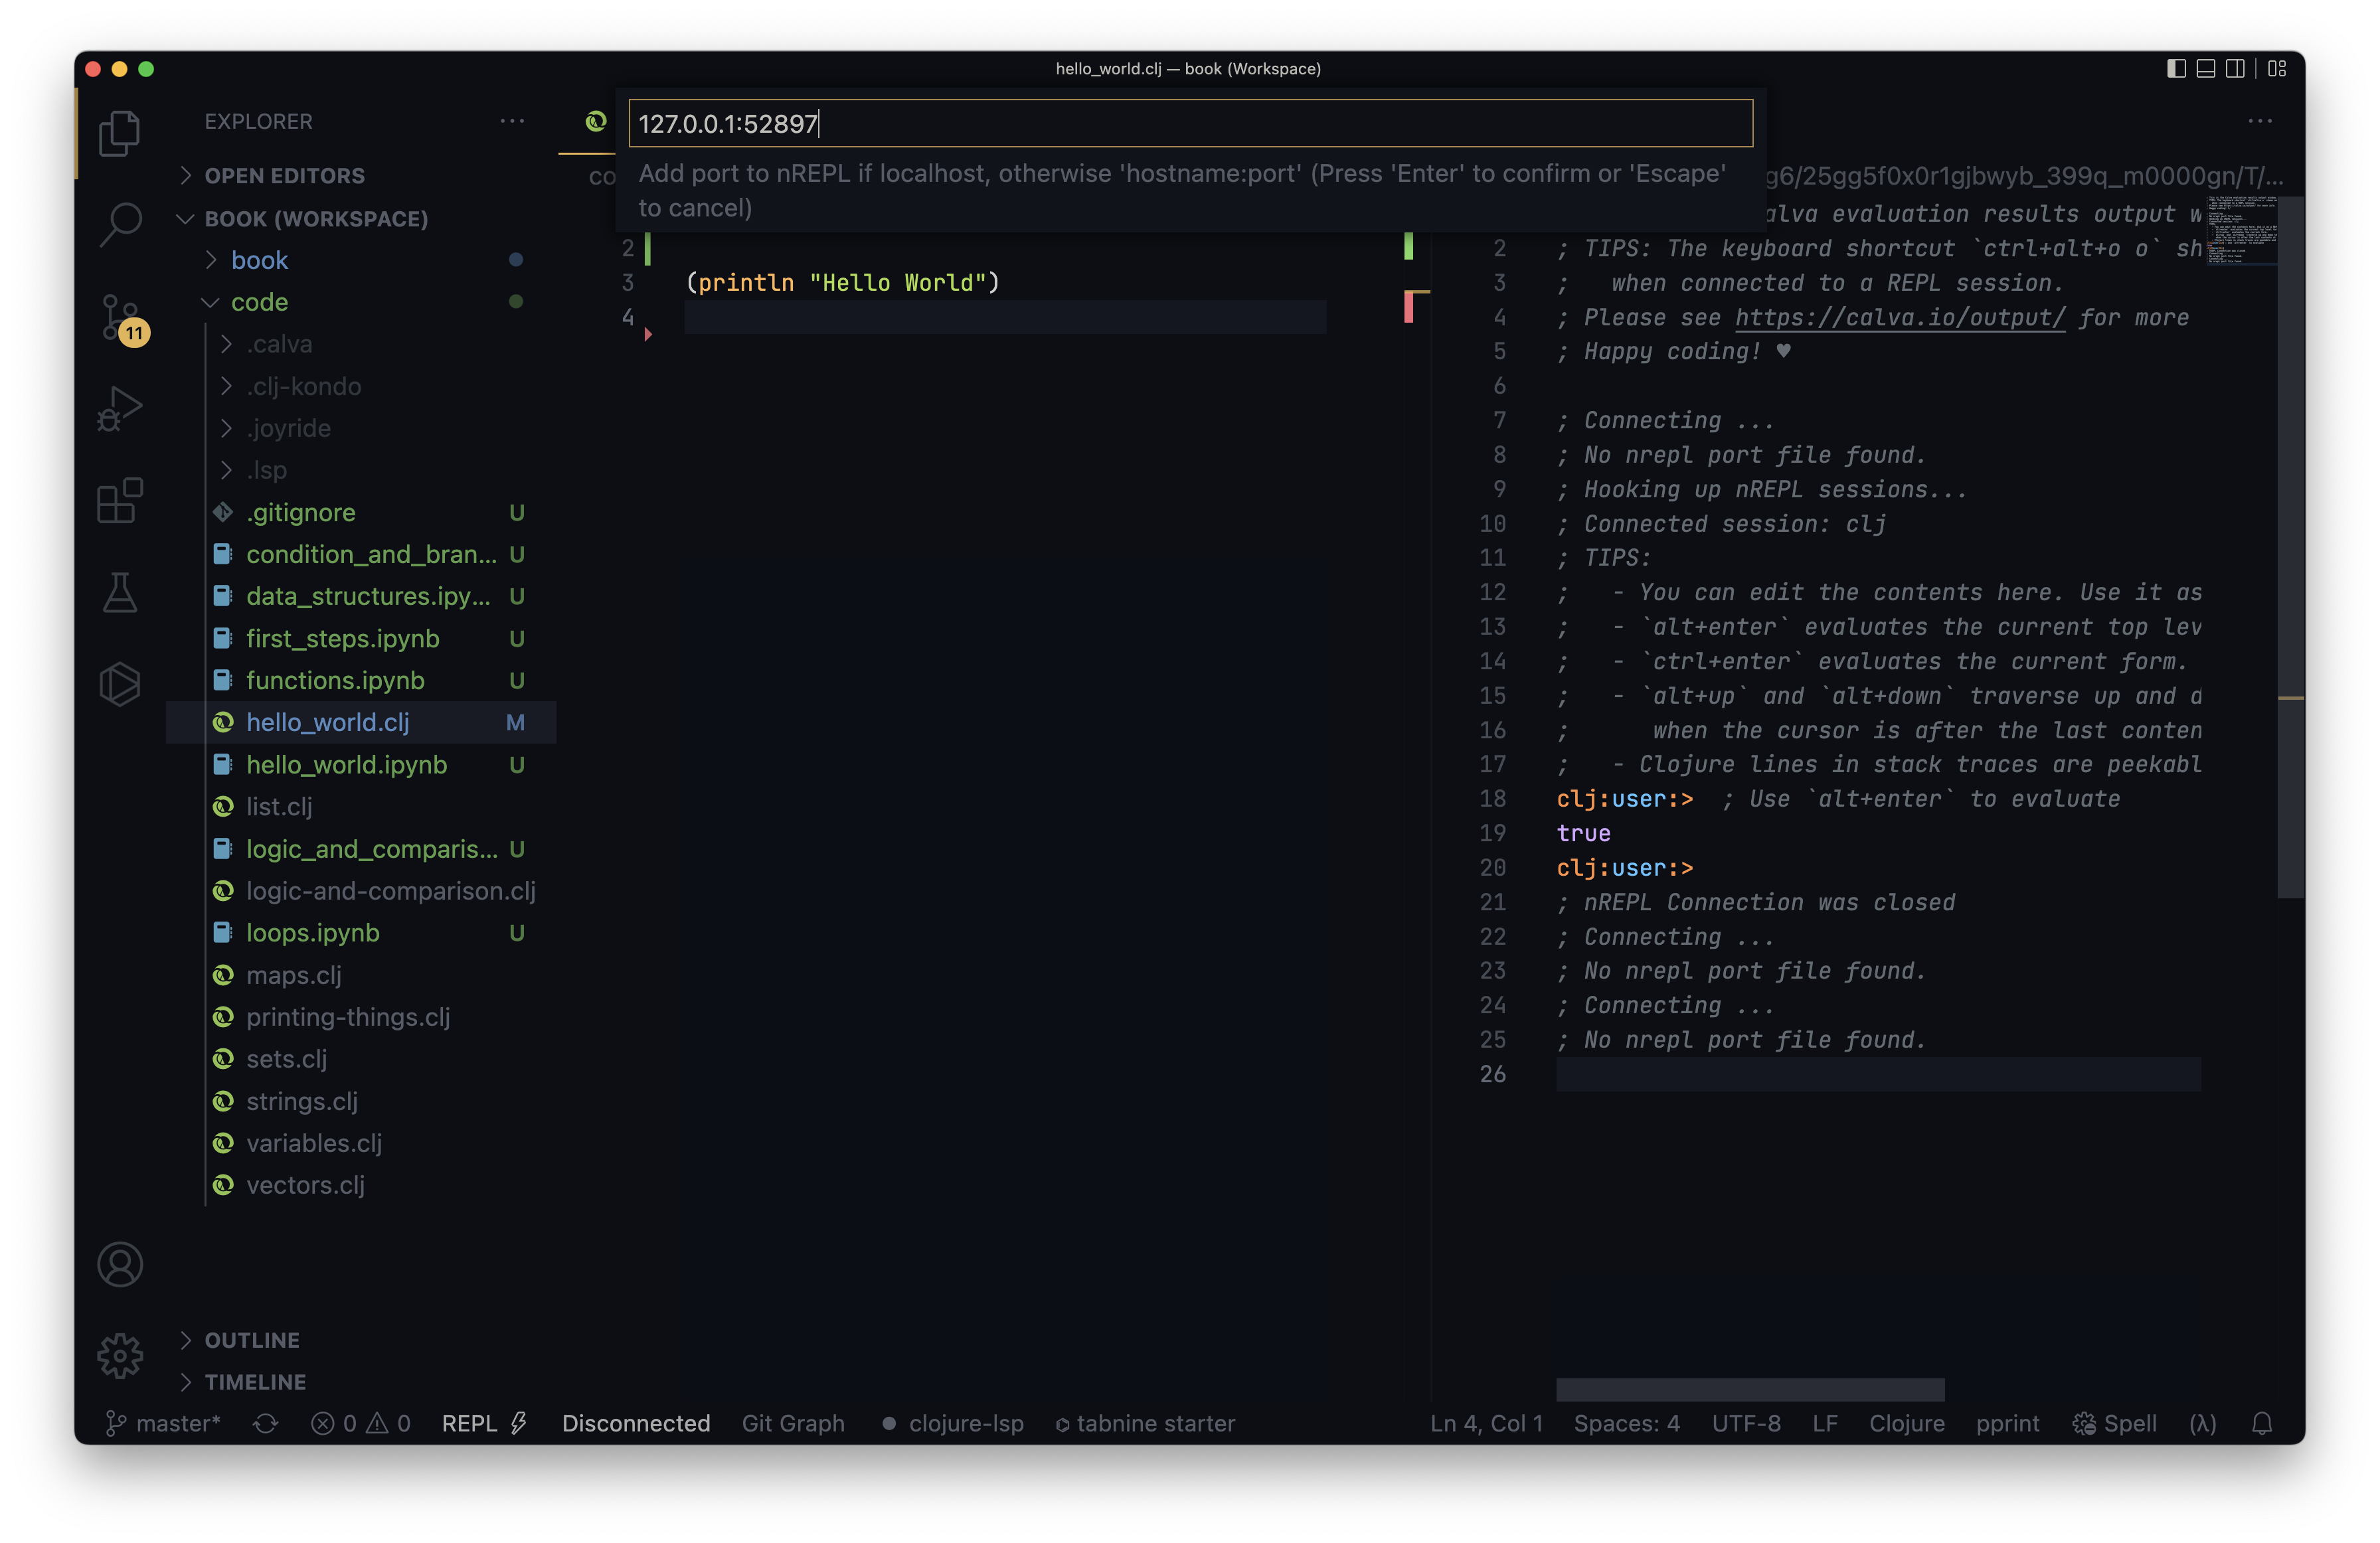
Paste the value 127.0.0.1:52897 and press Enter. A Clojure REPL window will open on the right. Now, in the hello_world.clj file on the left, place your cursor inside (println "Hello World") and press ALT+ENTER or option+return.
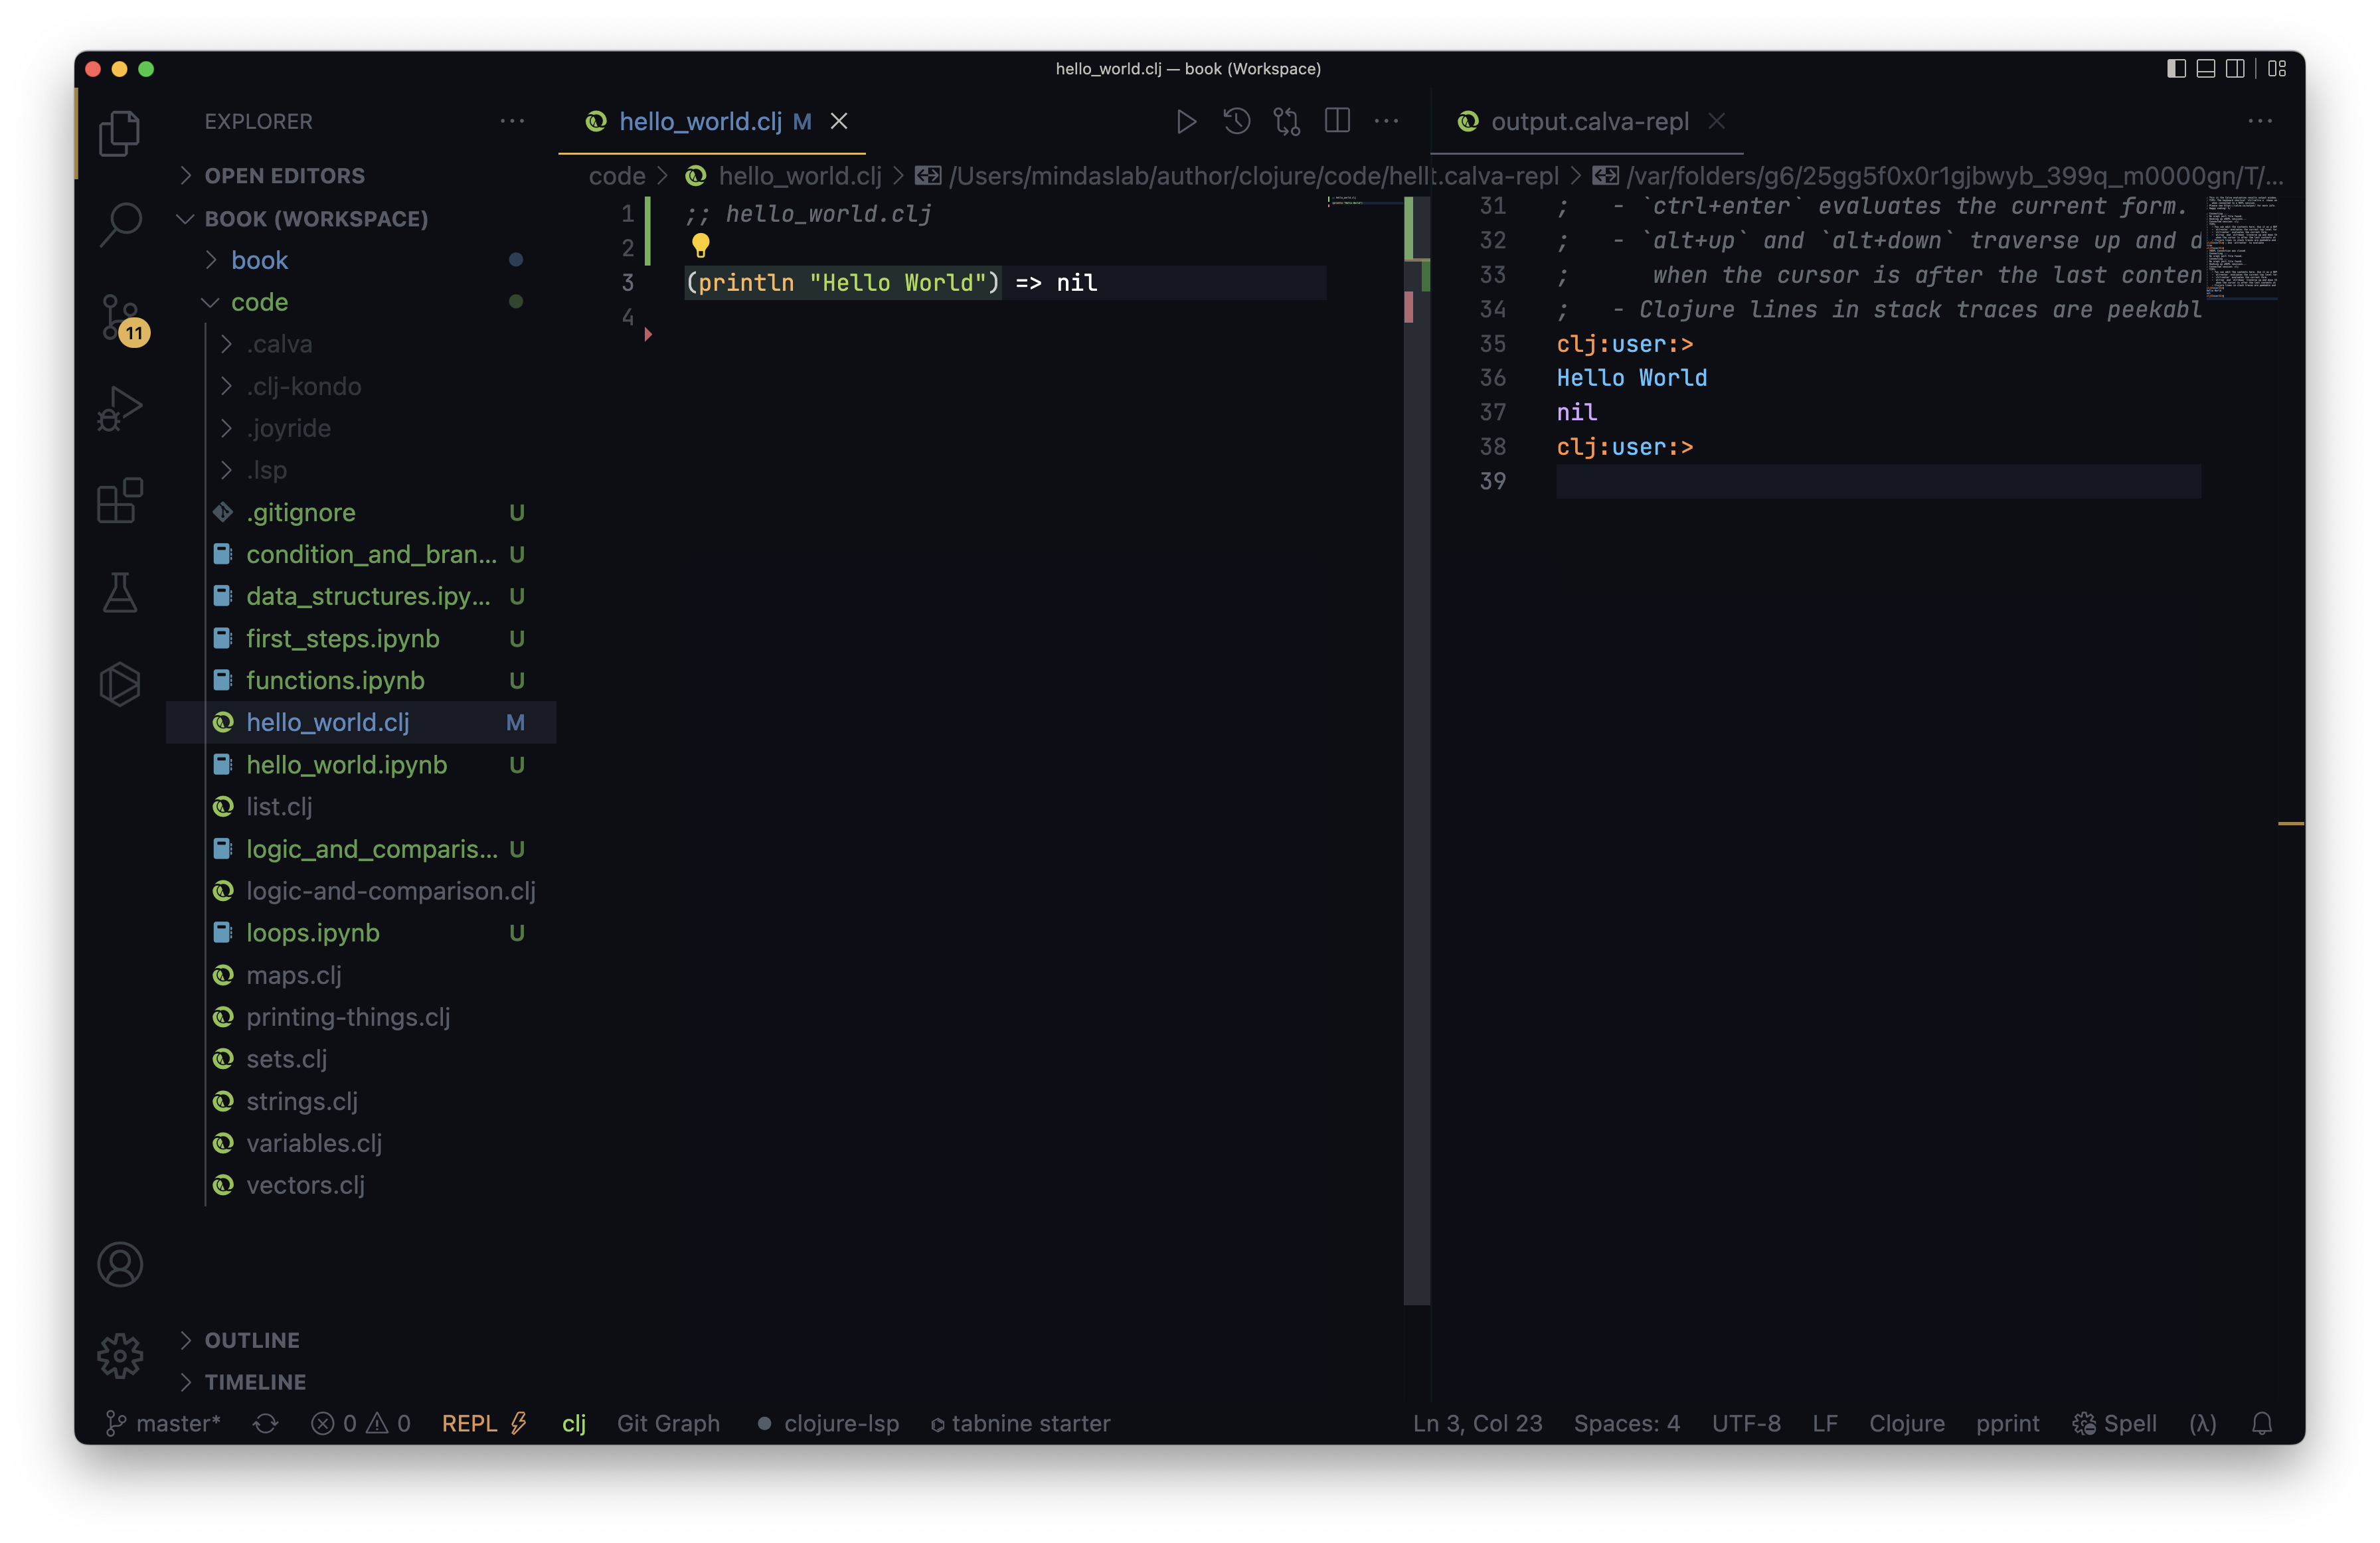
You will see the result of (println "Hello World") in the right-hand REPL pane. Congratulations, you’ve learned how to connect a REPL with VSCodium.
3.2. Printing Things
| Watch video for this section here https://yu7.in/clj-first-steps-printing-things |
| For this section, you can use the code at https://gitlab.com/clojure-book/code/-/raw/master/printing_things.clj. Copy and paste the lines one by one into your REPL, whether the REPL runs in your terminal or is integrated with your IDE. |
First, let’s print Hello World!. Copy the code below, paste it, and execute it:
(println "Hello World!")Output
Hello World!
nil
You will see Hello World! followed by nil on the next line. For now, you can ignore nil; we will discuss it when we cover functions. For this task, our mission is accomplished.
Commenting is essential in coding. Comments are notes for the developer reading the code, and the computer ignores them during execution. In Clojure, everything that follows a semicolon ; is a comment. So in the code below:
(println "Hello World!") ; Says Hello to this worldOutput
Hello World!
nil
; Says Hello to this world is a comment that the Clojure interpreter ignores. In the code above, we are adding a comment on the same line as the code; by convention, a single semicolon ; is used for this purpose. If you want a whole line dedicated to a comment, use two semicolons ;; as shown below:
;; This program says hello to this world
(println "Hello World!")
Output
Hello World!
nil
Both single and double semicolons function the same way, but this is the established convention in Clojure for inline comments versus dedicated comment lines.
We have printed Hello World, but what if we want to print multiple things? With println, it is simple: just provide additional arguments, and it will print them as shown:
(println "Hello World!" "Try staying cool.")Output
Hello World! Try staying cool.
nil
So you have successfully printed something in Clojure.
3.3. Arithmetic
| For this section, you can use the code at https://gitlab.com/clojure-book/code/-/raw/master/arithmetic.clj. Copy and paste the lines one by one into your REPL, whether the REPL runs in your terminal or is integrated with your IDE. |
| Watch the video for this section here: https://yu7.in/clj-arithmetic |
In this section, let’s explore mathematics in Clojure. First, let’s add two numbers, 40 and 2:
(+ 40 2)Output
42
In the expression above, we use the plus + symbol (which is actually a function in Clojure). We pass 40 and 2 as arguments to this function, which adds them and returns 42. Similarly, let’s see what happens when we pass 44 and 2 to the minus - symbol:
(- 44 2)Output
42
It subtracts the second argument, 2, from 44 and returns 42.
Now, let’s see what happens when we pass 6 and 7 to the asterisk * operator:
(* 6 7)Output
42
It returns 42, which is the product of 6 and 7.
Now, let’s see what happens when we pass 210 and 5 to the slash / operator:
(/ 210 5)Output
42
210 is divided by 5, resulting in 42.
Now, let’s see what happens if we pass more than two numbers to the + function:
(+ 1 2 3 4 5)Output
15
All the numbers are added together, and the sum is returned.
Look at the code below; can you figure out how it works?
(/ (+ 1 2 3 4 5) 5)Output
3
Consider the expression (/ (+ 1 2 3 4 5) 5). Focus on the innermost parentheses, (+ 1 2 3 4 5), where several numbers are passed to the ` function, which returns their sum: 15. Substituting 15 for `( 1 2 3 4 5) gives us the expression (/ 15 5), where 15 is divided by 5, resulting in 3.
Now, let’s pass more than two arguments to /. For example, passing 1, 2, and 3 results in \$1/6\$:
(/ 1 2 3) ; this gives out a ratio, a Clojure data typeOutput
1/6
The output above is a fraction (a ratio). To obtain a decimal result, append .0 to at least one of the numbers passed to /:
(/ 1 6.0)Output
0.16666666666666666
| If this is unclear now, don’t worry; it will be explained in more detail as you progress through the book. |
As long as at least one number passed to / is a decimal (indicated by the . symbol), the result will be a decimal rather than a fraction:
(/ 1 2.0 3)Output
0.16666666666666666
The same applies here:
(/ 1 2 3.0)Output
0.16666666666666666
To get the quotient of a division, you can use the quot function:
(quot 14 5)Output
2
To get the remainder of a division operation, use the rem function:
(rem 14 5)Output
4
Let’s calculate the area of a circle using Clojure. The area is \$pi r^2\$, where \$pi\$ is approximately \$22/7\$. This can be coded as follows:
;; Let's calculate area of circle of radius 7 units
(* (/ 22 7) (* 7 7))
Output
154N
In this expression, \$pi\$ is represented by (/ 22 7) and \$r^2\$ (where \$r\$ is 7) is represented by (* 7 7). Multiplying these together results in (* (/ 22 7) (* 7 7)), with an output of 154N.
The N indicates a BigInt (a way to store very large integers). Executing (type 10N) in the REPL returns clojure.lang.BigInt, whereas (type 10) returns java.lang.Long.
|
Adding .0 to any of the numbers removes the N:
(* (/ 22 7) (* 7 7.0))Output
154.0
Instead of using (/ 22 7) for \$pi\$, we can use the Java Math library, as Clojure is hosted on the JVM. This allows Clojure to leverage powerful libraries provided by the host platform. We can replace (/ 22 7) with Math/PI as shown below:
(* Math/PI (* 7 7))Output
153.93804002589985
Similarly, to compute \$x^y\$, we can use Math/pow. Replacing (* 7 7) with (Math/pow 7 2) looks like this:
(* Math/PI (Math/pow 7 2))Output
153.93804002589985
3.4. Types of Numbers
| For this section, you can use the code at https://gitlab.com/clojure-book/code/-/raw/master/types_of_numbers.clj. Copy and paste the lines one by one into your REPL, whether the REPL runs in your terminal or is integrated with your IDE. |
| Watch video for this section here https://yu7.in/clj-num-types |
There are different types of numbers in computing, just as there are different types of numbers in mathematics. For example, whole numbers are called Long in Clojure. You can verify this by passing a whole number to the type function, which tells you the type of data passed to it, as shown below:
(type 147)Output
java.lang.Long
Numbers with decimal values are called Double in Clojure, as you can see below:
(type 147.67)Output
java.lang.Double
The value of \$pi\$ is also a Double in Clojure:
(type Math/PI)Output
java.lang.Double
If a Long (whole number) is divided by another Long, the result is a Ratio in Clojure:
(type (/ 84 32))Output
clojure.lang.Ratio
As shown below, (/ 84 32) in Clojure does not provide a decimal value, but instead outputs a Ratio:
(/ 84 32)Output
21/8
You can convert one type of number to another; for example, 32 is of type Long:
(type 32)Output
java.lang.Long
you can convert it to a Double by passing it to the double function, as shown:
(double 32)Output
32.0
When you query its type, it returns Double:
(type (double 32))Output
java.lang.Double
If you want to prevent the division of two Long`s from resulting in a `Ratio, convert at least one of the arguments passed to the / function into a Double, as shown below:
(/ 84 (double 32))Output
2.625
The result is a Double rather than a Ratio:
(type (/ 84 (double 32)))Output
java.lang.Double
To get only the non-decimal part of a Double, pass that Double to the long function:
(long 42.32)Output
42
As you can see, when a Double is passed to the long function, it is cast to a Long:
(type (long 42.32))Output
java.lang.Long
3.5. Strings
| For this section, you can use the code at https://gitlab.com/clojure-book/code/-/raw/master/strings.clj. Copy and paste the lines one by one into your REPL, whether the REPL runs in your terminal or is integrated with your IDE. |
| Watch video for this section here https://yu7.in/clj-strings |
Your very first Clojure program in this book was likely this:
(println "Hello World!")It prints Hello World! on the screen. The text "Hello World!", enclosed in double quotes, is a sequence of characters known as a string.
Anything enclosed in double quotes in Clojure is a String, as shown below:
(type "Hello")Output
java.lang.String
Strings can be concatenated with other data types using the str function:
(str "1 + 2 is " (+ 1 2))Output
"1 + 2 is 3"
In the code above, (+ 1 2) returns a Long, but it can be concatenated with the string "1 + 2 is " by passing both to the str function.
You can determine the number of characters in a string using the count function:
(count "Hello")Output
5
In the code below, we pass six arguments to the str function: five numbers and a final string, " and so on…":
(str 1 2 3 4 5 " and so on...")Output
"12345 and so on..."
Clojure concatenates these values and returns a single string.
Clojure has a built-in string library; you can read the documentation at https://clojuredocs.org/clojure.string. Let’s use the reverse function to reverse a string:
(clojure.string/reverse "Hello")Output
"olleH"
Now, let’s convert all characters to uppercase:
(clojure.string/upper-case "Hello")Output
"HELLO"
This section provides a brief introduction to strings. You will learn more as you progress. Stay tuned!
3.6. Variables
| For this section, you can use the code at https://gitlab.com/clojure-book/code/-/raw/master/variables.clj. Copy and paste the lines one by one into your REPL, whether the REPL runs in your terminal or is integrated with your IDE. |
| Watch video for this section here https://yu7.in/clj-variables |
Imagine variables as boxes that contain a value; they make the code more human-readable. For example, look at the code below:
(def my-name "Karthik")Output
#'user/my-name
I have assigned the string "Karthik" to a variable named my-name. Now, my-name can be used anywhere in the Clojure code. When defining a variable, there are three main components. First, the parentheses:
()Then we have the def function:
(def)Following def is the variable name; in this case, it is my-name:
(def my-name)The second argument to def is the value to be stored in my-name, which is "Karthik" in this example:
(def my-name "Karthik")This is how we define a variable. A variable defined with def is typically called a global variable, meaning it is available anywhere in the program. If this isn’t clear yet, don’t worry.
Now we can print this variable as shown:
(println my-name)Output
Karthik
nil
Here, I am adding "Hello " before the variable my-name, which is equivalent to using the string "Karthik":
(println "Hello" my-name)Output
Hello Karthik
nil
Look at the code below:
(def greeting (str "Hello " my-name "!"))
(println greeting)
Output
Hello Karthik!
nil
I have defined a variable called greeting and assigned it the result of (str "Hello " my-name "!"). This joins three strings—"Hello ", my-name, and "!"—and stores the result in greeting. Finally, we print it using (println greeting).
Variables like my-name and greeting can be used anywhere in the code because they are defined using the def keyword. To define a local variable within a specific block (), use let as shown:
(let [local-variable "something"]
  (println local-variable))
Output
something
In the code above, we define a variable named local-variable with the value "something" and print it. However, outside the (let …) block, this local variable does not exist, as shown below:
(println local-variable)Output
; Syntax error compiling at (variables.clj:16:1).
; Unable to resolve symbol: local-variable in this context
Attempting to print local-variable results in an error.
3.7. Clojure in file
| Watch video for this section here https://yu7.in/clj-in-file |
Up until now, you have likely run your code in a REPL, either in your terminal or in an IDE (such as VSCodium). Now, let’s see how to store your code in a file and run it. First, create a new file in your text editor named as follows:
;; hello_world.clj

(println "Hello World")
Save the code as hello_world.clj. Then, in your terminal, cd to the directory containing the file and run the following command:
$ clj hello_world.clj
The entire program will run, and you will see Hello World as the output. It should look like this:
$ clj hello_world.clj
WARNING: Implicit use of clojure.main with options is deprecated, use -M
Hello World
4. Data Structures
Almost every programming language offers some way to pack, organize, and access data in a computer’s RAM [3]. This relieves programmers from the burden of writing extensive code to manage data stored in the computer’s temporary memory.
Strings are also data structures. They enable us to represent any written language in a computer’s memory and help us perform operations on them. In this section, we will explore other data structures that Clojure provides, which you can use out of the box.
4.1. Vectors
| For this section, you can use the code at https://gitlab.com/clojure-book/code/-/raw/master/vectors.clj. Copy and paste the lines one by one into your REPL, whether the REPL runs in your terminal or is integrated with your IDE. |
| Watch the video for this section here https://yu7.in/clj-vectors |
Imagine a rack with many compartments; the first compartment is labeled 0, the second 1, and so on. You can put something into this rack and retrieve it if you know the compartment number, also known as the index. This is a real-world analogy for vectors.
Look at the code below:
[1 2 3 4] ; a very simple vectorOutput
[1 2 3 4]
This is how you represent a vector in Clojure. It starts with an opening square bracket [ and ends with a closing square bracket ]; everything in between are the elements of the vector. In the above code, you have four elements: 1, 2, 3, and 4.
Another way to create a vector is to pass arguments to a function called vector, as shown below:
(vector 1 2 3)Output
[1 2 3]
In the above code, we passed 1, 2, and 3 to the vector function, and we get the vector [1 2 3].
So far, we have seen vectors created with numbers; in reality, you can create a vector with any type of value:
[1 true "Bashir"] ; vector containing multiple data typesOutput
[1 true "Bashir"]
In the above code, we created a three-element vector with 1 (a Long), true (a boolean, which you will learn about soon), and "Bashir" (a String).
In the code below, we define a variable named friends and assign it a vector containing four names:
(def friends
    ["Ram" "Bashir" "Antony" "Buddha"])
Output
#'user/friends
Now let’s see what the first element of the vector friends is. To do that, we pass friends to a function named first:
(first friends)Output
"Ram"
This returns the first element of the vector.
There is a function called rest which, when given a vector, omits the first element and returns the rest of the elements in the vector, as shown below:
(rest friends)Output
("Bashir" "Antony" "Buddha")
As you can see, "Ram" is ignored because it is the first element, and the rest is returned.
Let’s check the type of friends:
(type friends)Output
clojure.lang.PersistentVector
From the output, it is clear that it’s a vector, but let’s check what type rest returns:
(type (rest friends))Output
clojure.lang.PersistentVector$ChunkedSeq
Although it seems to return ("Bashir" "Antony" "Buddha") (not enclosed in square brackets), querying the type reveals it is a chunked sequence of the passed-in vector.
We can access any element by its index in the vector using the nth function, whose first argument should be a vector and the second should be the index number, as shown:
(nth friends 3)Output
"Buddha"
At index 3 of friends, the value is the string "Buddha".
The element at the third index can also be accessed as shown:
(friends 3)Output
"Buddha"
It seems that when you define friends as a vector, Clojure allows you to use friends as a function that takes an index and returns the value at that position.
To add an element to the end of a vector, use the conj function, which takes a vector as the first argument and the value to be added as the second:
(conj friends "Periyaar")Output
["Ram" "Bashir" "Antony" "Buddha" "Periyaar"]
In the above code, we added "Periyaar" to friends, but this does not mean that friends has been modified. We can print friends:
(println friends)Output
[Ram Bashir Antony Buddha]
nil
And it still shows the original values without "Periyaar". In reality, Clojure constructs and returns a new vector when we call (conj friends "Periyaar").
To add an element to the beginning of a vector, use cons as shown below:
(cons "Periyaar" friends)Output
("Periyaar" "Ram" "Bashir" "Antony" "Buddha")
Does it modify friends? Research the concept of immutability [4] in computing.
4.1.1. Exercise
-
How do you get the total number of elements in a vector?
-
What will happen if I give
(friends 42)?
4.2. Lists
| For this section, you can use the code at https://gitlab.com/clojure-book/code/-/raw/master/list.clj. Copy and paste the lines one by one into your REPL, whether the REPL runs in your terminal or is integrated with your IDE. |
| Watch the video for this section here https://yu7.in/clj-lists |
Lists are very similar to vectors. The primary difference is that vectors are enclosed in square brackets [ and ], while lists are enclosed in round parentheses ( and ). In fact, an entire Clojure program is a list. For example, to calculate \$3 + 5\$ in Clojure, we write (+ 3 5). Because it is wrapped in round parentheses, it is a list.
All Clojure code consists of lists. A list starts with an opening parenthesis ( and is typically followed by a function to call. For instance, to add two numbers, we use the ` function. This starts as `(, followed by the arguments passed to the function—such as 3 and 5—resulting in (+ 3 5. Finally, a closing parenthesis ) completes the list: (+ 3 5), which can then be executed by the Clojure interpreter.
Take a look at the example below:
'(1 2 3 4)Output
(1 2 3 4)
In the example above, we have built a list of four numbers. However, notice that we do not start with a (, but with an apostrophe followed by a parenthesis, like this: '(. This tells Clojure not to execute the content within the parentheses.
When you try it without an apostrophe, Clojure assumes 1 is a function and that 2, 3, and 4 are the arguments passed to it. It then tries to execute it and fails, as shown below:
(1 2 3 4)Output
; Execution error (ClassCastException) at lawyer/eval2148 (REPL:79).
; class java.lang.Long cannot be cast to class clojure.lang.IFn (java.lang.Long is in module java.base of loader 'bootstrap'; clojure.lang.IFn is in unnamed module of loader 'bootstrap')
The apostrophe before the parentheses tells Clojure not to execute '(1 2 3 4), but rather to treat it simply as a list.
You can also create a list using the list function, as shown below:
(list 1 2 3)Output
(1 2 3)
Above, we passed 1, 2, and 3 to the list function, and we get a list returned.
In the code below, we are creating a list of four strings and assigning it to a variable friends-list:
(def friends-list
    '("Ram" "Bashir" "Antony" "Buddha"))
Output
#'user/friends-list
Note how we are using the apostrophe in '("Ram" "Bashir" "Antony" "Buddha") to tell the Clojure interpreter not to execute the list.
Now let’s see how many elements are in friends-list. To do that, we use count as shown below and pass friends-list to it:
(count friends-list)Output
4
Thus, count indicates there are four elements in friends-list.
Let’s get the first element in friends-list. For that, we use the first function as shown below:
(first friends-list)Output
"Ram"
Now let’s get all elements except the first one in friends-list. For that, we use the rest function as shown below:
(rest friends-list)Output
("Bashir" "Antony" "Buddha")
Now let’s get the fourth element in friends-list. For that, we use the nth function, which takes a list as the first argument and the index to be fetched as the second argument.
(nth friends-list 3)Output
"Buddha"
Note that list indexing starts at zero. That is, the first element is indexed 0, the second is 1, and so on.
In the example below, let’s try to get the fourth element of friends-list by passing the number 3 to it directly:
(friends-list 3)Output
Execution error (ClassCastException) at user/eval5554 (REPL:1).
clojure.lang.PersistentList cannot be cast to clojure.lang.IFn

       core.clj:  3214 clojure.core$eval/invokeStatic
       core.clj:  3210 clojure.core$eval/invoke
       main.clj:   437 clojure.main$repl$read_eval_print__9086$fn__9089/invoke
       main.clj:   458 clojure.main$repl$fn__9095/invoke
       main.clj:   368 clojure.main$repl/doInvoke
   RestFn.java:  1523 clojure.lang.RestFn/invoke
       AFn.java:    22 clojure.lang.AFn/run
       AFn.java:    22 clojure.lang.AFn/run
   Thread.java:   745 java.lang.Thread/run
And it fails.
Now, let’s add an element to the list. For that, we use the conj function. With conj, we pass the list to which the element should be added, followed by the element itself, as shown below:
(conj friends-list "Periyaar")Output
("Periyaar" "Ram" "Bashir" "Antony" "Buddha")
4.3. Sets
| For this section, you can use the code at https://gitlab.com/clojure-book/code/-/raw/master/sets.clj. Copy and paste the lines one by one into your REPL, whether the REPL runs in your terminal or is integrated with your IDE. |
| Watch the video for this section here https://yu7.in/clj-sets |
A set is a collection of unique items. Imagine a list or a vector where no two items repeat; that’s a set. In Clojure, you can create a set as shown:
#{1 2 3 4}Output
#{1 4 3 2}
A set starts with a hash symbol and an opening curly brace #{, followed by the set items, and ends with a closing curly brace }.
Below, we query the type of the set:
(type #{1 2 3 4})Output
clojure.lang.PersistentHashSet
It returns clojure.lang.PersistentHashSet, which might be confusing to beginners. Instead, one can use the set? function to check if something is a set, as shown below:
(set? #{1 2 3 4})Output
true
Since #{1 2 3 4} is a set, it returns true.
A set can have only unique elements. If we try to create a set with non-unique elements using a literal, it will throw an error, as shown:
#{1 2 3 4 4}Output
Syntax error reading source at (REPL:1:13).
Duplicate key: 4

    PersistentHashSet.java:    68 clojure.lang.PersistentHashSet/createWithCheck
           LispReader.java:  1366 clojure.lang.LispReader$SetReader/invoke
           LispReader.java:   853 clojure.lang.LispReader$DispatchReader/invoke
           LispReader.java:   285 clojure.lang.LispReader/read
                  core.clj:  3768 clojure.core$read/invokeStatic
                  core.clj:  3741 clojure.core$read/invoke
                  main.clj:   433 clojure.main$repl$read_eval_print__9086$fn__9087/invoke
                  main.clj:   432 clojure.main$repl$read_eval_print__9086/invoke
                  main.clj:   458 clojure.main$repl$fn__9095/invoke
                  main.clj:   368 clojure.main$repl/doInvoke
               RestFn.java:  1523 clojure.lang.RestFn/invoke
                  AFn.java:    22 clojure.lang.AFn/run
                  AFn.java:    22 clojure.lang.AFn/run
               Thread.java:   745 java.lang.Thread/run
Let’s create a set of unique fruit names:
#{"Apple" "Orange" "Mango" "Banana"}Output
#{"Mango" "Orange" "Apple" "Banana"}
Now, when we try to create a similar set with a duplicate element, "Apple", it throws an error, as shown below:
#{"Apple" "Orange" "Mango" "Banana" "Apple"}Output
Syntax error reading source at (REPL:1:45).
Duplicate key: Apple

    PersistentHashSet.java:    68 clojure.lang.PersistentHashSet/createWithCheck
           LispReader.java:  1366 clojure.lang.LispReader$SetReader/invoke
           LispReader.java:   853 clojure.lang.LispReader$DispatchReader/invoke
           LispReader.java:   285 clojure.lang.LispReader/read
                  core.clj:  3768 clojure.core$read/invokeStatic
                  core.clj:  3741 clojure.core$read/invoke
                  main.clj:   433 clojure.main$repl$read_eval_print__9086$fn__9087/invoke
                  main.clj:   432 clojure.main$repl$read_eval_print__9086/invoke
                  main.clj:   458 clojure.main$repl$fn__9095/invoke
                  main.clj:   368 clojure.main$repl/doInvoke
               RestFn.java:  1523 clojure.lang.RestFn/invoke
                  AFn.java:    22 clojure.lang.AFn/run
                  AFn.java:    22 clojure.lang.AFn/run
               Thread.java:   745 java.lang.Thread/run
Let’s create a set of fruit names and assign it to a variable named fruits, as shown below:
(def fruits #{"Apple" "Orange" "Mango" "Banana"})Output
#'user/fruits
Now we can check if fruits contains "Banana", as shown below:
(contains? fruits "Banana")Output
true
It returns true because fruits contains "Banana".
Now let’s check if fruits contains "Jack Fruit":
(contains? fruits "Jack Fruit")Output
false
It returns false because "Jack Fruit" is not part of fruits.
You can also check if a set contains an element by using the set itself as a function, as shown below:
(fruits "Banana")Output
"Banana"
In the code above, we pass "Banana" to fruits, and it returns "Banana" because it is present in the set.
When we pass "Jack Fruit" to fruits, it returns nil because "Jack Fruit" is not in the set:
(fruits "Jack Fruit")Output
nil
Food for thought: if (fruits "Banana") works, does this suggest that Clojure has treated the set fruits as a function?
|
Now let’s see what happens if we try to pass fruits to "Banana", as shown below:
("Banana" fruits)Output
Execution error (ClassCastException) at user/eval5624 (REPL:1).
java.lang.String cannot be cast to clojure.lang.IFn

       core.clj:  3214 clojure.core$eval/invokeStatic
       core.clj:  3210 clojure.core$eval/invoke
       main.clj:   437 clojure.main$repl$read_eval_print__9086$fn__9089/invoke
       main.clj:   458 clojure.main$repl$fn__9095/invoke
       main.clj:   368 clojure.main$repl/doInvoke
   RestFn.java:  1523 clojure.lang.RestFn/invoke
       AFn.java:    22 clojure.lang.AFn/run
       AFn.java:    22 clojure.lang.AFn/run
   Thread.java:   745 java.lang.Thread/run
It fails.
Clojure also has a special data type called keywords. Their syntax is a colon followed by a name, such as :<some-name>. For example, if we want a set of programming languages, we can define it as follows:
(def programming-languages #{:ruby :python :clojure})Output
#'user/programming-languages
In this case, every element in programming-languages is a keyword.
Now let’s check if programming-languages contains :ruby:
(contains? programming-languages :ruby)Output
true
It does.
Now let’s check if it contains :java:
(contains? programming-languages :java)Output
false
It does not.
You can also check if an element exists in programming-languages by passing the element to the set:
(programming-languages :ruby)Output
:ruby
Since :ruby is in programming-languages, it is returned.
Because :ruby is a keyword, it has special properties that strings do not have. Recall that attempting to check if "Banana" exists in fruits using ("Banana" fruits) failed. However, checking if :ruby exists in programming-languages using the same pattern works, as shown below:
(:ruby programming-languages)Output
:ruby
We can add an element to a set using the conj function. In this case, let’s add :perl to programming-languages:
(conj programming-languages :perl)Output
#{:clojure :python :perl :ruby}
Similarly, we can remove an element from a set using the disj function. Let’s remove :python from programming-languages:
(disj programming-languages :python)Output
#{:clojure :ruby}
That covers the basics of sets for now.
4.4. Maps
| For this section, you can use the code at https://gitlab.com/clojure-book/code/-/raw/master/maps.clj. Copy and paste the lines one by one into your REPL, whether the REPL runs in your terminal or is integrated with your IDE. |
| Watch the video for this section here https://yu7.in/clj-maps |
Lists and vectors can be accessed using numeric indices, as shown in the following code:
(def nums ["zero" "one" "two" "three" "four" "five" "six"])

(nth nums 5)
Output
"five"
We get "five" as the output. But what if we want to use more user-friendly words as indices for our data collection? This is where maps come in.
Look at the code below, then type and execute it:
{ "name" "Bashir" "age" 12 }Output
{"name" "Bashir", "age" 12}
In the above code, we create a map where the first element has the key "name" and the value "Bashir", and the second element has the key "age" and the value 12.
Instead of using curly braces, we can create a map by passing keys and values to the hash-map function, as shown below:
(hash-map "name" "Bashir"
          "age" 20)
Output
{"age" 20, "name" "Bashir"}
The hash-map function takes keys as odd-numbered arguments and values as even-numbered arguments. In the code above, "name" is mapped to "Bashir" and the key "age" is mapped to the value 20.
Now, let’s create a map and assign it to a variable named friend:
(def friend { "name" "Bashir" "age" 12 })Output
#'user/friend
Now we can retrieve the value associated with the key "name" from friend using the get function, passing the map as the first argument and the key to be fetched as the second:
(get friend "name")Output
"Bashir"
The code above looks for the key "name" in friend, and its corresponding value, "Bashir", is returned.
There is also a shortcut to retrieve a value from a map: treat the map itself as a function and pass the key to it, as shown below:
(friend "name")Output
"Bashir"
In the example above, we have the map friend; by passing the key "name" to it, we receive the mapped value "Bashir".
The type of "name" is a string, as seen below:
(type "name")Output
java.lang.String
Clojure also has keywords, which are preceded by a colon : followed by the keyword’s name. As you can see below, :name is a keyword:
(type :name)Output
clojure.lang.Keyword
Instead of using strings as keys, let’s create a map with keywords as keys:
(def wise-friend {:name "Periyaar"
                  :age 90})
Output
#'user/wise-friend
In the code above, we create a map where the key :name is mapped to "Periyaar" and the key :age is mapped to 90. We assign this map to wise-friend.
Now we can retrieve the :name of wise-friend as follows:
(wise-friend :name)Output
"Periyaar"
Similarly, we can retrieve the :age of wise-friend as shown below:
(get wise-friend :age)Output
90
In the above example, we use the get function, passing the map as the first argument and the key as the second.
In the following example, we extract the name of wise-friend using (wise-friend :name) and pass it to print, along with a second argument, "is very wise.":
(print (wise-friend :name)
       "is very wise.")
Output
Periyaar is very wise.nil
The output is Periyaar is very wise.nil. Try replacing print with println in the example above. What do you observe?
Since we used keywords as keys in wise-friend, we can also retrieve a value as shown:
(:name wise-friend)Output
"Periyaar"
In the above code, we treat the keyword :name as a function and pass the map wise-friend to it to fetch the value.
Now, let’s add a new key-value pair to wise-friend:
(assoc wise-friend :belief "Rationalism")Output
{:name "Periyaar", :age 90, :belief "Rationalism"}
In the code above, we use the assoc (associate) function. We pass the map wise-friend, followed by the key :belief and the value "Rationalism". In Clojure, data structures are immutable. The operation above returns a new map {:name "Periyaar", :age 90, :belief "Rationalism"}, and since we did not assign it to a variable, the result is not stored. You might think that wise-friend was modified to include the new key and value. However, if you query wise-friend for :belief, it will return nil:
(wise-friend :belief)Output
nil
All original values in wise-friend remain intact. Let’s query its age:
(wise-friend :age)Output
90
Now, let’s remove a key-value pair from wise-friend as shown:
(dissoc wise-friend :age)Output
{:name "Periyaar"}
In the code above, we remove :age from wise-friend, resulting in a map containing only the :name. Once again, it is important to remember that Clojure did not change the original wise-friend map. The dissoc (disassociate) function takes wise-friend as the first argument and the key to be removed as the second, creating and returning a new map without that key. In Clojure, data structures are immutable.
If we query the keys of wise-friend, we still see both :name and :age, as shown:
(keys wise-friend)Output
(:name :age)
To get the values stored in the map, pass it to the vals function, as shown:
(vals wise-friend)Output
("Periyaar" 90)
wise-friend has the key :name (a keyword) and we can also use "name" (a string). This means you can have a map with both a keyword and a string as keys, even if they are spelled the same, as seen below:
(assoc wise-friend "name" "Ramasamy")Output
{:name "Periyaar", :age 90, "name" "Ramasamy"}
By adding "name" as a key and associating it with the value "Ramasamy", we create a map with both :name and "name" as keys. Although this is possible, it is highly discouraged for the sake of code clarity.
4.5. Difference Between Vectors and Lists
| Watch video for this section here https://yu7.in/clj-vec-list |
If you had seen past few sections, you would have noticed vector is created by putting things between square brackets, and we can create a list by putting things between '( and ). Apart from that all operations are the same. So what’s the real difference?
Imagine vector is a rack. Each compartment of the rack is named 0, 1, 2 and so on till n.
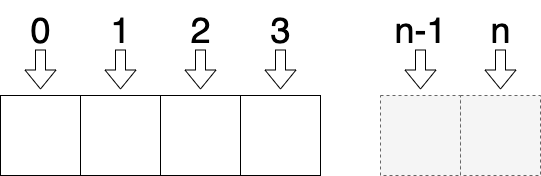
You can put anything in the compartment that’s after the last filled one. See the example below:
(def numbers ["zero" "one" "two" "three" "four"])
(conj numbers "five")
Output
["zero" "one" "two" "three" "four" "five"]In the above code, we add "five" to numbers and Clojure adds it to the last. A vector is a huge rack of contiguous spaces. Clojure can easily access any of the rack very easily because it’s stored in a compact form in the memory. So even if you have a million element vector accessing the 7,546th is fast in Clojure. Like every thing this comes with a catch. Say you have a million element vector, and you want to add another element, if the adjacent space in memory is not available and is occupied by some other thing, Clojure should do the huge work finding continuous free space, then it must move all elements to it and add the new value at the end. This process of moving around data is very costly.
So if speed of random access with index is not important, and you need only sequential access, and if you want to add a lot of values to your collection, and you have large list to be stored, consider list.

An element in a list has two parts. One is the value, and another one is a pointer to the next element. So elements of a list can be anywhere in your computer memory as shown below.
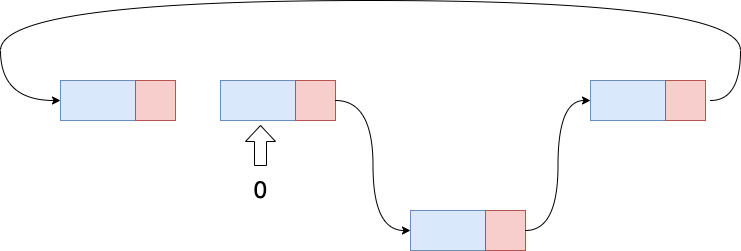
Adding a new element means it will have the value you push to it, and its pointer will point to current first element. So now the new value is the first element of the list. The drawback is, if you want to access the nth element of a list, then Clojure needs to traverse through n - 1 elements to get to it. The positive is adding element is very easy.
5. Reading Clojure Documentation
| Watch video for this section here https://yu7.in/clj-docs |
You are reading this book because it documents Clojure. In programming, documentation is essential; almost all programming languages have a way of providing and accessing it. Clojure is no different. In this section, we will see how to access Clojure’s documentation.
5.1. doc
Clojure has a function named doc. You pass any valid function name to it. For example, if we pass + to doc, its documentation is printed:
(doc +)Output
clojure.core/+
([] [x] [x y] [x y & more])
  Returns the sum of nums. (+) returns 0. Does not auto-promote
  longs, will throw on overflow. See also: +'
nil
From the documentation above, we can see that + can receive no arguments and will return zero:
(+)Output
0
This is confirmed by the output above. We can also infer that + accepts a single argument and returns that number:
(+ 42)Output
42
This is also true. Finally, we can infer that + accepts two or more arguments and returns their sum, which is verified below:
(+ 40 2)Output
42
(+ 10 30 2)Output
42
5.2. find-doc
If you want to search the entire Clojure documentation text, you can use the find-doc function as shown below:
(find-doc "sum of nums")Output
clojure.core/+
([] [x] [x y] [x y & more])
  Returns the sum of nums. (+) returns 0. Does not auto-promote
  longs, will throw on overflow. See also: +'
-------------------------
clojure.core/+'
([] [x] [x y] [x y & more])
  Returns the sum of nums. (+') returns 0. Supports arbitrary precision.
  See also: +
nil
clj꞉user꞉>
-------------------------
clojure.core/+
([] [x] [x y] [x y & more])
  Returns the sum of nums. (+) returns 0. Does not auto-promote
  longs, will throw on overflow. See also: +'
-------------------------
clojure.core/+'
([] [x] [x y] [x y & more])
  Returns the sum of nums. (+') returns 0. Supports arbitrary precision.
  See also: +
Above I have found functions whose documentation contains the string "sum of nums".
5.3. apropos
If you want to search for functions whose names contain a specific string, use the apropos function as shown below:
(apropos "replace")Output
(clojure.core/replace clojure.string/re-quote-replacement clojure.string/replace clojure.string/replace-first clojure.walk/postwalk-replace clojure.walk/prewalk-replace clojure.zip/replace)
Above, I used the apropos function to find all functions whose names contain the string "replace". Now, let’s check the documentation of the replace function to see what it does:
(doc replace)Output
-------------------------
clojure.core/replace
([smap] [smap coll])
  Given a map of replacement pairs and a vector/collection, returns a
  vector/seq with any elements = a key in smap replaced with the
  corresponding val in smap.  Returns a transducer when no collection
  is provided.
nil
5.4. Clojure docs online
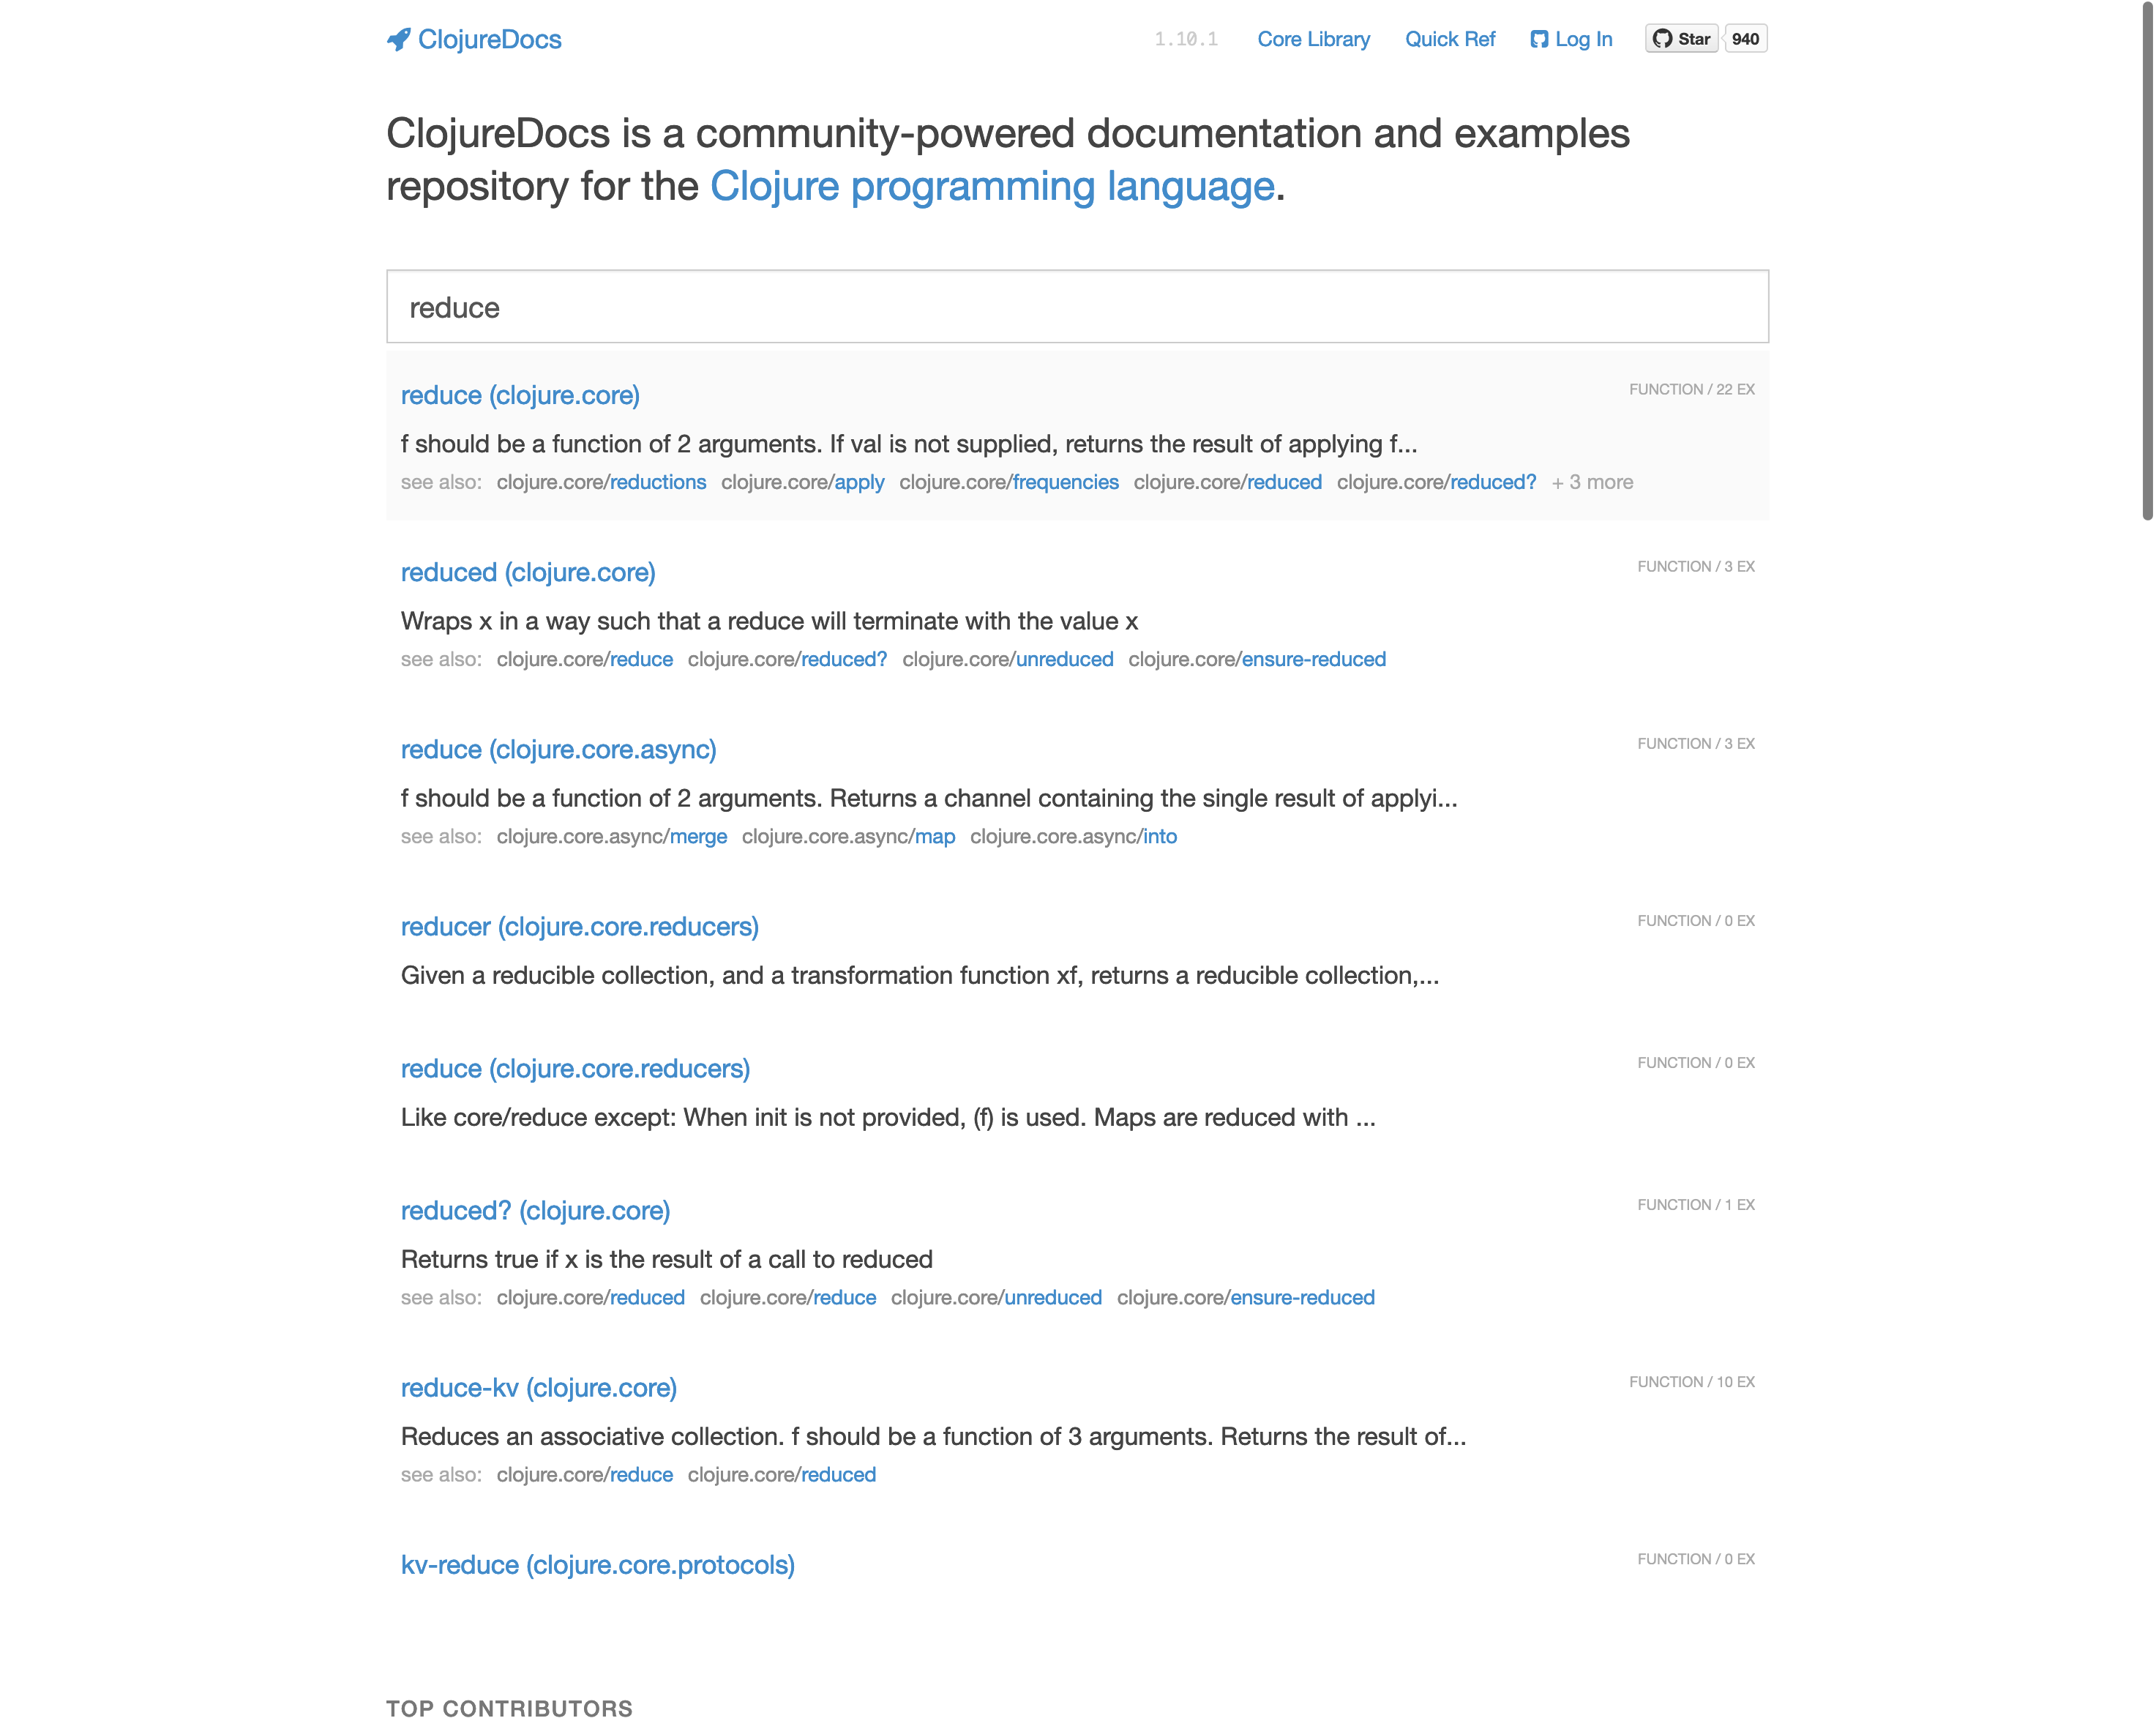
If you are not comfortable using the Clojure REPL to access documentation, you can use Clojure’s online documentation available at https://clojuredocs.org/
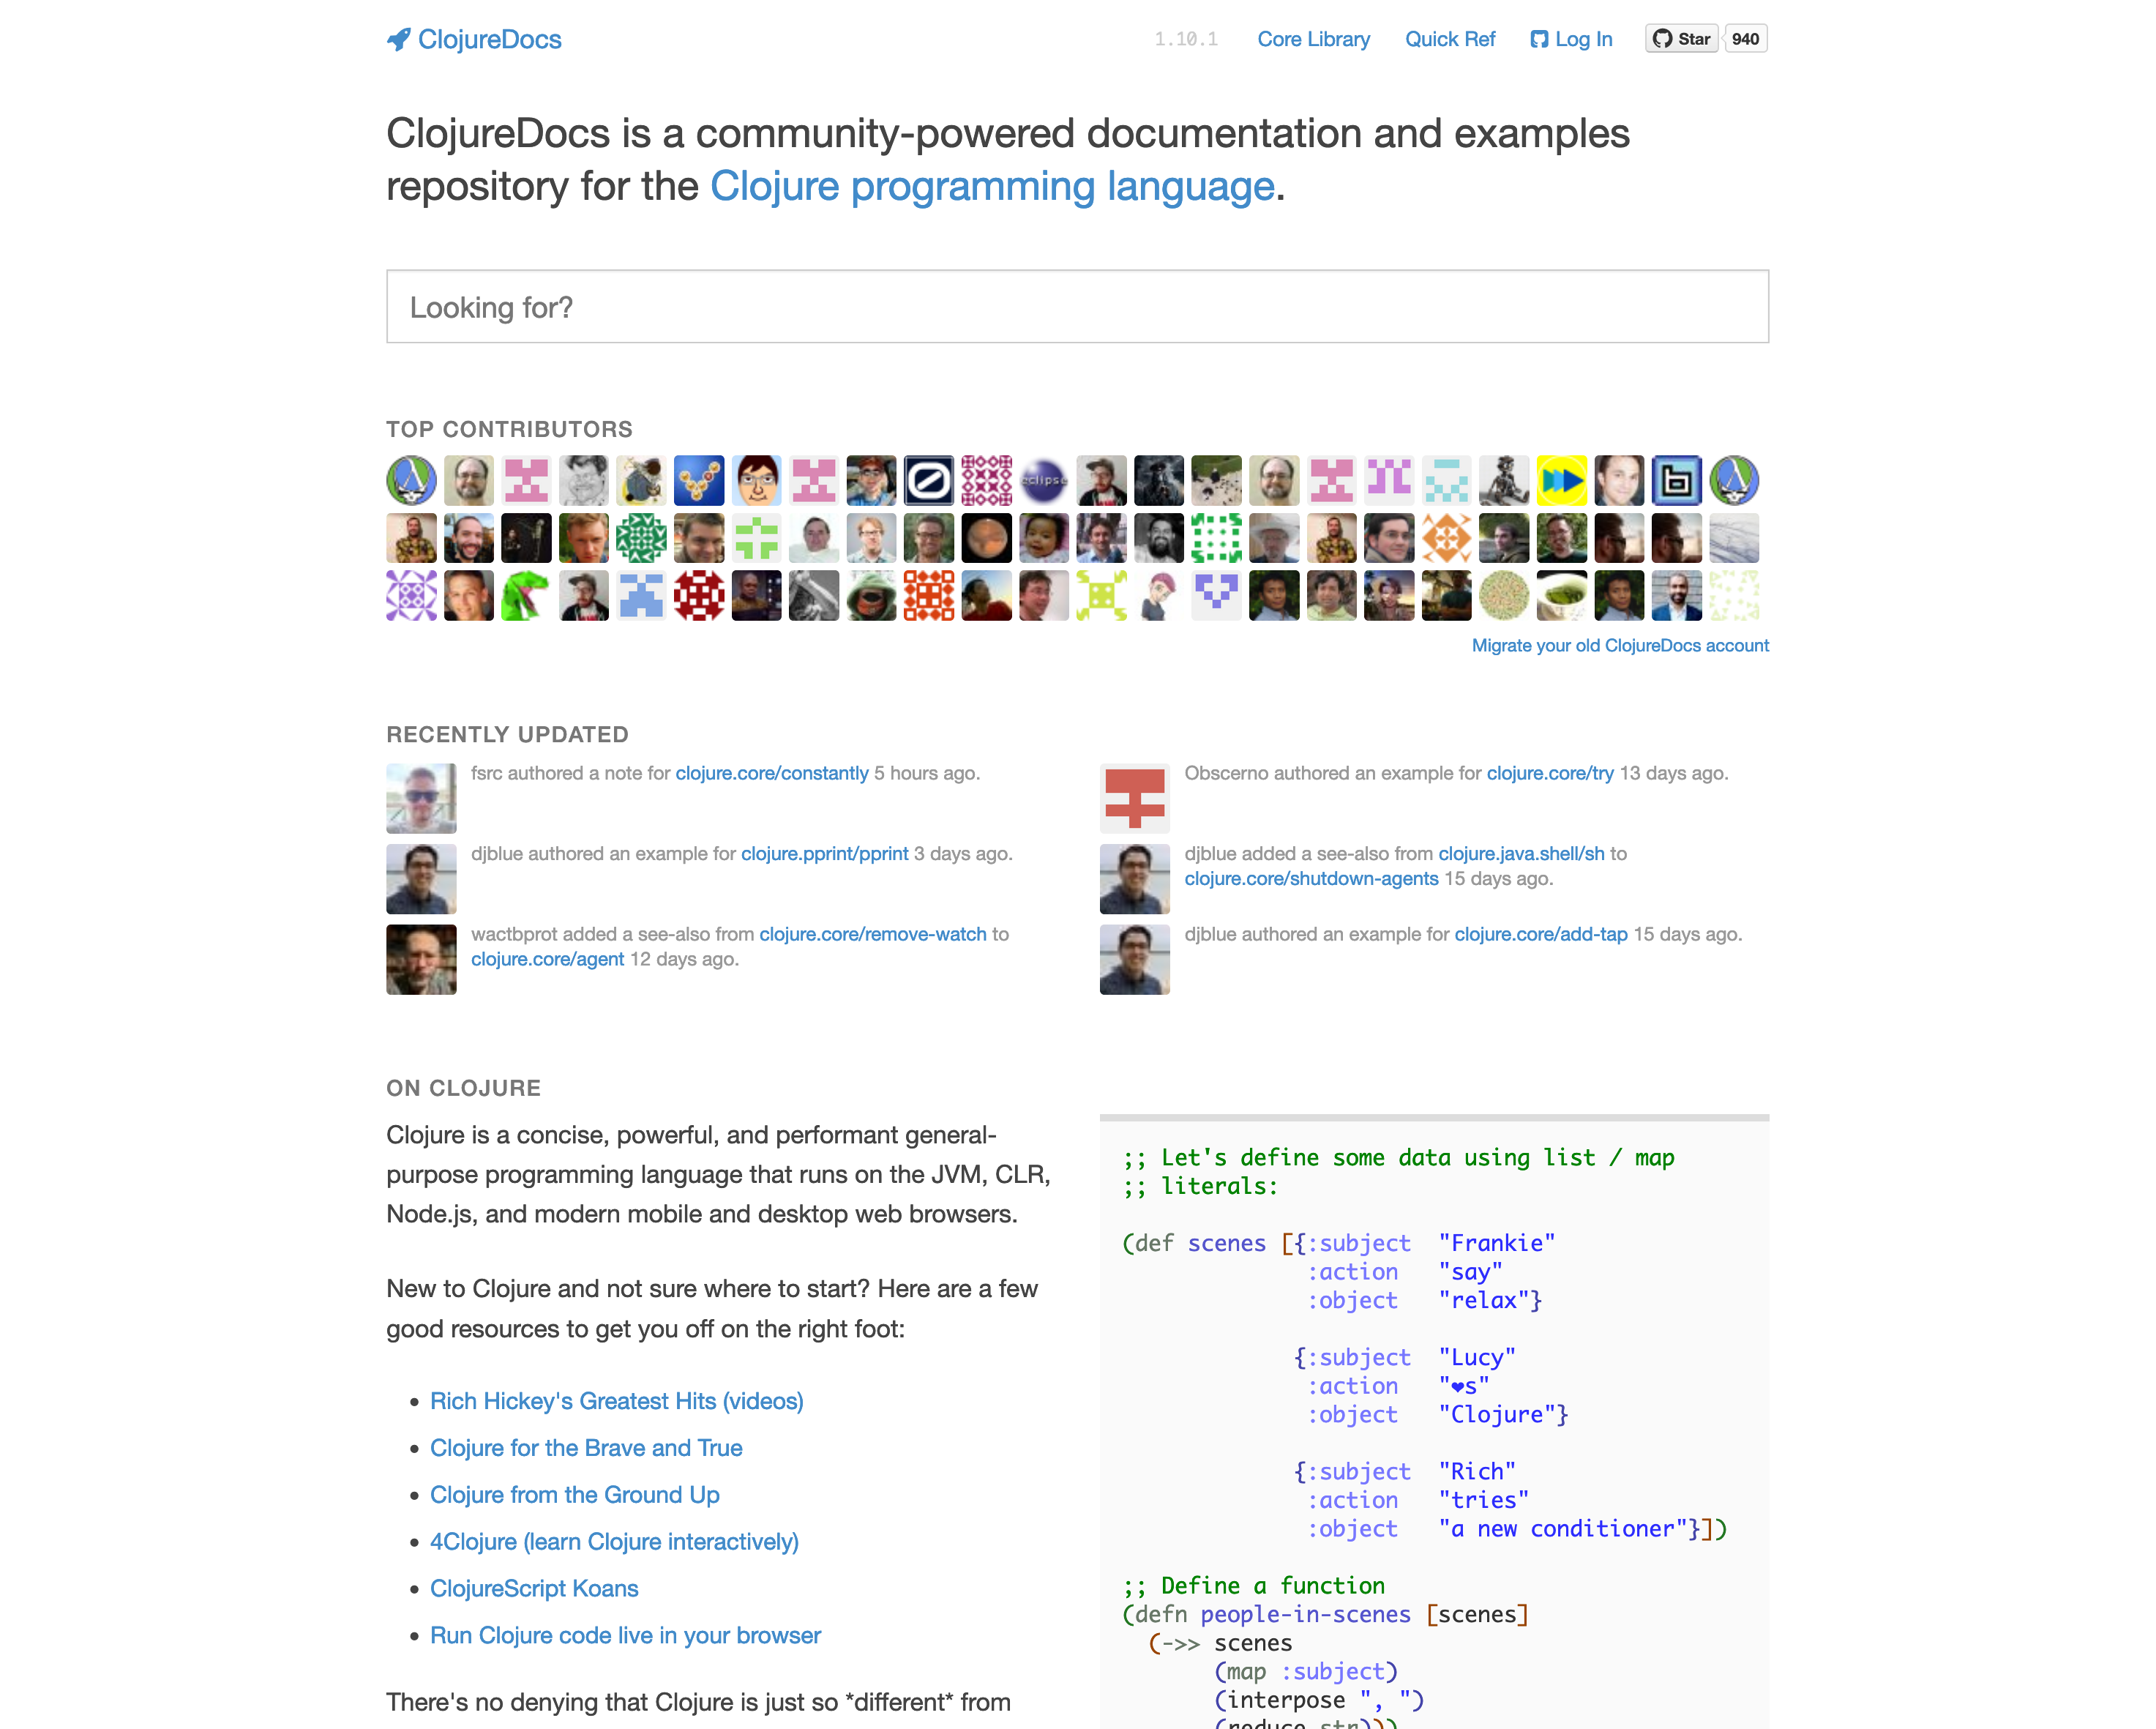
In the image below, searching for reduce shows all functions whose names contain the word "reduce".
Clicking on reduce displays its documentation:
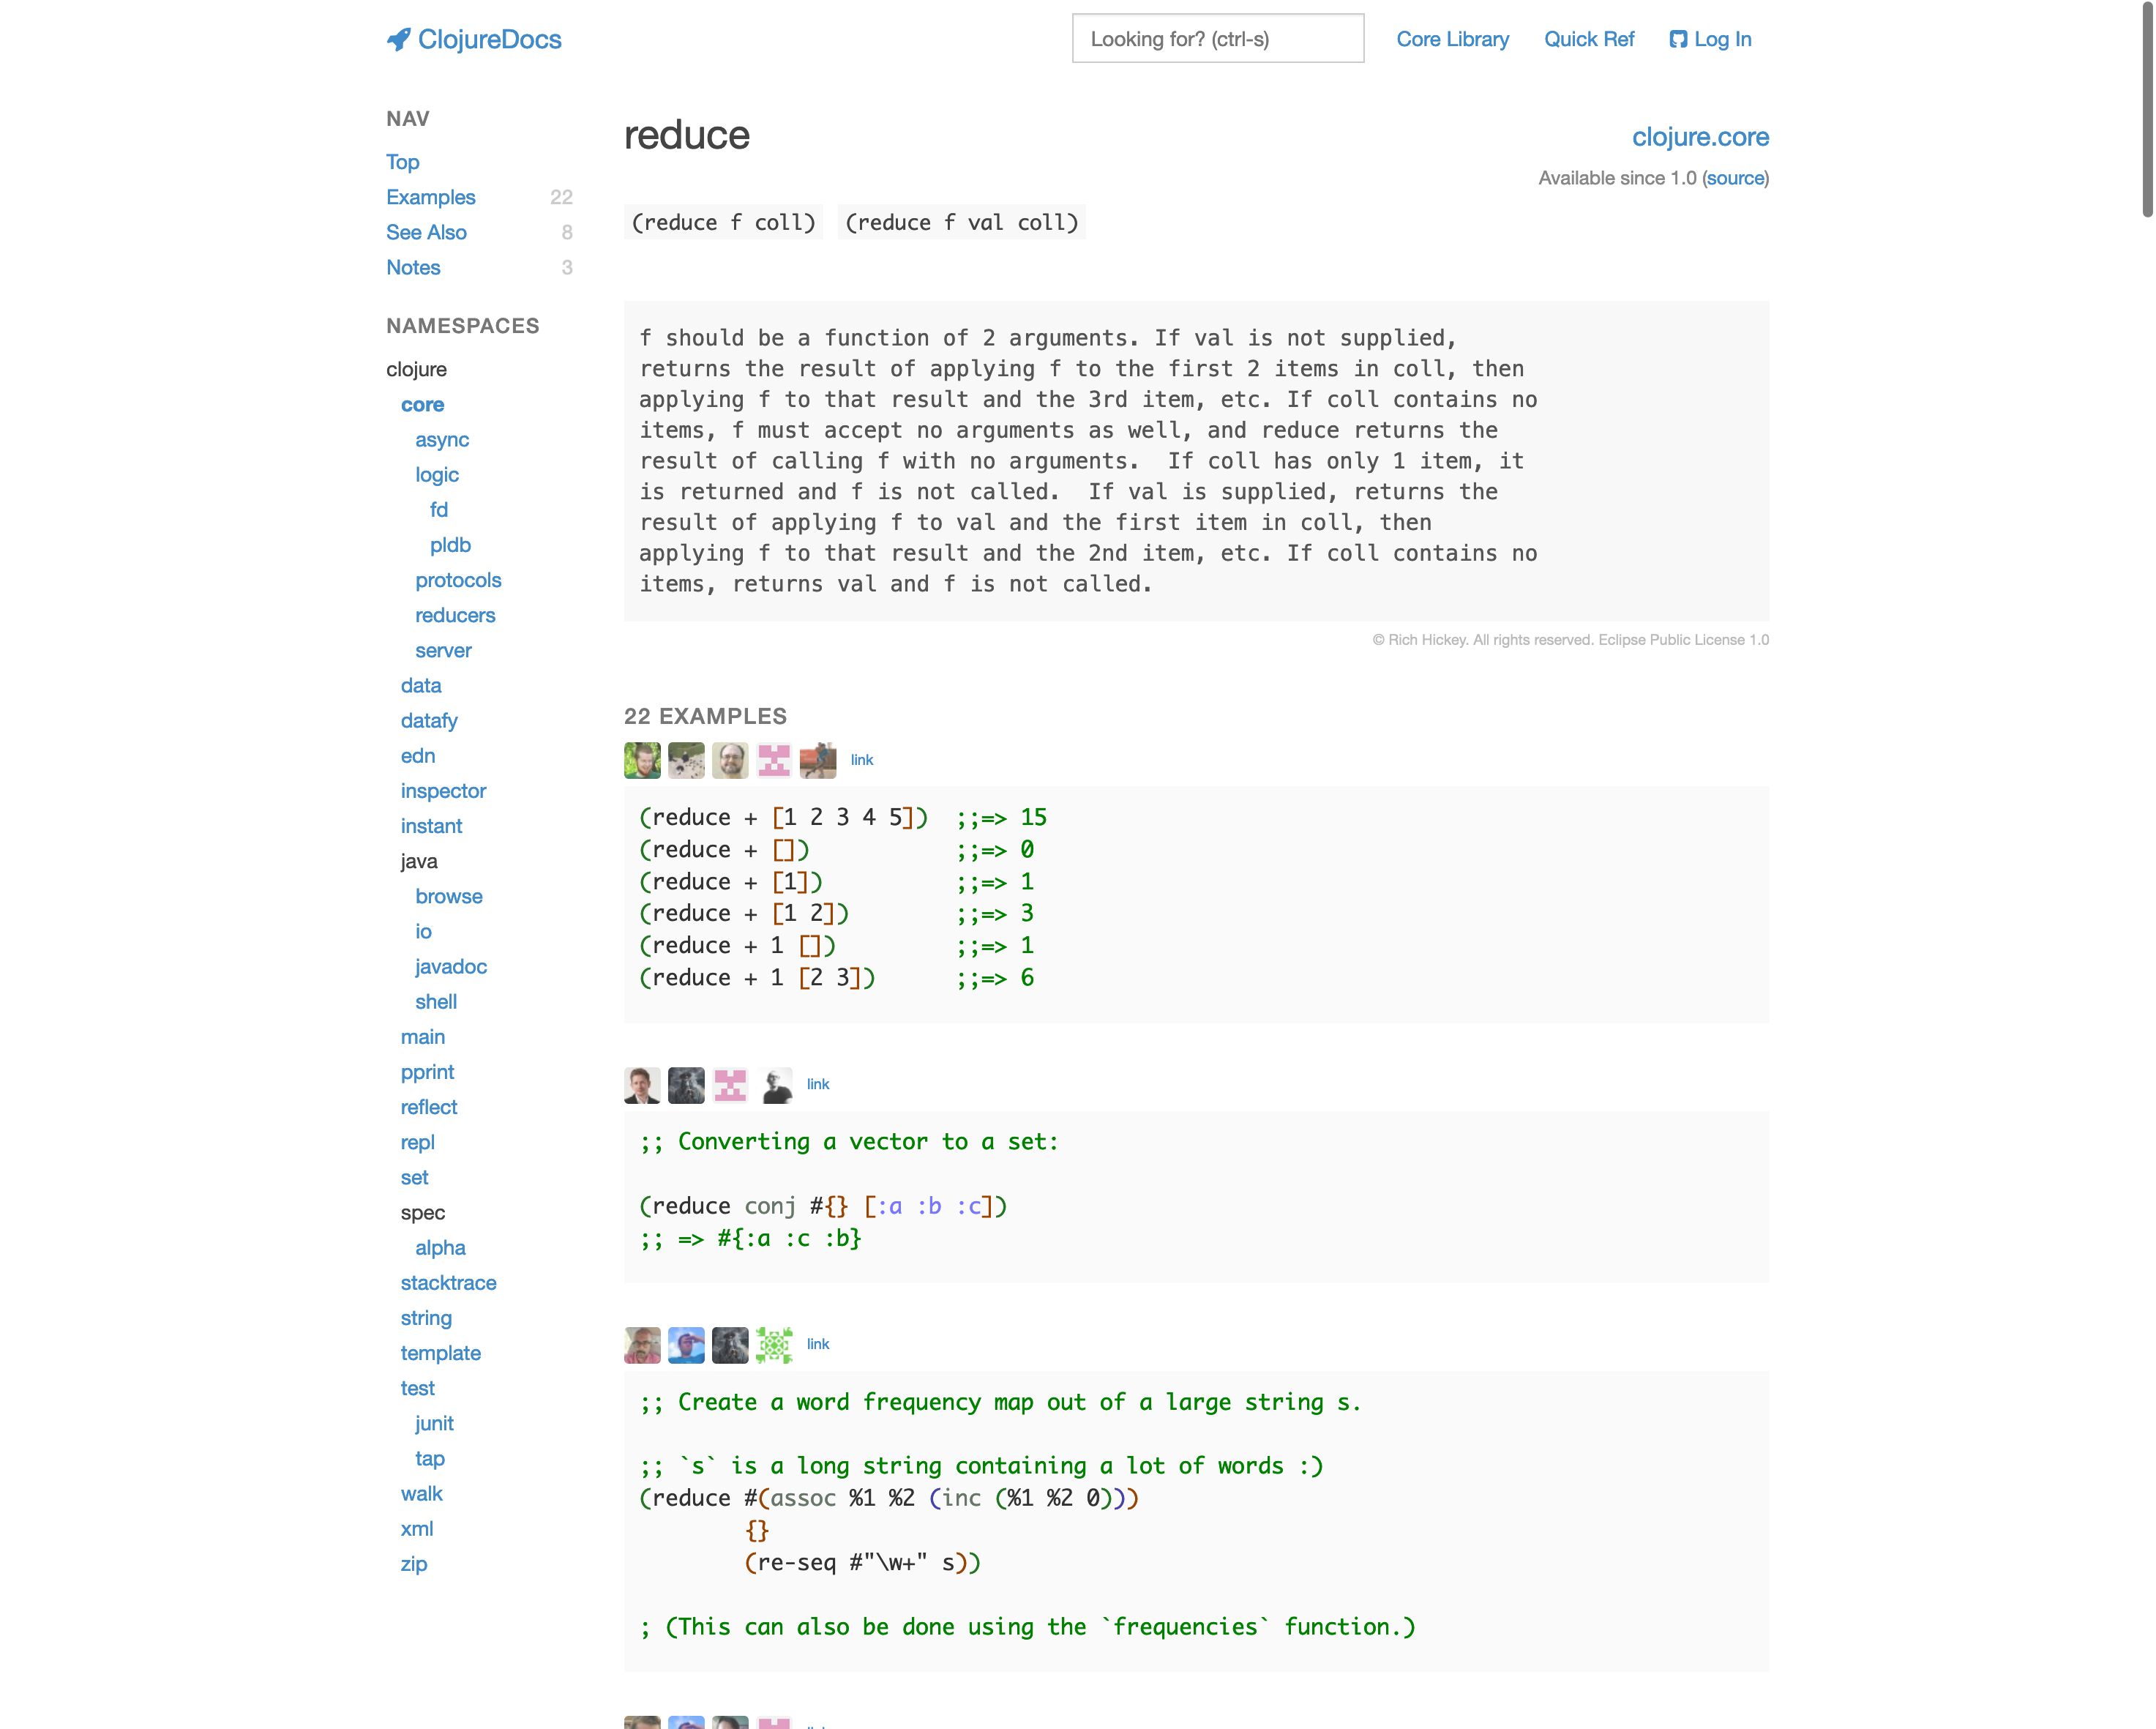
ClojureDocs is a convenient way to access documentation in a browser.
6. Logic and comparison
| For this section, you can use the code at https://gitlab.com/clojure-book/code/-/raw/master/logic_and_comparison.clj. Copy and paste the lines one by one into your REPL, whether the REPL runs in your terminal or is integrated with your IDE. |
| Watch video for this section here https://yu7.in/clj-logic-comp |
Clojure comes with functions that help us compare values. For example, you can use the equals = function to check if two things are equal, as shown below:
(= 1 1)Output
true
Since 1 is equal to 1, the above code returns true. In the code below, 1 is not equal to 2, and hence = returns false when 1 and 2 are passed as arguments to it:
(= 1 2)Output
false
= does not just compare two arguments; you can pass any number of arguments to it, and it returns true only when all arguments are equal.
(= 7 7 7 )Output
true
(= 7 8 7)Output
false
The greater than > function is used to check if the first argument passed to it is greater than the second one:
(> 1 2)Output
false
(> 2 1)Output
true
If you provide it with more than two arguments, it will check if the arguments are passed in descending order; if so, it will return true:
(> 3 2 1)Output
true
The greater than or equal to >= function returns true if the arguments passed to it are either greater than or equal to the second one. In the code below, 5 is equal to 5, and hence it will return true:
(>= 5 5)Output
true
In the example below, 6 is greater than 5, and hence it’s true:
(>= 6 5)Output
true
The code below returns false because 6 is neither greater than 7 nor equal to 7:
(>= 6 7)Output
false
The less than function < returns true if the arguments passed to it are in ascending order. Below, 1 is less than 2, so true is returned:
(< 1 2)Output
true
In the example below, 1 is less than 2, which is less than 3, and hence true is returned:
(< 1 2 3)Output
true
2 is not less than 1, and hence the code below returns false:
(< 2 1)Output
false
The code below returns false because 1, 3, and 2 are not passed to < in ascending order:
(< 1 3 2)Output
false
The code below returns true because 7 is equal to 7:
(<= 7 7)Output
true
The code below returns true because 7 is less than or equal to 8:
(<= 7 8)Output
true
The code below returns false because 8 is neither less than 7 nor equal to it:
(<= 8 7)Output
false
Now let’s look at logical functions. The and function returns true if all the arguments passed to it are true:
(and true true)Output
true
If any of the arguments passed to and are false, it returns false.
(and true false)Output
false
The or function returns true if any of the arguments passed to it are true:
(or true true)Output
true
(or true false)Output
true
(or false false)Output
false
The not function simply inverts true to false and vice versa:
(not true)Output
false
(not false)Output
true
7. Conditions and branching
In programming, the flow of execution often needs to change based on the data or information available. For example, while anyone can visit the landing page of a website, a user attempting to access a secured page must be presented with a login screen if they are not already logged in. In such cases, we must check specific conditions and branch the program flow accordingly.
In this section, we will explore how to implement this in Clojure.
7.1. if
| Watch video for this section here https://yu7.in/clj-if |
if is one of the basic condition checking functions in Clojure. Let’s try out a simple example. Execute the code shown below:
;; if.clj

(let [a 5]
  (if (> a 0)
    (println a "is positive")))
Output
5 is positive
nil
We get the result 5 is positive as shown above. So we get the following, to an if the first argument is condition check, over here its (> a 0), if the condition check returns true, then the second argument passed (println a "is positive") is executed.
Now modify the program as shown:
;; if.clj

(let [a -5]
  (if (> a 0)
    (println a "is positive")))
Output
nil
In the above code, a is -5 and hence (> a 0) fails. In theory then the third argument passed to if should execute, we have first argument (> a 0), and second argument (println a "is positive"), there is no third argument, so nil gets returned.
Now let’s give a third argument to it, see the code below and execute it:
;; if_else.clj

(let [a -5]
  (if (> a 0)
    (println a "is positive")
    (println a "is negative")))
Output
-5 is negative
nil
In the above code a is -5 and hence (> a 0) fails. In then the third argument should execute. In this case, the third argument is (println a "is negative") gets executed and -5 is negative gets printed out.
Take a look at the code below, execute it.
;; if_nested.clj

(let [a 5]
  (if (> a 0)
    (println a "is positive")
    (if (< a 0)
      (println a "is negative")
      (println a "is neither positive nor negative"))))
Output
5 is positive
nil
So in the above code (> a 0) is true, so the first argument passed to it (println a "is positive") is executed and above output is printed.
Now let’s change a to -5 and see what happens.
;; if_nested.clj

(let [a -5]
  (if (> a 0)
    (println a "is positive")
    (if (< a 0)
      (println a "is negative")
      (println a "is neither positive nor negative"))))
Output
-5 is negative
nil
So the second argument passed to if is:
(if (< a 0)
      (println a "is negative")
      (println a "is neither positive nor negative"))
This argument itself contains a if, let’s call it nested if, and here the condition passed to it (< a 0) passes, so the second argument passed to the nested if (println a "is negative") gets executed and -5 is negative gets printed out.
Now what if a is zero, once again it comes to the second argument to the top level if, which is
(if (< a 0)
      (println a "is negative")
      (println a "is neither positive nor negative"))
In the code above (< a 0) fails, and the third argument passed to nested if (println a "is neither positive nor negative") gets executed, and we have execution as shown below:
;; if_nested.clj

(let [a 0]
  (if (> a 0)
    (println a "is positive")
    (if (< a 0)
      (println a "is negative")
      (println a "is neither positive nor negative"))))
Output
0 is neither positive nor negative
nil
if function can accept only 3 arguments, the first one is a condition, the second argument will get executed when the condition passes, the third will get executed when condition fails. So what if we want to execute more than one statement if a condition passes or fails, well, wrap them in do as shown:
;; if_multiple_statements_in_branch.clj

(let [a 5]
  (if (> a 0)

    (do
      (println a "is positive")
      (println "There are infinite positive numbers"))

    (do
      (println a "is negative")
      (println "There are infinite negative numbers"))))
Output
5 is positive
There are infinite positive numbers
nil
Now let’s make a negative and execute it:
;; if_multiple_statements_in_branch.clj

(let [a -5]
  (if (> a 0)

    (do
      (println a "is positive")
      (println "There are infinite positive numbers"))

    (do
      (println a "is negative")
      (println "There are infinite negative numbers"))))
Output
-5 is negative
There are infinite negative numbers
nil
7.2. when
| Watch video for this section here https://yu7.in/clj-when |
if accepts a condition as first argument, as second it accepts what should be done if the condition is true, and third is what should be done if the condition is false. if does work when the third argument is left out, but if we want to execute a bunch of statements when a condition is true, then we can use when as shown below:
;; when.clj

(let [print-something true]
  (when print-something
    (println "I print something.")
    (println "I print other things too.")))
Output
I print something.
I print other things too.
nil
Type the above program and execute it. When print-something is true, then the statements:
(println "I print something.")
(println "I print other things too.")
in the form
(when print-something
    (println "I print something.")
    (println "I print other things too."))
get’s executed, and we get the output shown above.
Now let’s set print-something to false as shown below and execute the code:
;; when.clj

(let [print-something false]
  (when print-something
    (println "I print something.")
    (println "I print other things too.")))
Output
nil
Nothing gets printed. So if the first argument passed to when is true, all statements enclosed in its form gets executed, else nothing happens.
7.3. cond
What if you want to check multiple conditions and execute different code based on which one is met? Welcome to cond (short for conditional). Take a look at the example below and try executing it:
;; cond.clj

(let [number 5]
  (cond
    (> number 0) (println number "is positive.")
    (< number 0) (println number "is negative.")
    :else (println number "is neither positive nor negative.")))
Output
5 is positive.
nil
It prints 5 is positive because we set number to 5 using the let binding. The cond form is structured as follows:
(cond
    (> number 0) (println number "is positive.")
    (< number 0) (println number "is negative.")
    :else (println number "is neither positive nor negative."))
In this code, since number is greater than 0, the condition (> number 0) is satisfied, and the associated expression (println number "is positive.") is executed.
Try changing number to a negative value, execute the code, and observe the result. If no preceding conditions are satisfied, the :else clause is executed:
:else (println number "is neither positive nor negative.")Set number to 0 and execute the code to see the result.
Now, try executing the following code and analyze its behavior:
(let [number 5]
  (cond
    (> number 0) (println number "is positive.")
    (< number 0) (println number "is negative.")))
Set number to 0, execute it, and observe what happens.
7.4. case
| Watch video for this section here https://yu7.in/clj-case |
Below is an example of case, type it and execute it.
;; case.clj

(let [num 20]
  (case num
    1 "one"
    2 "two"
    3 "three"
    4 "four"
    5 "five"
    "I don't know"))
Output
"I don't know"
We get "I don’t know", so what happens? We have set num to 20 in let [num 20], then we pass num to case as shown:
(case num
  ........)
So case checks the value of num. Since num is not 1, the statement 1 "one" is not touched.
(case num
    1 "one"
    ........)
Similarly, num is not 2, 3, 4, or 5, so all the statements below are not touched.
(case num
  1 "one"
  2 "two"
  3 "three"
  4 "four"
  5 "five"
  ........)
Finally, the default case "I don’t know" is executed as shown below:
(case num
    ........
    "I don't know")
And it gets returned.
As an exercise, remove the "I don’t know" and run the code. What do you get? Change num to 4 and run the code. What do you get? How can you explain it?
When num is 4, and "I don’t know" is removed, does it matter? Why?
When num is 20, and "I don’t know" is removed, does it matter? Why?
8. Loops
| For this section, you can use the code at https://gitlab.com/clojure-book/code/-/raw/master/loops.clj. Copy and paste the lines one by one into your REPL, whether the REPL runs in your terminal or is integrated with your IDE. |
| Watch video for this section here https://yu7.in/clj-loops |
In programming, when you need to repeat an action, you use loops. In this section, we will explore them.
| Clojure handles repetition differently than imperative languages. While it doesn’t have traditional 'for' or 'while' loops in the same sense, it provides powerful alternatives. This section explores those alternatives. |
8.1. for
The first construct we’ll look at is for. Type and execute the following code:
(let [nums [1 2 3 4]]
  (for [num nums]
       (* num 10)))
Output
(10 20 30 40)
Let’s see how it works. The expression
(let [nums [1 2 3 4]])binds [1 2 3 4] to the symbol nums. Then we use for as follows:
(let [nums [1 2 3 4]]
  (for [num nums]
    ;; loop body
       ))
In the expression (for [num nums] …), the [num nums] part defines the binding. The body will be executed four times. On the first iteration, the first value in nums, 1, is bound to num; on the second iteration, 2 is bound to num, and so on.
In the body, we multiply num by 10. Let’s put (* num 10) in the loop body as shown:
(let [nums [1 2 3 4]]
  (for [num nums]
       (* num 10)))
Here is how for works: on the first iteration, num is 1 and the body returns 10. for collects this into a sequence. On the next iteration, num is 2 and the body returns 20, which is added to the sequence. This continues until all elements are processed, and for returns the final sequence: (10 20 30 40).
Now let’s use for with multiple sequences. Type and execute the following program:
(def colors ["red" "blue" "green" "yellow"])

(def shapes ["square" "circle" "triangle" "rectangle"])

(for [color colors
      shape shapes]
  (str color " " shape))
Output
("red square" "red circle" "red triangle" "red rectangle" "blue square" "blue circle" "blue triangle" "blue rectangle" "green square" "green circle" "green triangle" "green rectangle" "yellow square" "yellow circle" "yellow triangle" "yellow rectangle")
In this expression:
(def colors ["red" "blue" "green" "yellow"])we define a vector of four colors called colors. Similarly, in this expression:
(def shapes ["square" "circle" "triangle" "rectangle"])we define a vector of four shapes called shapes. Now we can use for to combine every color with every shape. Look at this:
(for [color colors]
  ;; loop body
  )
In the code above, for iterates through each item in colors. During the first iteration, color is bound to "red", and during the last, it is bound to "yellow".
To combine these with shapes, we add another binding for shape:
(for [color colors
      shape shapes]
  ;; loop body
  )
It executes as follows: first, "red" is bound to color and "square" to shape. Then the body executes, concatenating them with str. Here is the complete code:
(for [color colors
      shape shapes]
  (str color " " shape))
In the first iteration, "red", a space, and "square" are concatenated, and for collects "red square". Then, shape takes the next value, "circle", resulting in "red circle". This process continues for all shapes before color moves to the next value, "blue". Ultimately, for returns the following sequence:
("red square" "red circle" "red triangle" "red rectangle" "blue square" "blue circle" "blue triangle" "blue rectangle" "green square" "green circle" "green triangle" "green rectangle" "yellow square" "yellow circle" "yellow triangle" "yellow rectangle")
8.2. doseq
doseq is similar to for in its iteration syntax, but it is designed for side effects and always returns nil. Look at the code below. Unlike for, it will not return a sequence of results. Use doseq when you want to perform an action without returning a value.
doseq is used for repetitive actions that produce side effects, such as printing to the console, writing to a file, sending emails, or updating a database.
|
(let [nums [1 2 3 4]]
  (doseq [num nums]
    (* num 10)))
Output
nil
Although doseq returns nil, you can perform actions within the loop body. For example, we can print the result of the multiplication:
(let [nums [1 2 3 4]]
  (doseq [num nums]
    (println (* num 10))))
Output
10
20
30
40
nil
In a real-world scenario, this could be used to send emails to a list of recipients where no return value is needed.
8.3. loop
Finally, let’s look at loop. Type and execute the following program:
(loop [x 1]
  (when (<= x 5)
    (println x)
    (recur (inc x))))
Output
1
2
3
4
5
nil
Here is how it works. First, we define the loop construct:
(loop )Now, we initialize a binding x to 1:
(loop [x 1])To print numbers from 1 to 5, we need a condition to stop the loop. We use when to check if x is less than or equal to 5:
(loop [x 1]
  (when (<= x 5)
    ))
The first part of loop is the binding [x 1], followed by the body containing the condition check:
(when (<= x 5)
    )
Whenever x is less than or equal to 5, the body of the when expression is executed.
Now we add a call to println to print the current value of x:
(loop [x 1]
  (when (<= x 5)
    (println x)))
To continue the loop, we use recur to jump back to the start of the loop with an updated value for x. We pass (recur (inc x)) as the final expression in the when block:
(loop [x 1]
  (when (<= x 5)
    (println x)
    (recur (inc x))))
Now the loop starts again, but this time x is 2. Since (⇐ x 5) is still true, 2 is printed. This continues until x becomes 6, at which point (⇐ x 5) fails, and the loop terminates.
8.4. dotimes
| Watch video for this section here https://yu7.in/clj-dotimes |
If you know in advance how many times an action needs to be repeated, you can use dotimes. Let’s look at an example.
We start with dotimes:
(dotimes )We pass a vector containing the counter and the number of iterations:
(dotimes [])To repeat an action five times, we specify 5:
(dotimes [5])To use the current iteration count, we bind it to a variable, such as x:
(dotimes [x 5])Now we print the value of x:
(dotimes [x 5]
  (println x))
Running the code above produces the following result:
0
1
2
3
4
In most programming languages, counting starts at 0. This is why the output begins with 0. There are five distinct numbers from 0 to 4, meaning the body was executed five times.
Here is another example:
(dotimes [_ 5]
  (println "Hello World!"))
Running this code produces the following output:
Hello World!
Hello World!
Hello World!
Hello World!
Hello World!
As you can see, "Hello World!" is printed five times. You might wonder why we used an underscore _ instead of a variable like x. By convention, an underscore is used when the iteration counter is not needed in the body of the loop.
9. Functions
| Watch video for this section here https://yu7.in/clj-st-fun |
Abstraction is the key to greatness and progress. Michael Faraday discovered a link between electricity and magnetism, but I don’t think about it when I drive my car. Everything is abstracted away behind the steering wheel and pedals. Abstraction is so important that almost every programming language provides a way to abstract away complexity.
Functions are the way you can abstract away things in Clojure. Whenever code becomes complex, you can refactor it into functions and use those functions as building blocks. In fact, you have been using functions all along; for example, when you call (+ 1 2) in Clojure, ` is a function, and `1` and `2` are the values it receives. Technically, we call the values received by a function arguments. You don't know what happens in the computer when you execute `( 1 2); it’s been neatly abstracted away behind the function +.
So let’s see how to build our own functions in this chapter.
9.1. Saying Hello With Functions
Here is the code in Clojure to print Hello World:
(println "Hello world!")Now, let’s make this functionality available by calling (say-hello). To do that, we use defn (short for define function):
(defn )First, we pass the function name say-hello as an argument:
(defn say-hello)Now that say-hello is passed to defn, we need to specify the arguments. Since we don’t need any arguments to print 'Hello World!', we use empty square brackets [] to indicate that no arguments are accepted.
(defn say-hello [])Now, we write the function body. In this case, we simply print 'Hello World!', as shown below:
(defn say-hello []
  (println "Hello world!"))
Whenever we call (say-hello), 'Hello World!' is printed. The code below shows the final version of say-hello:
;; function_say_hello.clj

(defn say-hello []
  (println "Hello world!"))

(say-hello)
Output
Hello world!
nil
9.2. Passing Arguments
We can pass arguments to functions. For example, consider a function \$f(x) = x^2 + 2\$. This function accepts an argument \$x\$; if we plug in 7 for \$x\$, we get \$f(7) = 51\$. Similarly, a function in Clojure can take an argument and perform an operation with it.
Look at the say hello example below, type it, and execute it:
;; function_with_arguments.clj

(defn say-hello [name]
  (println "Hello" name "!"))

(say-hello "Karthik")
Output
Hello Karthik !
nil
It prints Hello Karthik !. But how does it work? By writing (defn say-hello …), we define a function named say-hello. Notice the [name] part shown below:
(defn say-hello [name]
  ;; function body goes here
  )
The name is an argument that must be passed for the function to run. It can be used as a variable within the function body. Notice the structure of the function: it starts with defn, followed by the function name say-hello, and then the square brackets containing the argument name [name]. Now let’s finish off the function by writing its body as shown:
(defn say-hello [name]
  (println "Hello" name "!"))
In the function body, we are printing a greeting to the name. We pass name to println as follows: (println "Hello" name "!").
Calling say-hello with the argument "Karthik": (say-hello "Karthik") prints Hello Karthik !. Modify the program to say hello to you.
9.2.1. Finding Area Of Circle
The area of a circle is calculated as \$pi r^2\$. Given that the radius of a circle is stored in a variable radius, we can write Clojure code to find the area as shown below:
(* Math/PI (Math/pow radius 2))Instead of writing the calculation every time, it would be better to find the area by calling a function named circle-area. This is how we implement it in the code below:
;; function_circle_area.clj

(defn circle-area [radius]
  (* Math/PI (Math/pow radius 2)))

(circle-area 7)
Output
153.93804002589985
In the above code, rather than dealing with Math/PI and calculating the power each time, all we need to do is call (circle-area 7), and we get the area of a circle with a radius of 7 units. A well-designed function abstracts away complexity and allows us to write better programs.
9.3. Refactoring
Imagine a friend is building a billion-dollar startup with an app that helps customers calculate the area of a circle. After a successful pitch and investment round, your friend claimed that thousands of people want to calculate the area of a circle every day and that his app would be incredibly useful. He knows you are a great programmer, so you coded the circle-area function for him. The app is released, and humanity is saved.
You realize that instead of calculating the area using (* Math/PI (Math/pow radius 2)), you can simply use (* Math/PI radius radius). The latter is much simpler and easier to maintain. Consequently, all you need to do is change the code in one place, as shown below:
;; function_circle_area_refactored.clj

(defn circle-area [radius]
  (* Math/PI radius radius))

(circle-area 7)
The rest of the app’s code is completely unaware of this change and continues to work perfectly. If you hadn’t abstracted the logic into a function and had instead placed (* Math/PI (Math/pow radius 2)) in 50 different places throughout the app, making such a change and testing it would have been incredibly difficult.
Thus, functions lead to better code and reduce the likelihood of bugs.
9.4. Functions with Multiple Arguments
| Watch video for this section here https://yu7.in/clj-mul-arg |
Functions aren’t limited to a single argument. For example, if you want to calculate the hypotenuse of a right-angled triangle with sides of lengths \$a\$ and \$b\$, it can be represented as a function \$f(a, b) = \sqrt{a^2 + b^2}\$. Now let’s code this in Clojure:
;; hypotenuse.clj

(defn hypotenuse [a b]
  (Math/sqrt (+ (* a a) (* b b))))

(hypotenuse 3 4)
Output
5.0
In the code above, we define a function hypotenuse that takes two arguments, a and b. It should now be clear that if a function takes no arguments, the function name is followed by empty square brackets []; if it does take arguments, their names are included within those brackets, such as [a b]. In the function body, we use (Math/sqrt (+ (* a a) (* b b))) to compute and return the hypotenuse.
When we call (hypotenuse 3 4), 5.0 gets returned.
Suppose you need a function that can accept either one or two arguments. Clojure allows this through function overloading. Look at the code below:
;; function_multiple_arguments.clj

(defn multiple-args
  ([arg-1] (println "One argument passed:" arg-1))
  ([arg-1 arg-2] (println "Two arguments passed:" arg-1 arg-2)))

(multiple-args 1)
(multiple-args 1 2)
Output
One argument passed: 1
Two arguments passed: 1 2
We have a function called multiple-args, defined as follows:
(defn multiple-args
  ;; function body goes here
  )
To allow the function to accept a single argument, we add a form as shown below:
(defn multiple-args
  ([arg-1] (println "One argument passed:" arg-1)))
This form:
([arg-1] (println "One argument passed:" arg-1))receives one argument, arg-1:
([arg-1] ...)In the function body, we print the argument using (println "One argument passed:" arg-1):
([arg-1] (println "One argument passed:" arg-1))So this will respond to a function call like (multiple-args 1).
To support two arguments, we add another form with two parameters:
([arg-1 arg-2] (println "Two arguments passed:" arg-1 arg-2))This is our complete function definition, which can accept either one or two arguments:
(defn multiple-args
  ([arg-1] (println "One argument passed:" arg-1))
  ([arg-1 arg-2] (println "Two arguments passed:" arg-1 arg-2)))
([arg-1 arg-2] (println "Two arguments passed:" arg-1 arg-2)) is executed when we call (multiple-args 1 2).
As an exercise, try writing code that allows you to call (multiple-args), which should print 'No argument passed'. If you find this difficult, refer to function_multiple_arguments_exercise.clj in the code examples.
9.5. Accepting Unlimited Arguments
Clojure functions can accept an unlimited number of arguments. For example, the + function can accept any number of arguments and return their sum:
(+ 1 2 3 5 7 -1)Output
17
For a function to accept an unlimited number of arguments, prefix the last argument in the argument vector with the & symbol. Take a look at the code below:
;; function_unlimited_arguments.clj

(defn unlimited-arguments [& args]
  (println "Arguments:" args)
  (println "Type of args:" (type args)))

(unlimited-arguments 1)
(println)
(unlimited-arguments 1 17 true "Karthik" :coder)
Output
Arguments: (1)
Type of args: clojure.lang.ArraySeq

Arguments: (1 17 true Karthik :coder)
Type of args: clojure.lang.ArraySeq
In this example, & args in the argument vector allows the unlimited-arguments function to accept any number of arguments.
For example, if we call the function like this:
(unlimited-arguments 1)We get the output Arguments: (1), which is generated by this statement:
(println "Arguments:" args)In the previous snippet, we simply printed the arguments. In the next snippet:
(println "Type of args:" (type args))We print the type of args, which is clojure.lang.ArraySeq (a type of sequence). Similarly, when we call:
(unlimited-arguments 1 17 true "Karthik" :coder)All arguments— 1, 17, true, "Karthik", and :coder—are bundled into args as a sequence, as seen in the output: Arguments: (1 17 true Karthik :coder).
To define a function that accepts one or more arguments, you can write it like this:
;; function_unlimited_arguments_2.clj

(defn unlimited-arguments [first-arg & args]
  (println "First argument:" first-arg)
  (println "Other arguments:" args))

(unlimited-arguments 1)
(println)
(unlimited-arguments 1 17 true "Karthik" :coder)
Output
First argument: 1
Other arguments: nil

First argument: 1
Other arguments: (17 true Karthik :coder)
In the argument vector [first-arg & args], the first argument is captured by first-arg, and any subsequent arguments are bundled into args.
In the following example, the unlimited-arguments function requires a minimum of two arguments:
;; function_unlimited_arguments_3.clj

(defn unlimited-arguments [first-arg second-arg & args]
  (println "First argument:" first-arg)
  (println "Second argument:" second-arg)
  (println "Other arguments:" args))

(unlimited-arguments 1 2)
(println)
(unlimited-arguments 1 17 true "Karthik" :coder)
Output
First argument: 1
Second argument: 2
Other arguments: nil

First argument: 1
Second argument: 17
Other arguments: (true Karthik :coder)
The first argument is captured by first-arg, the second by second-arg, and any additional arguments are bundled as a sequence in args.
9.6. Returning Values
| Watch video for this section here https://yu7.in/clj-ret |
Consider a mathematical function, such as \$f(x) = x^2 + 2\$. If you plug in a value, say \$x = 7\$, the function returns 51. Similarly, you expect a programming function to return a value.
In Clojure, the result of the last expression executed by a function is its return value. Take, for example, the code below:
;; function_returning_something.clj

(defn add [a b]
  (+ a b))

(println (add 2  3))
Output
5
nil
In the code above, the result of (+ a b) is returned from the add function. Since (+ a b) is the last expression in the add function, its result is returned, captured by println, and then printed. You might have noticed nil in the output. This is because println, after printing 5, returns nil, which is then printed by the REPL.
Another clear example is any built-in math function in Clojure, such as +:
(+ 1 2 3 4 5)This returns 15. If you try this in the REPL, you will see 15 rather than nil because the expression evaluates to a value. In Clojure, nil represents the absence of a value or 'nothingness'.
Let’s write a function to see how the return value is determined. Try executing the following example:
;; what_it_returns.clj

(defn do-math [a b]
  (+ a b)
  (* a b))

(do-math 5 3)
Output
15
In the do-math function, the first expression is (+ a b). When (do-math 5 3) is called, (+ a b) evaluates to 8, but this result is discarded. The last expression is (* a b), which returns 15; this is the final return value of do-math and the value that appears in the output.
Now, let’s define another function by swapping the * and + operators, as shown below:
;; what_it_returns_2.clj

(defn do-math [a b]
  (* a b)
  (+ a b))

(do-math 5 3)
Output
8
In the code above, since (+ a b) is the last expression, its result is returned, and the result of (* a b) is discarded.
The key takeaway is that the result of the last expression in a function is what gets returned.
9.7. Recursion
| Watch video for this section here https://yu7.in/clj-recursion |
A function calling itself is known as recursion. For example, look at the code below:
;; function_recursion.clj

(defn count-down [number]
  (println number)
  (if (pos? (dec number))
    (count-down (dec number))))

(count-down 5)
Output
5
4
3
2
1
nil
When this function is executed, it prints numbers from 5 down to 1 and then stops. We called the function like this: (count-down 5). Let’s analyze the function body:
(println number)
(if (pos? (dec number))
  (count-down (dec number)))
First, the expression (println number) prints 5, and then the execution moves to the following form:
(if (pos? (dec number))
  (count-down (dec number)))
In the code above, (dec number) evaluates to 4. Since 4 is positive, (pos? 4) is true, and the expression (count-down (dec number)) is executed, resulting in a call to (count-down 4). That is, the function count-down calls itself.
This process continues until number becomes 0. At that point, (dec number) is -1, making (pos? -1) false. Consequently, (count-down (dec number)) is not executed, and the recursion terminates.
You can perform recursion by calling the function by name, as seen in the previous example, or by using the recur special form, as shown below:
;; function_recur.clj

(defn count-down [number]
  (println number)
  (if (pos?  (dec number))
    (recur (dec number))))

(count-down 5)
Output
5
4
3
2
1
nil
In the example above, we replaced the function name count-down with recur when the function calls itself. Using recur is more memory-efficient because it performs tail-call optimization. For recur to work, it must be the last expression executed in the function.
In the following example, we use recursion to compute the sum of a sequence of numbers. Try executing the code below, and we will analyze its execution shortly.
;; function_sum_using_recursion.clj

(defn sum [numbers total]
  (if (empty? numbers)
    total
    (recur (rest numbers) (+ total (first numbers)))))

(println (sum [1 2 3 4 5] 0))
Output
15
nil
In the previous example, we called (sum [1 2 3 4 5] 0), which returned 15. To simplify the analysis, let’s use a smaller example:
(sum [1 2] 0)So, what happens when the above code is executed? Let’s look at the body of sum:
(if (empty? numbers)
  total
  (recur (rest numbers) (+ total (first numbers))))
(empty? [1 2]) evaluates to false, so the following expression is executed:
(recur (rest numbers) (+ total (first numbers)))Substituting the values, we get:
(recur (rest [1 2]) (+ 0 (first [1 2])))This can be reduced to:
(recur [2] (+ 0 1))Which simplifies to:
(recur [2] 1)Since recur calls the current function, we can represent this as:
(sum [2] 1)Now, sum is called with numbers as [2] and total as 1. Since (empty? [2]) is again false, we reach the following expression:
(recur (rest numbers) (+ total (first numbers)))Substituting the values, we get:
(recur (rest [2]) (+ 1 (first [2])))Reducing the expression, we get:
(recur [] (+ 1 2))Replacing recur with sum and simplifying (+ 1 2) to 3, we get:
(sum [] 3)Now numbers is [] and total is 3. Let’s plug these into the function:
(if (empty? numbers)
  total
  (recur (rest numbers) (+ total (first numbers))))
Here, (empty? numbers) is true, so total is returned. Thus, 3 is returned, which is the sum of the vector [1 2].
What if you want a function that takes only a sequence and computes its sum without requiring an initial total? See the example below:
;; function_collection_sum.clj

(defn sum [numbers total]
  (if (empty? numbers)
    total
    (recur (rest numbers) (+ total (first numbers)))))

(defn collection-sum [collection]
  (sum collection 0))

(println (collection-sum [1 2 3 4 5]))
Output
15
nil
In this example, the collection-sum function takes a collection. It abstracts the process by passing the collection and an initial total of 0 to the previously defined sum function, which uses recursion to calculate the total.
9.8. Multimethods
| Watch video for this section here https://yu7.in/clj-mm and here https://yu7.in/clj-mmm |
Suppose you pass arguments to a function, and based on the values passed, Clojure determines which specific method should be called. This technique is known as multimethods.
Examine the code below, then type and execute it:
;; multimethod_factorial.clj

(defmulti factorial identity)

(defmethod factorial 0 [_]  1)

(defmethod factorial :default [num]
  (* num (factorial (dec num))))

(factorial 0) ; => 1
(factorial 1) ; => 1
(factorial 3) ; => 6
(factorial 7) ; => 5040
In the line (defmulti factorial identity), we declare a multimethod called factorial. The dispatch value (which determines the execution path) is defined by the identity function. Now, we define the behavior for when the identity is 0:
(defmethod factorial 0)Next, we specify the arguments:
(defmethod factorial 0 [_])Since we aren’t using the argument, we follow the convention of using an underscore _. We then specify that the function should return 1:
(defmethod factorial 0 [_] 1)For any other dispatch value, we use the :default keyword:
(defmethod factorial :default)We define the argument as num:
(defmethod factorial :default [num])We return \$n * (n - 1)!\$ as shown below:
(defmethod factorial :default [num]
  (* num (factorial (dec num))))
This results in clean and elegant code for calculating the factorial of any number.
Now consider the code below:
;; without_multimethods.clj

(defn print-welcome-message [person]
  (cond
    (string? person) (println "Welcome" person)
    (vector? person) (println  "Welcome" (first person) "from" (last person))
    (map? person)    (println "Welcome" (person "name") "from" (person "from"))))

(print-welcome-message "Karthik from Chennai")
(print-welcome-message ["Kalam" "Ramanthapuram"])
(print-welcome-message {"name" "Bharathiyaar" "from" "Yettaiyapuram"})
Output
Welcome Karthik from Chennai
Welcome Kalam from Ramanthapuram
Welcome Bharathiyaar from Yettaiyapuram
The print-welcome-message function accepts person as an argument. Depending on whether person is a string, a vector, or a map, the program extracts the data and prints it, as shown in the following block:
 (cond
    (string? person) (println "Welcome" person)
    (vector? person) (println  "Welcome" (first person) "from" (last person))
    (map? person)    (println "Welcome" (person "name") "from" (person "from")))
The same functionality can be implemented using multimethods, as shown in the code below. Type and execute it, and I will explain the process:
;; with_multimethods.clj

(defn welcome-person [person]
  (cond
    (string? person) :welcome-person-string
    (vector? person) :welcome-person-vector
    (map? person)    :welcome-person-map))

(defmulti print-welcome-message welcome-person)

(defmethod print-welcome-message :welcome-person-string [person]
  (println "Welcome" person))

(defmethod print-welcome-message :welcome-person-vector [person]
  (println  "Welcome" (first person) "from" (last person)))

(defmethod print-welcome-message :welcome-person-map [person]
  (println "Welcome" (person "name") "from" (person "from")))

(print-welcome-message "Karthik from Chennai")
(print-welcome-message ["Kalam" "Ramanthapuram"])
(print-welcome-message {"name" "Bharathiyaar" "from" "Yettaiyapuram"})
Output
Welcome Karthik from Chennai
Welcome Kalam from Ramanthapuram
Welcome Bharathiyaar from Yettaiyapuram
First you have a multimethod definition:
(defmulti print-welcome-message welcome-person)This statement defines the multimethod print-welcome-message and specifies that the welcome-person function will determine which method to execute.
Now let’s see what’s there in welcome-person:
(defn welcome-person [person]
  (cond
    (string? person) :welcome-person-string
    (vector? person) :welcome-person-vector
    (map? person)    :welcome-person-map))
The welcome-person function accepts person as an argument and returns a keyword that identifies the appropriate execution path.
Now let’s look at the definition of methods:
(defmethod print-welcome-message :welcome-person-string [person]
  (println "Welcome" person))

(defmethod print-welcome-message :welcome-person-vector [person]
  (println  "Welcome" (first person) "from" (last person)))

(defmethod print-welcome-message :welcome-person-map [person]
  (println "Welcome" (person "name") "from" (person "from")))
Let’s look at the first one:
(defmethod print-welcome-message :welcome-person-string [person]
  (println "Welcome" person))
In welcome-person, if person is a string, the function returns :welcome-person-string. The corresponding method is defined above, starting with defmethod:
(defmethod)Followed by the multimethod name:
(defmethod print-welcome-message)Next, we provide the keyword determined by welcome-person. In this case, if person is a string, this specific code is executed:
(defmethod print-welcome-message :welcome-person-string)This is followed by the argument person:
(defmethod print-welcome-message :welcome-person-string [person])Finally, we provide the function body, (println "Welcome" person):
(defmethod print-welcome-message :welcome-person-string [person]
  (println "Welcome" person))
Depending on the data type, welcome-person returns different keywords, triggering the execution of the corresponding defmethod. This allows us to isolate different execution paths into separate methods, keeping the code simple and manageable.
9.9. Pre and Post Condition Checking
| Watch video for this section here https://yu7.in/clj-prepo |
Most functions require data to operate on. If the data is not provided in the correct format, the function may fail. It is a good practice to validate the arguments passed to a function. Clojure provides a :pre hook for this purpose. Let’s see how it works using an example. Type the code below:
;; function_pre.clj

(defn sum [a b]
  {:pre [(number? a) (number? b)]}
  (+ a b))

(println (sum 4 5))
;; (println (sum "4" 5)) ;; Throws an error
Executing (println (sum 4 5)) works as expected, but (println (sum "4" 5)) throws an error. This is because of the following code snippet in sum:
{:pre [(number? a) (number? b)]}This is a map with a :pre key. Since we may want to check multiple conditions, we pass them as a vector. In this case, we check if the first argument a is a number using (number? a) and if the second argument b is a number using (number? b). The function body is executed only if all conditions in the vector are true.
For (sum 4 5), both a and b are numbers, so the sum function executes. For (sum "4" 5), "4" is a string, causing (number? a) to be false and triggering an error.
If you need to verify that the returned value has a specific format or structure, you can use a :post hook, as shown below:
;; function_post.clj

(defn sum [a b]
  {:post [(number? %)]}
  "45")

(defn sum-without-post [a b]
  "45")

(println (sum-without-post 4 5))
(println (sum 4 5)) ;; ; Assert failed: (number? %)
Execute the code above. In this example, both sum and sum-without-post return the string "45". Executing (sum-without-post 4 5) runs without issues. However, since the sum of two numbers should be a number, (sum 4 5) throws an error because it returns a string, which violates the :post hook:
{:post [(number? %)]}The :post hook expects the return value (represented by the % symbol) to be a number.
Now let’s see pre and post hooks in action:
;; function_pre_post.clj

(defn sum [a b]
  {:pre [(number? a) (number? b)]
   :post [(number? %)]}
  (+ a b))

(println (sum 4 5))
What do you think will happen if we call (sum 4 "5") using the code above?
9.10. Docstrings
| Watch video for this section here https://yu7.in/clj-docstr |
Documentation is crucial in programming. Clojure provides a built-in way to document functions, which are first-class citizens in the language. Examine the code below:
;; docstring.clj

(defn sum
  "Adds two numbers passed as arguments.

   The arguments should be numbers.

   **Usage**

   ```clojure
   (sum 4 5) ;; returns 9
   ```
  "
  [a b]
  {:pre [(number? a) (number? b)]}
  (+ a b))

(println (sum 4 5))
Immediately after (defn sum, we provide a docstring:
"Adds two numbers passed as arguments.

  The arguments should be numbers.

  **Usage**

  ```clojure
  (sum 4 5) ;; returns 9
  ```
"
This string serves as the documentation for the function. Note the use of Usage, which follows Markdown formatting. I’ve also included a code block within the docstring:
```clojure
(sum 4 5) ;; returns 9
```- This instructs the documentation viewer to highlight `(sum 4 5)
-
returns 9` as Clojure code.
You can access the documentation for sum using the doc function, as shown below:
clj꞉user꞉> (doc sum)
-------------------------
user/sum
([a b])
  Adds two numbers passed as arguments.

   The arguments should be numbers.

   **Usage**

   ```clojure
   (sum 4 5) ;; returns 9
   ```

nil
Alternatively, in VSCodium, you can simply hover over the function name to see the documentation in a neat popup, as shown here:
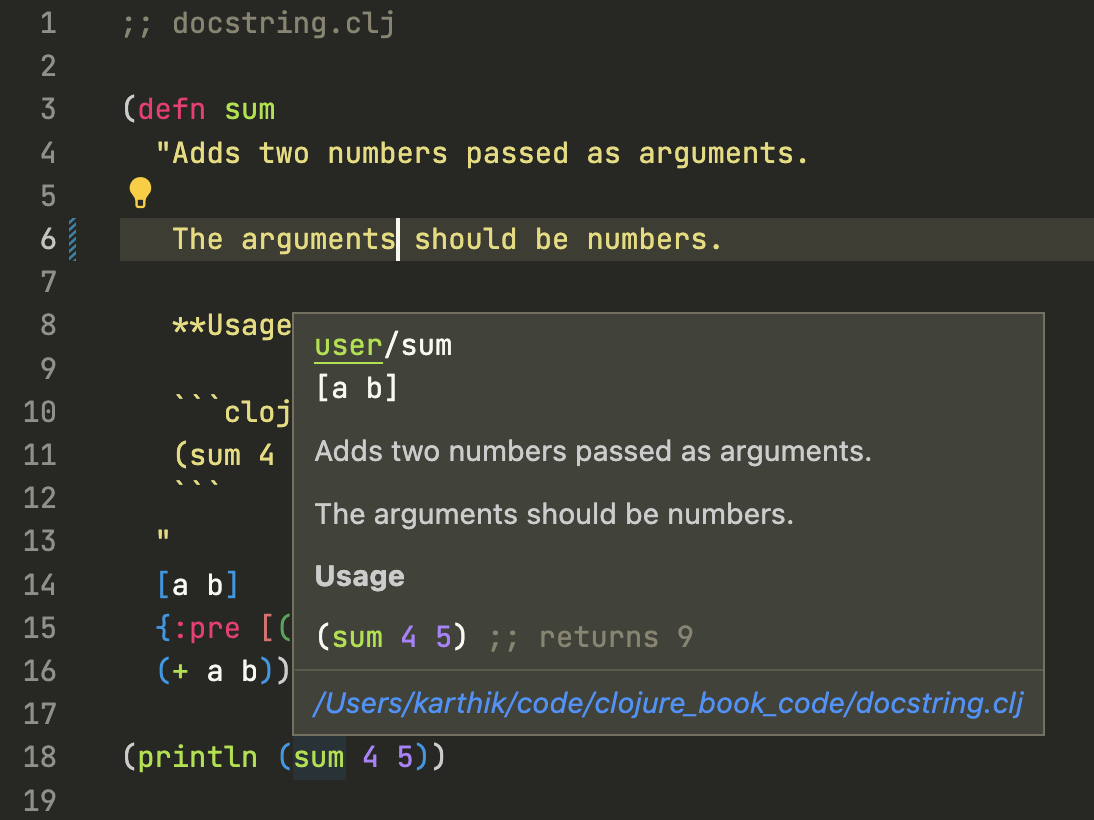
9.11. Anonymous Functions
| Watch video for this section here https://yu7.in/clj-frf |
You can define functions without assigning them a name; these are known as anonymous functions. Try the code below:
;; anonymous_function.clj

(def print-something
  (fn [something]
    (println something)))

(print-something "something is better than nothing")
Output
something is better than nothing
Look at this snippet:
(fn [something]
  (println something))
This expression returns a function that accepts a single argument called something. When this function is called with a value, it prints that value. Notice that the function returned in the snippet above has no name; it exists as a functional entity, but it lacks a symbolic identifier.
You can assign a name to an anonymous function by binding it to a symbol, as shown below:
(def print-something
  (fn [something]
    (println something)))
In the snippet above, the anonymous function is bound to the symbol print-something. You can now call it using that name: (print-something "something is better than nothing").
In fact, defn is essentially a shortcut that combines the definition of a function with fn and its assignment to a name via def.
Specifically, writing this:
(def print-something
  (fn [something]
    (println something)))
is equivalent to writing it like this:
(defn print-something [something]
    (println something))
and it will work the same way.
9.12. Functions Returning Functions
| Watch video for this section here https://yu7.in/clj-frf |
You might be wondering what the use of anonymous functions is? Take a look at the example below and execute it:
;; function_returning_function.clj

(defn multiplier [multiply-with]
  (fn [number]
    (* number multiply-with)))

(def double-it
  (multiplier 2))

(def triple-it
  (multiplier 3))

(double-it 21)

(triple-it 14)
When (double-it 21) is executed, it returns 42. Now, let’s look at the definition of double-it:
(def double-it
  (multiplier 2))
In the code above, double-it is assigned the output of (multiplier 2). Since double-it behaves as a function, (multiplier 2) must return a function. Let’s examine the source of multiplier:
(defn multiplier [multiply-with]
  (fn [number]
    (* number multiply-with)))
Now take a look at what multiplier returns:
(fn [number]
  (* number multiply-with))
As shown above, it returns a function. If we replace multiply-with with 2, we get the following:
(fn [number]
  (* number 2))
The resulting code is a function that takes a number and returns its product with 2. Now, substitute this into the definition of double-it:
(def double-it
  (multiplier 2))
we get the following:
(def double-it
  (fn [number]
    (* number 2)))
In short, we could have written it as:
(defn double-it [number]
    (* number 2))
In the multiplier function, we are essentially constructing new functions and returning them, which we then name. This is a powerful concept known as higher-order functions.
10. Debugging With Calva
| For this section you can use this code https://gitlab.com/clojure-book/code/-/raw/master/executing_form.clj |
Large codebases are often built by composing many small code snippets. To ensure these snippets behave as expected, you need a way to execute and evaluate them incrementally.
Calva is a Clojure plugin for VS Code that allows you to execute code and evaluate expressions. It also provides powerful debugging tools. In this section, we will learn how to use Calva to evaluate and debug Clojure code.
10.1. Connecting to a REPL
In VS Code, launch your terminal and type lein repl. You should see something like this:
$ lein repl
nREPL server started on port 62571 on host 127.0.0.1 - nrepl://127.0.0.1:62571
REPL-y 0.5.1, nREPL 1.0.0
Clojure 1.11.1
OpenJDK 64-Bit Server VM 25.0.2+10-LTS
    Docs: (doc function-name-here)
          (find-doc "part-of-name-here")
  Source: (source function-name-here)
 Javadoc: (javadoc java-object-or-class-here)
    Exit: Control+D or (exit) or (quit)
 Results: Stored in vars *1, *2, *3, an exception in *e

user=>
Note the nrepl://127.0.0.1:62571, where 127.0.0.1 is the host and 62571 is the port. We will use this information to connect to the REPL.
Open the command palette command+shift+p on MacOS or ctrl+shift+p on Linux/Windows and type Calva: Connect to Running REPL Server, not in Project. You should see something like this:
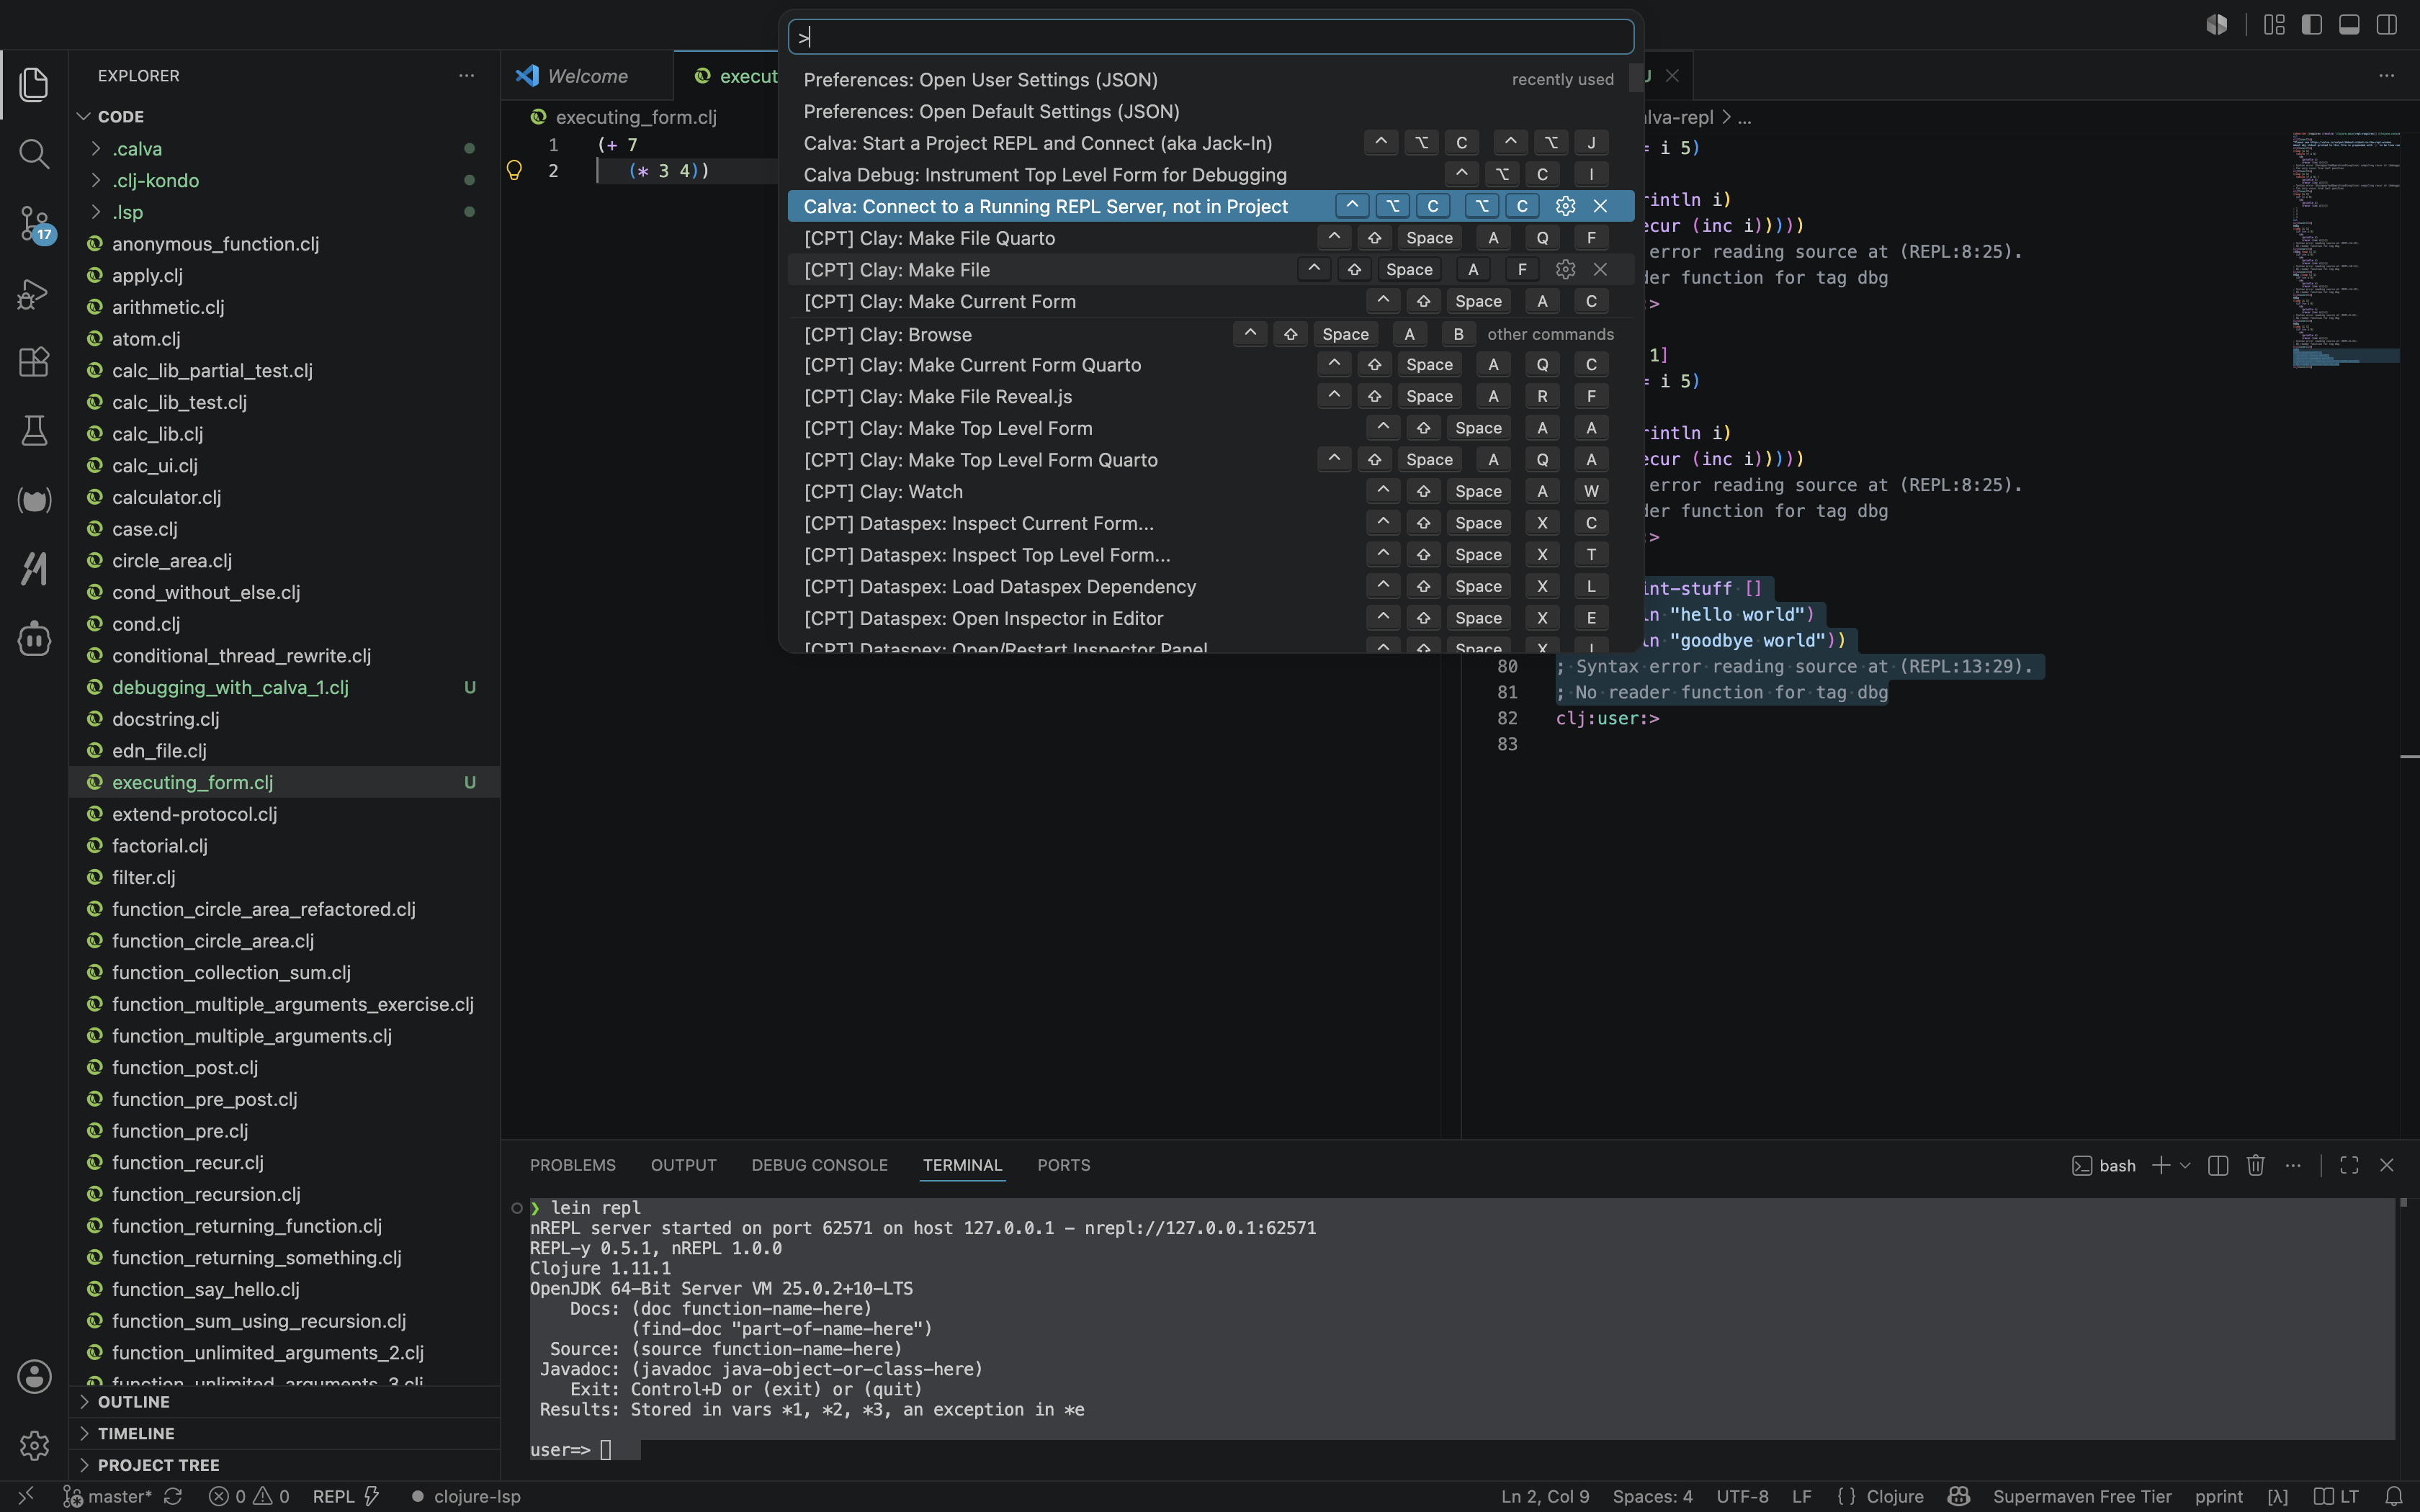
Once you have selected that option, you should see something like this:
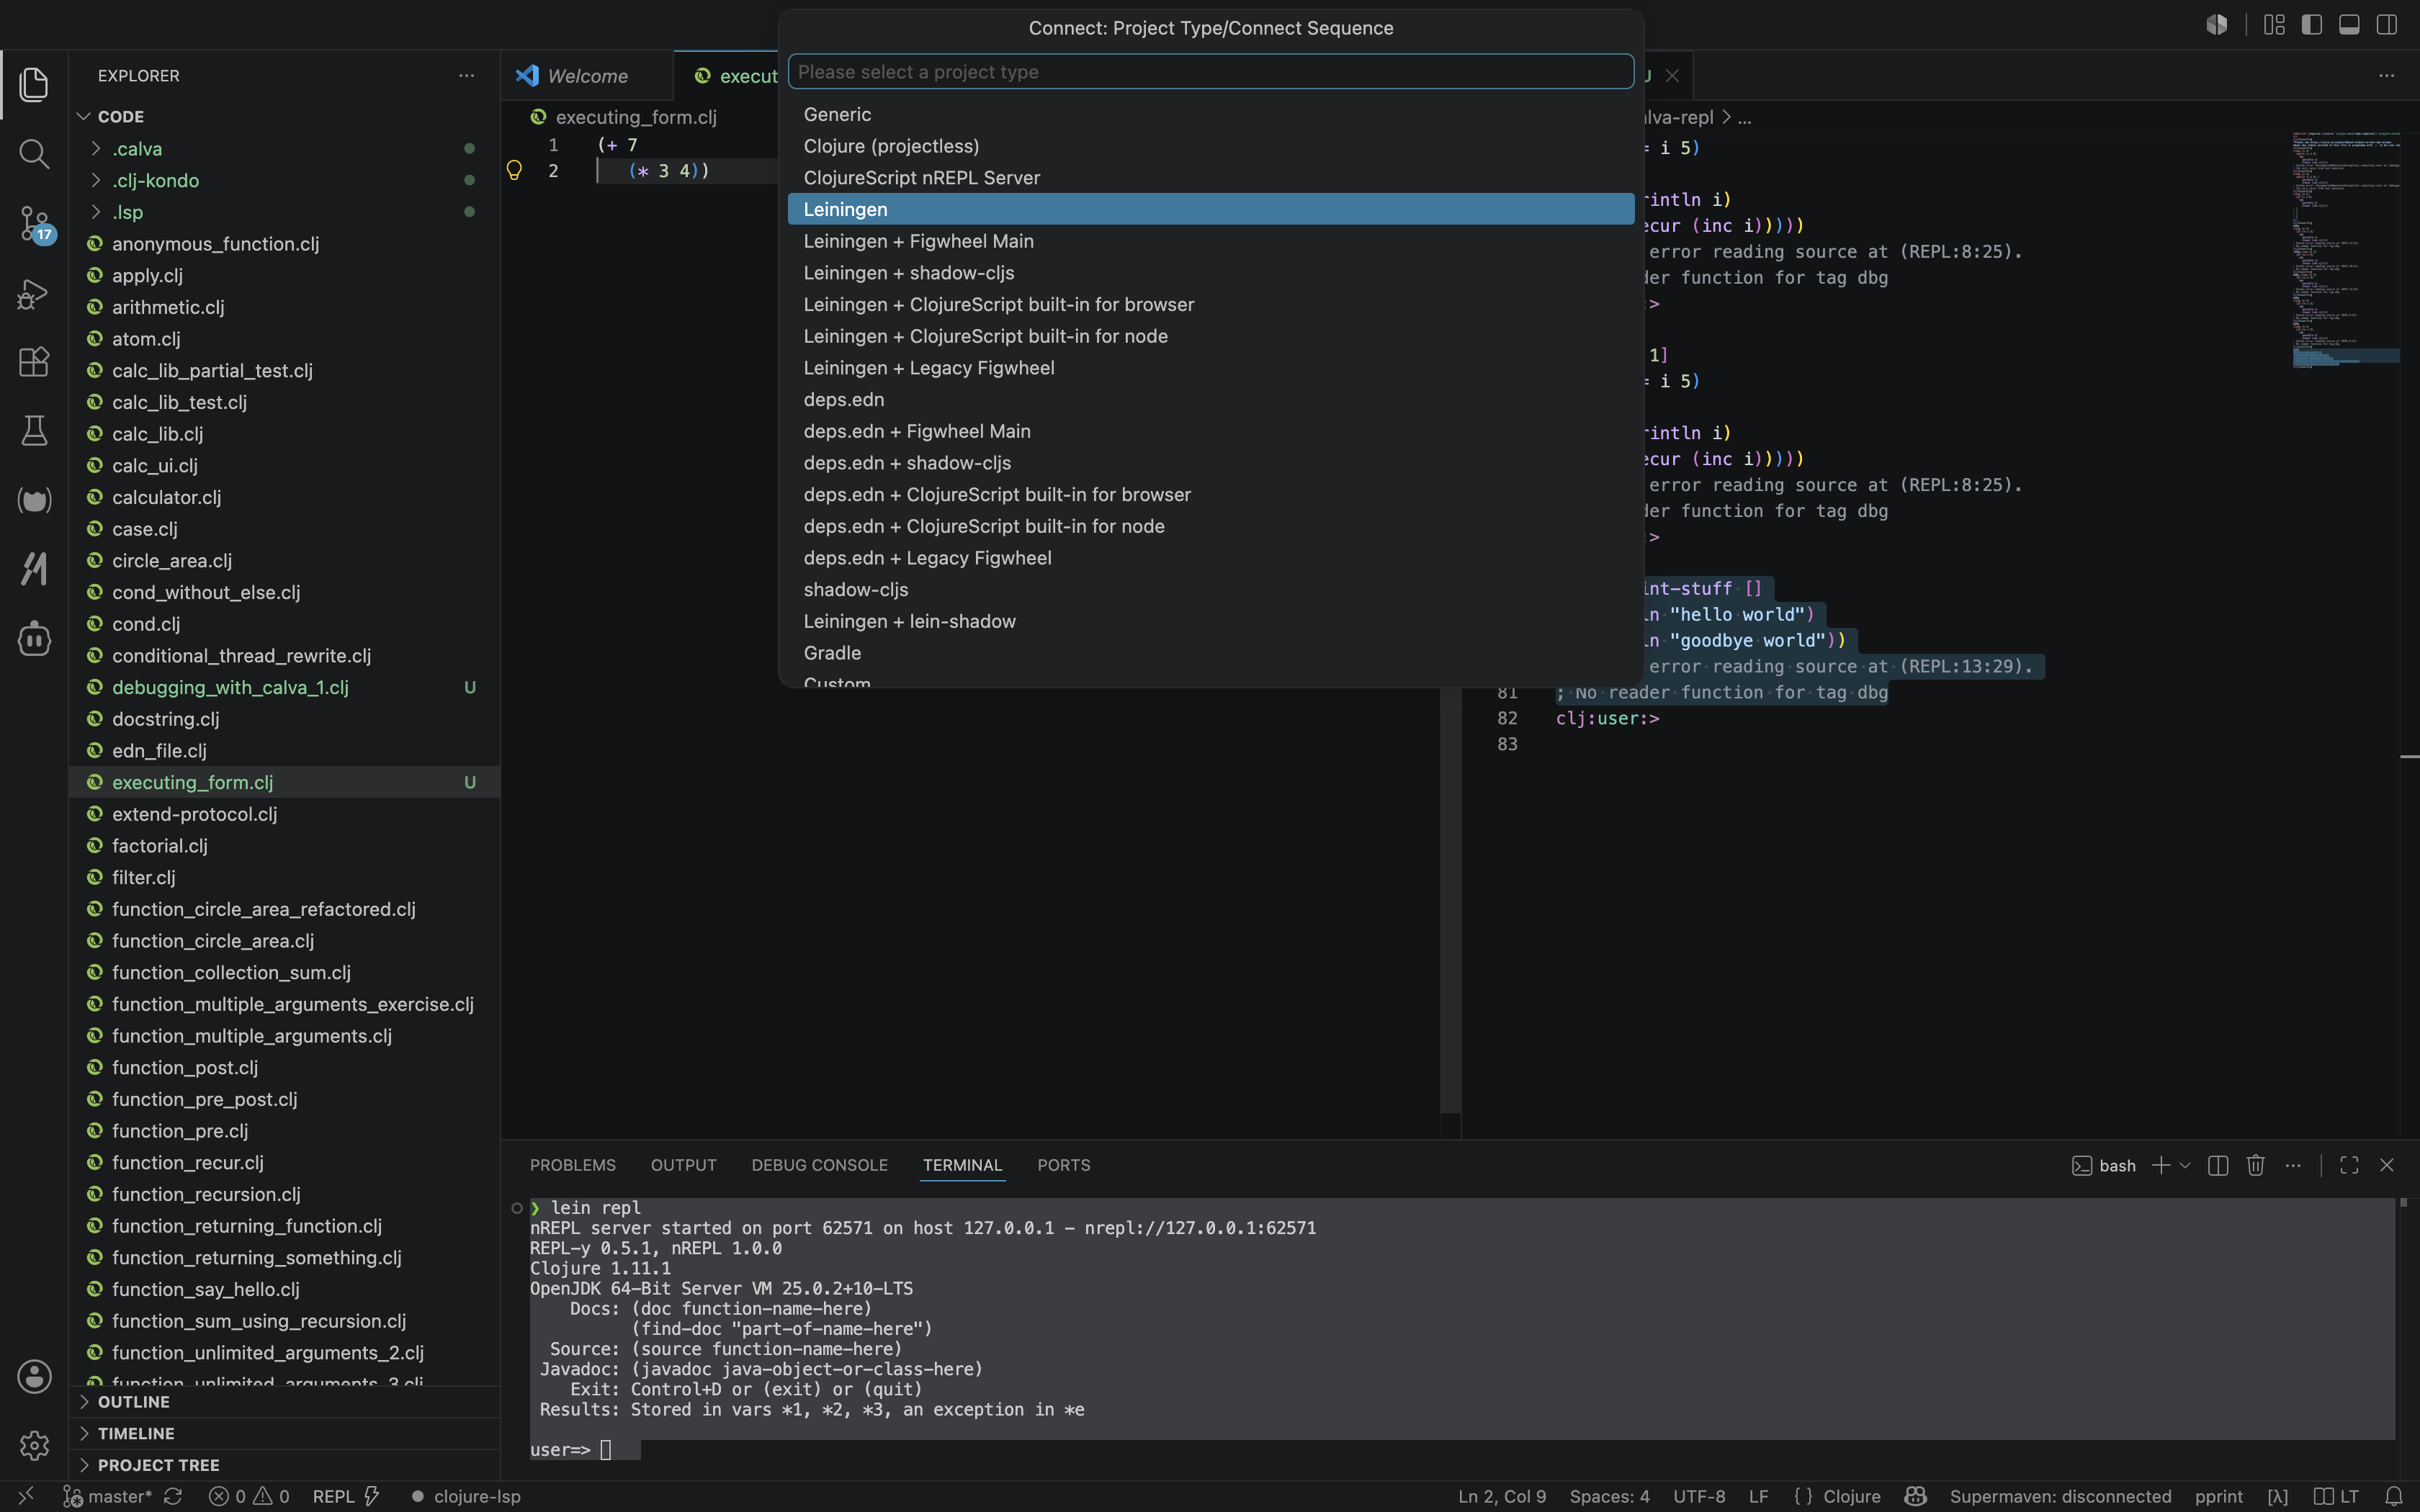
Select Leiningen. You should see something like this:
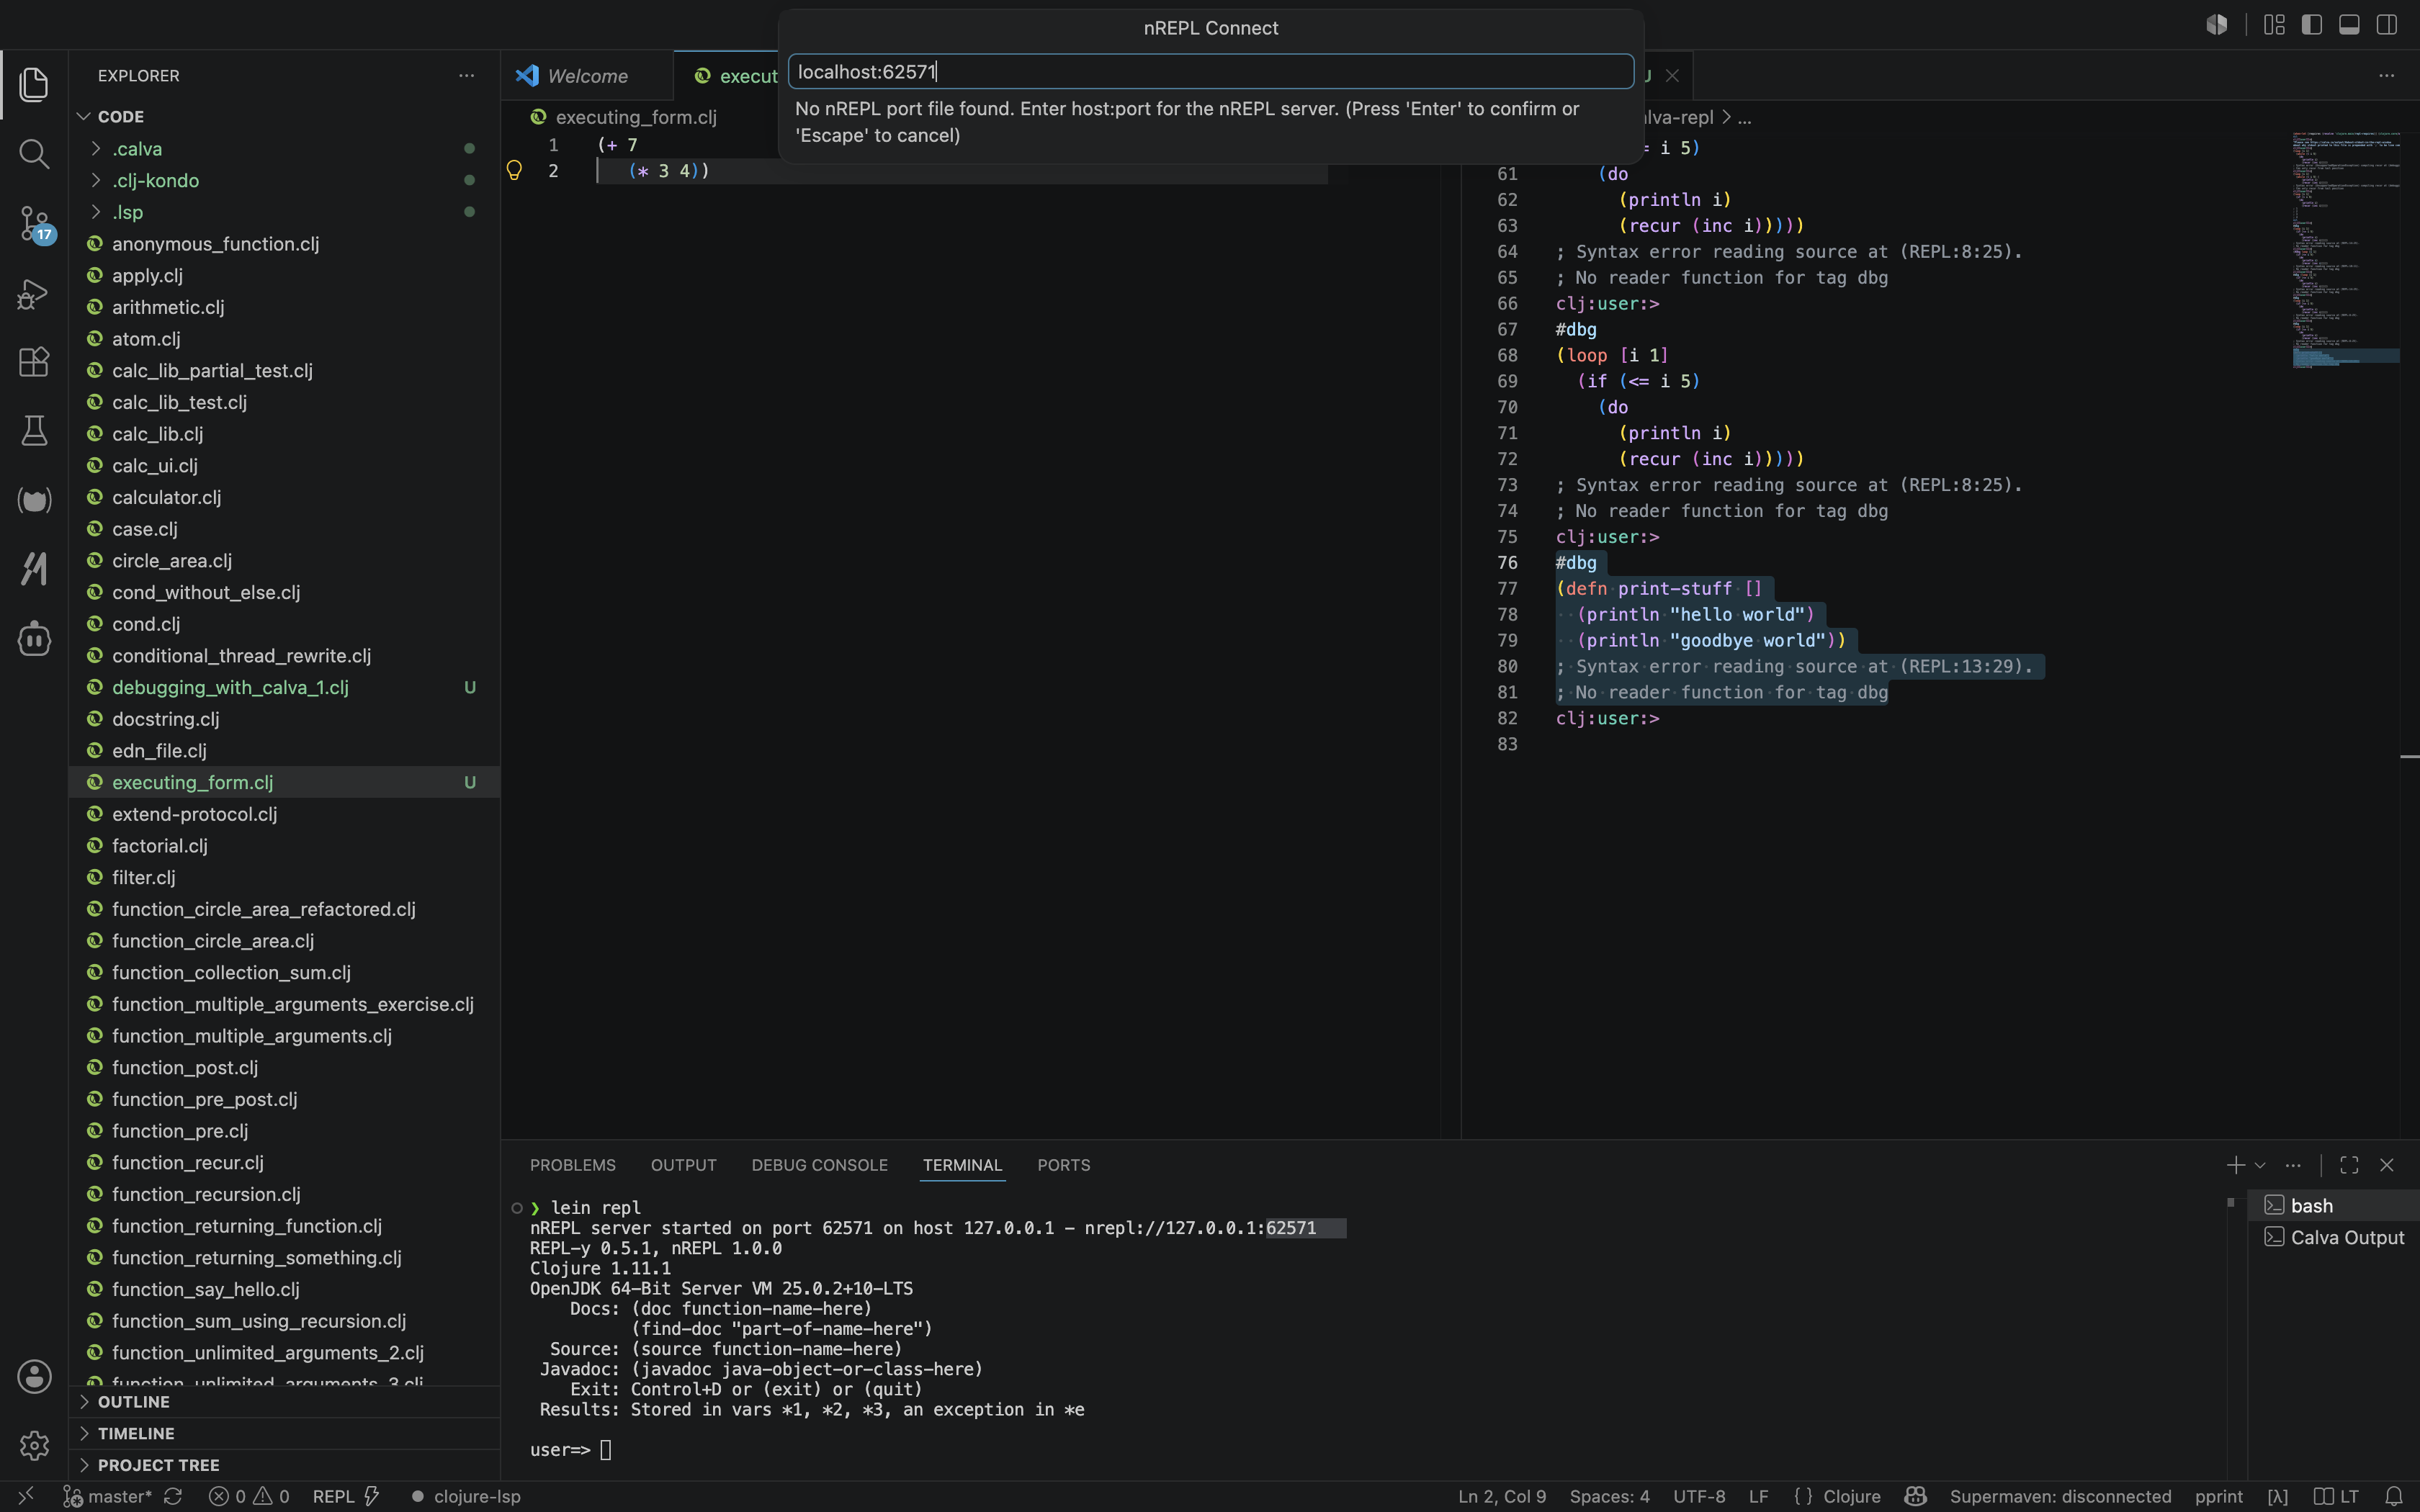
After localhost:, enter the port number you noted down. It may be different from the one shown here; in this example, it is 62571.
Once that’s done, you should be connected to the REPL.
10.2. Executing Top Level Form
Let’s create a simple file called executing_form.clj and add the following code to it:
(+ 7
  (* 3 4))
Now place the cursor anywhere within (+ 7 (* 3 4)) and press alt+enter on GNU/Linux or option+enter on macOS. You should see something like this:
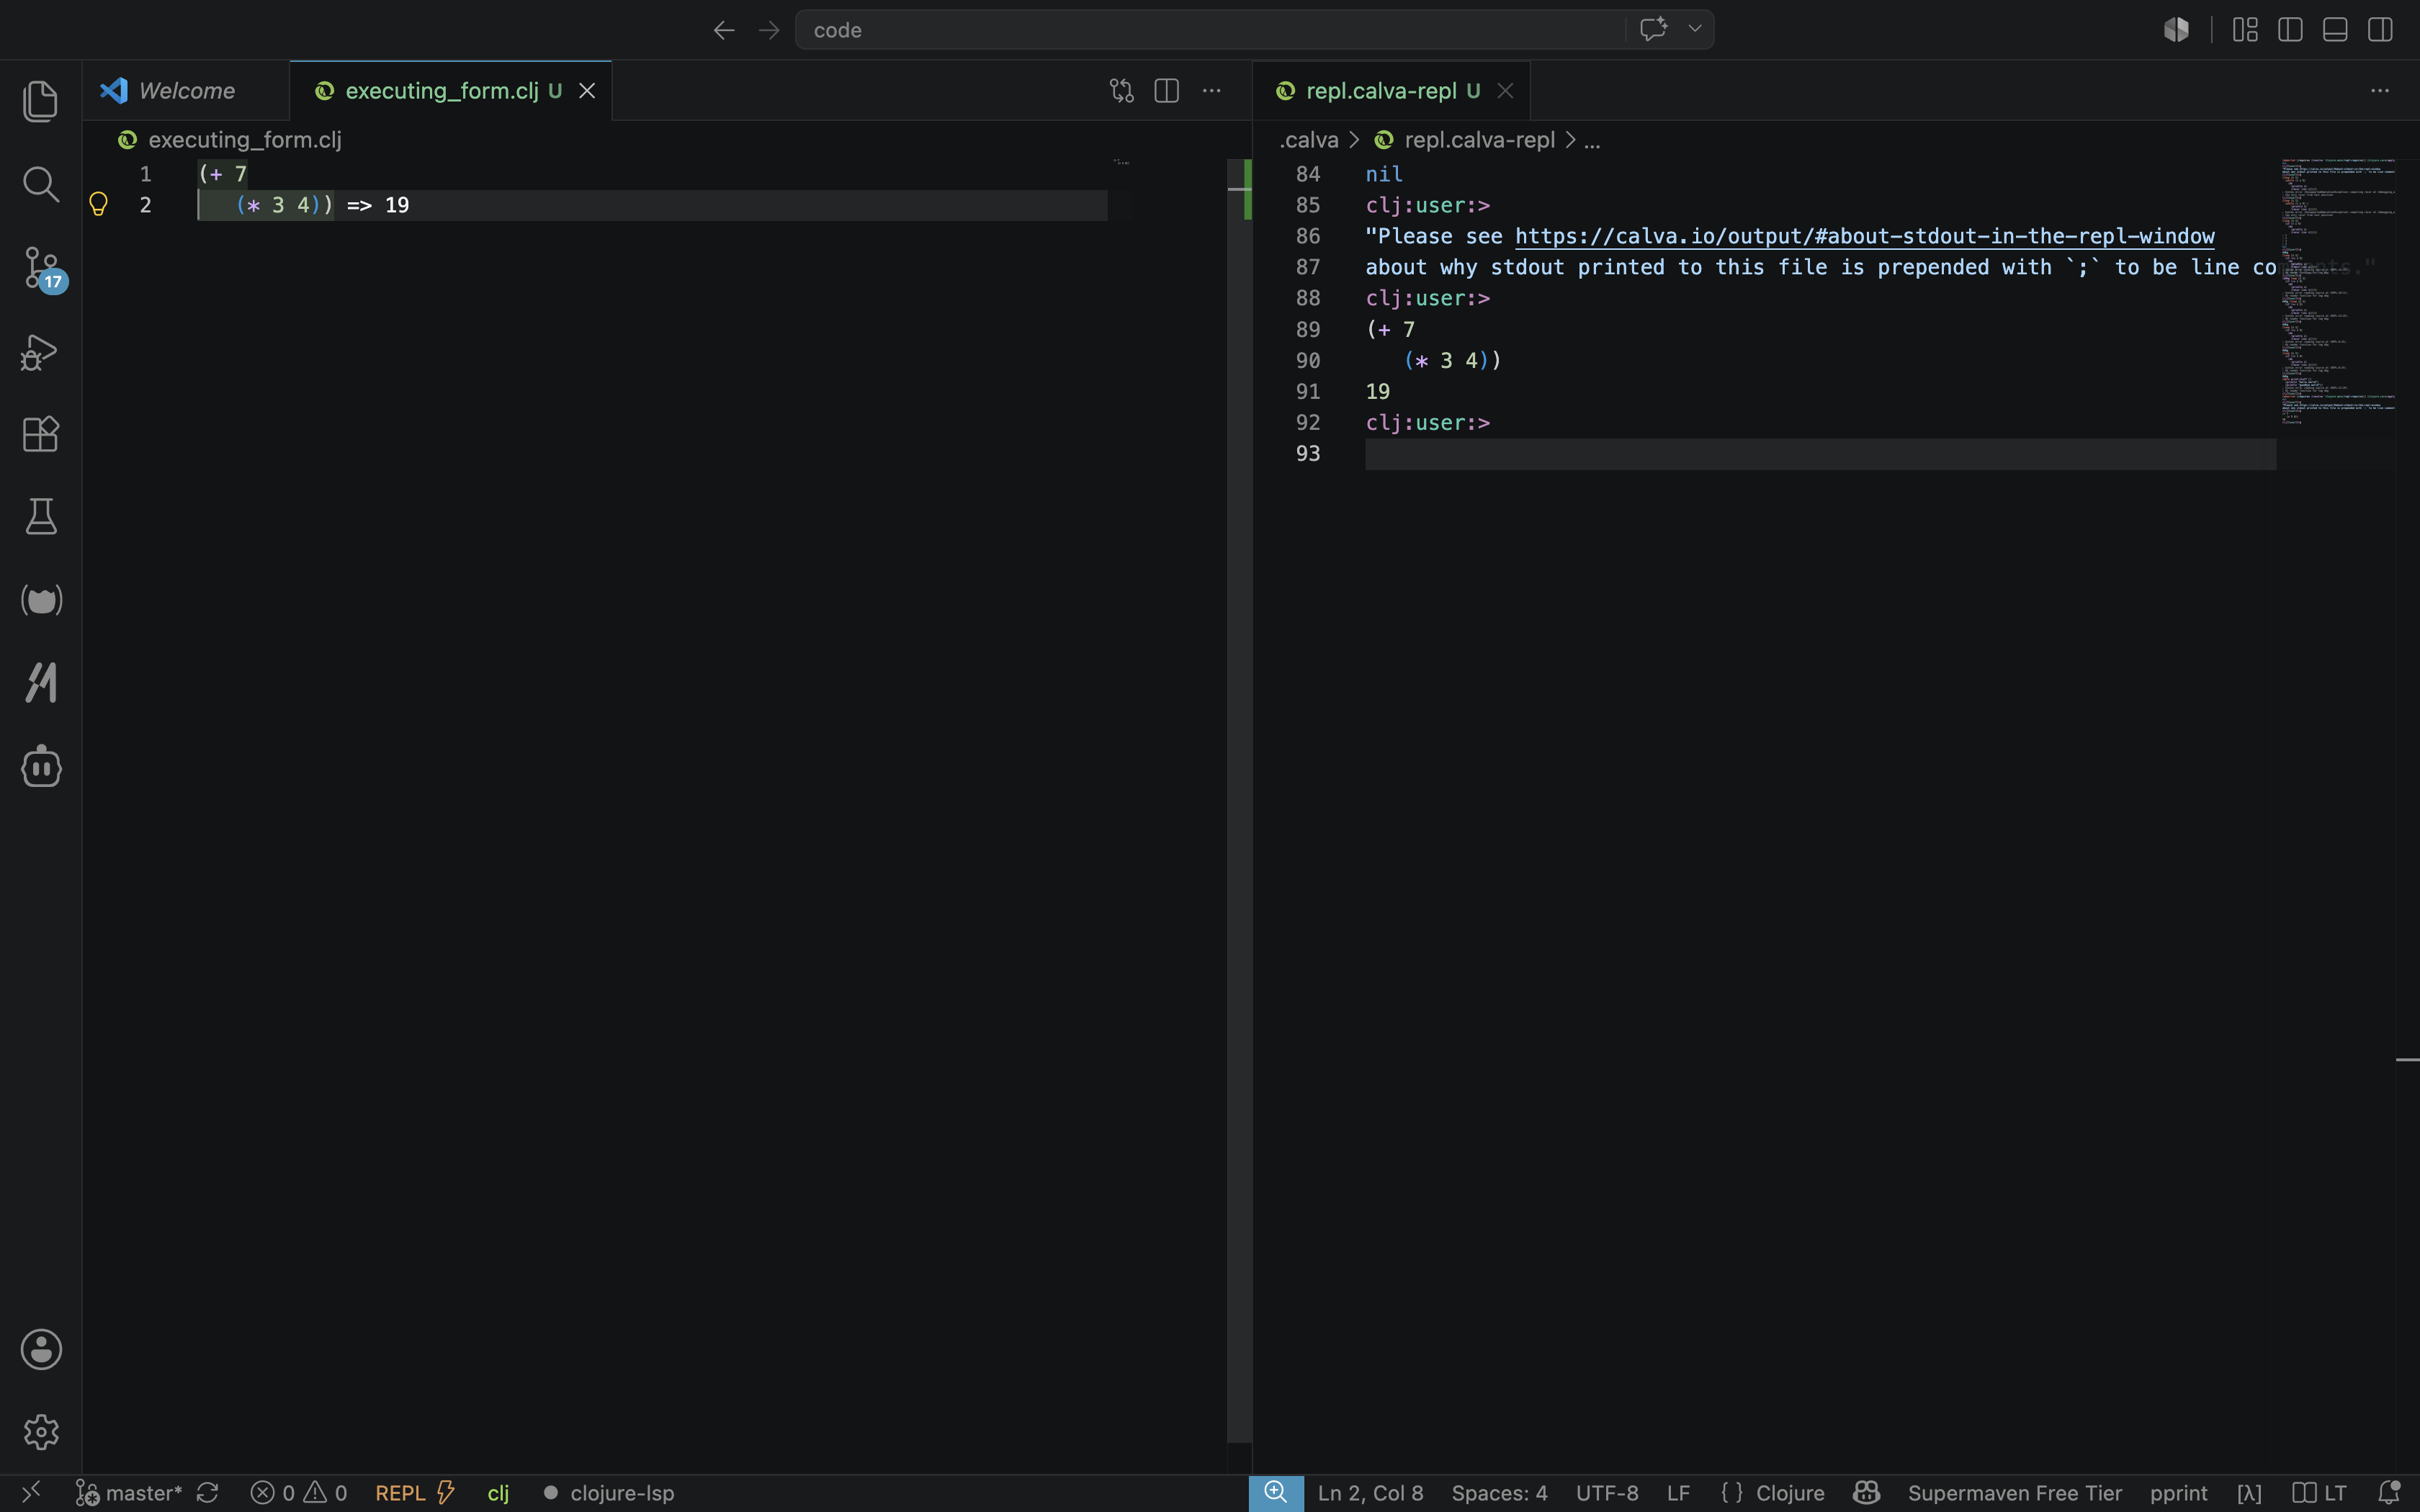
On the right, in the REPL, the result is 19. It is very convenient to evaluate code and see the results immediately in the REPL.
10.3. Executing Current Form
The code we have in executing_form.clj is:
(+ 7
  (* 3 4))
There are two forms here: the top-level form is (+ 7 (* 3 4)), and the inner form is (* 3 4).
Place the cursor anywhere before the starting paranthesis of (* 3 4) and press ctrl+enter on GNU/Linux and macOS. You should see something like this:
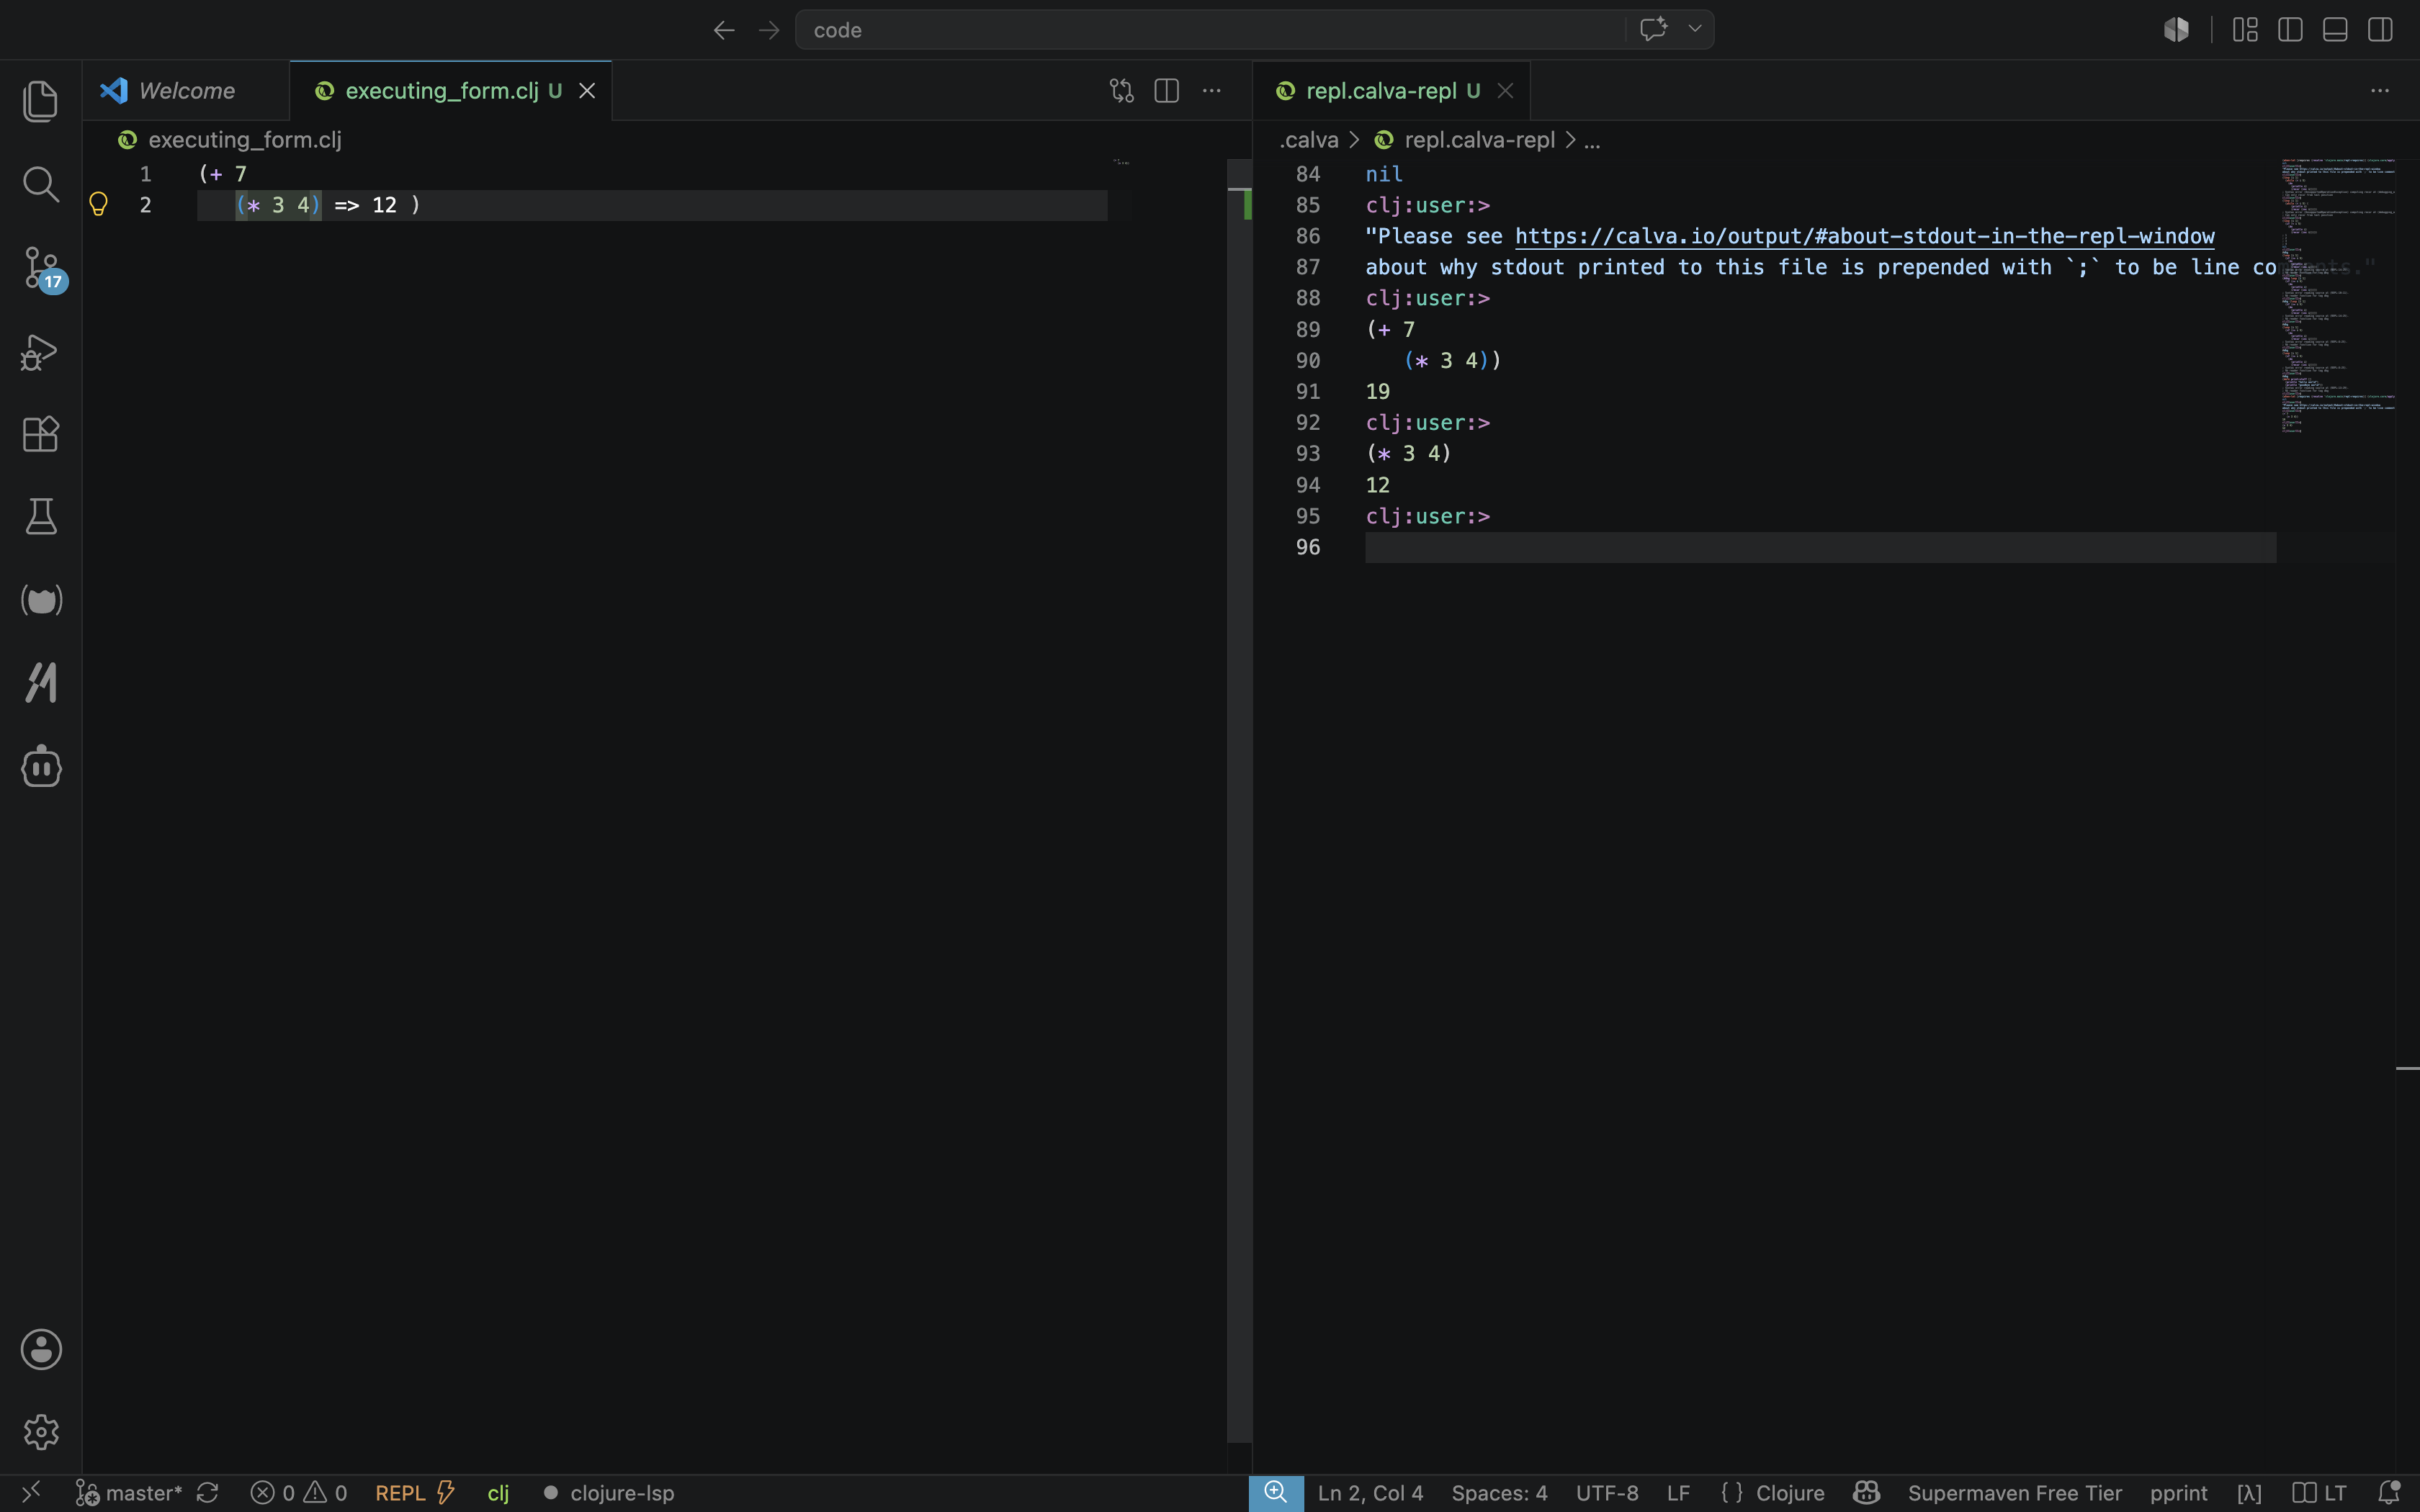
Notice that the result is 12. This is because the cursor was just before the form (* 3 4), and `ctrl+enter`executes the current form.
Now let’s execute the top-level form. Place the cursor just before the outermost bracket of (+ 7 (* 3 4)) and press ctrl+enter on GNU/Linux or macOS. You should see something like this:
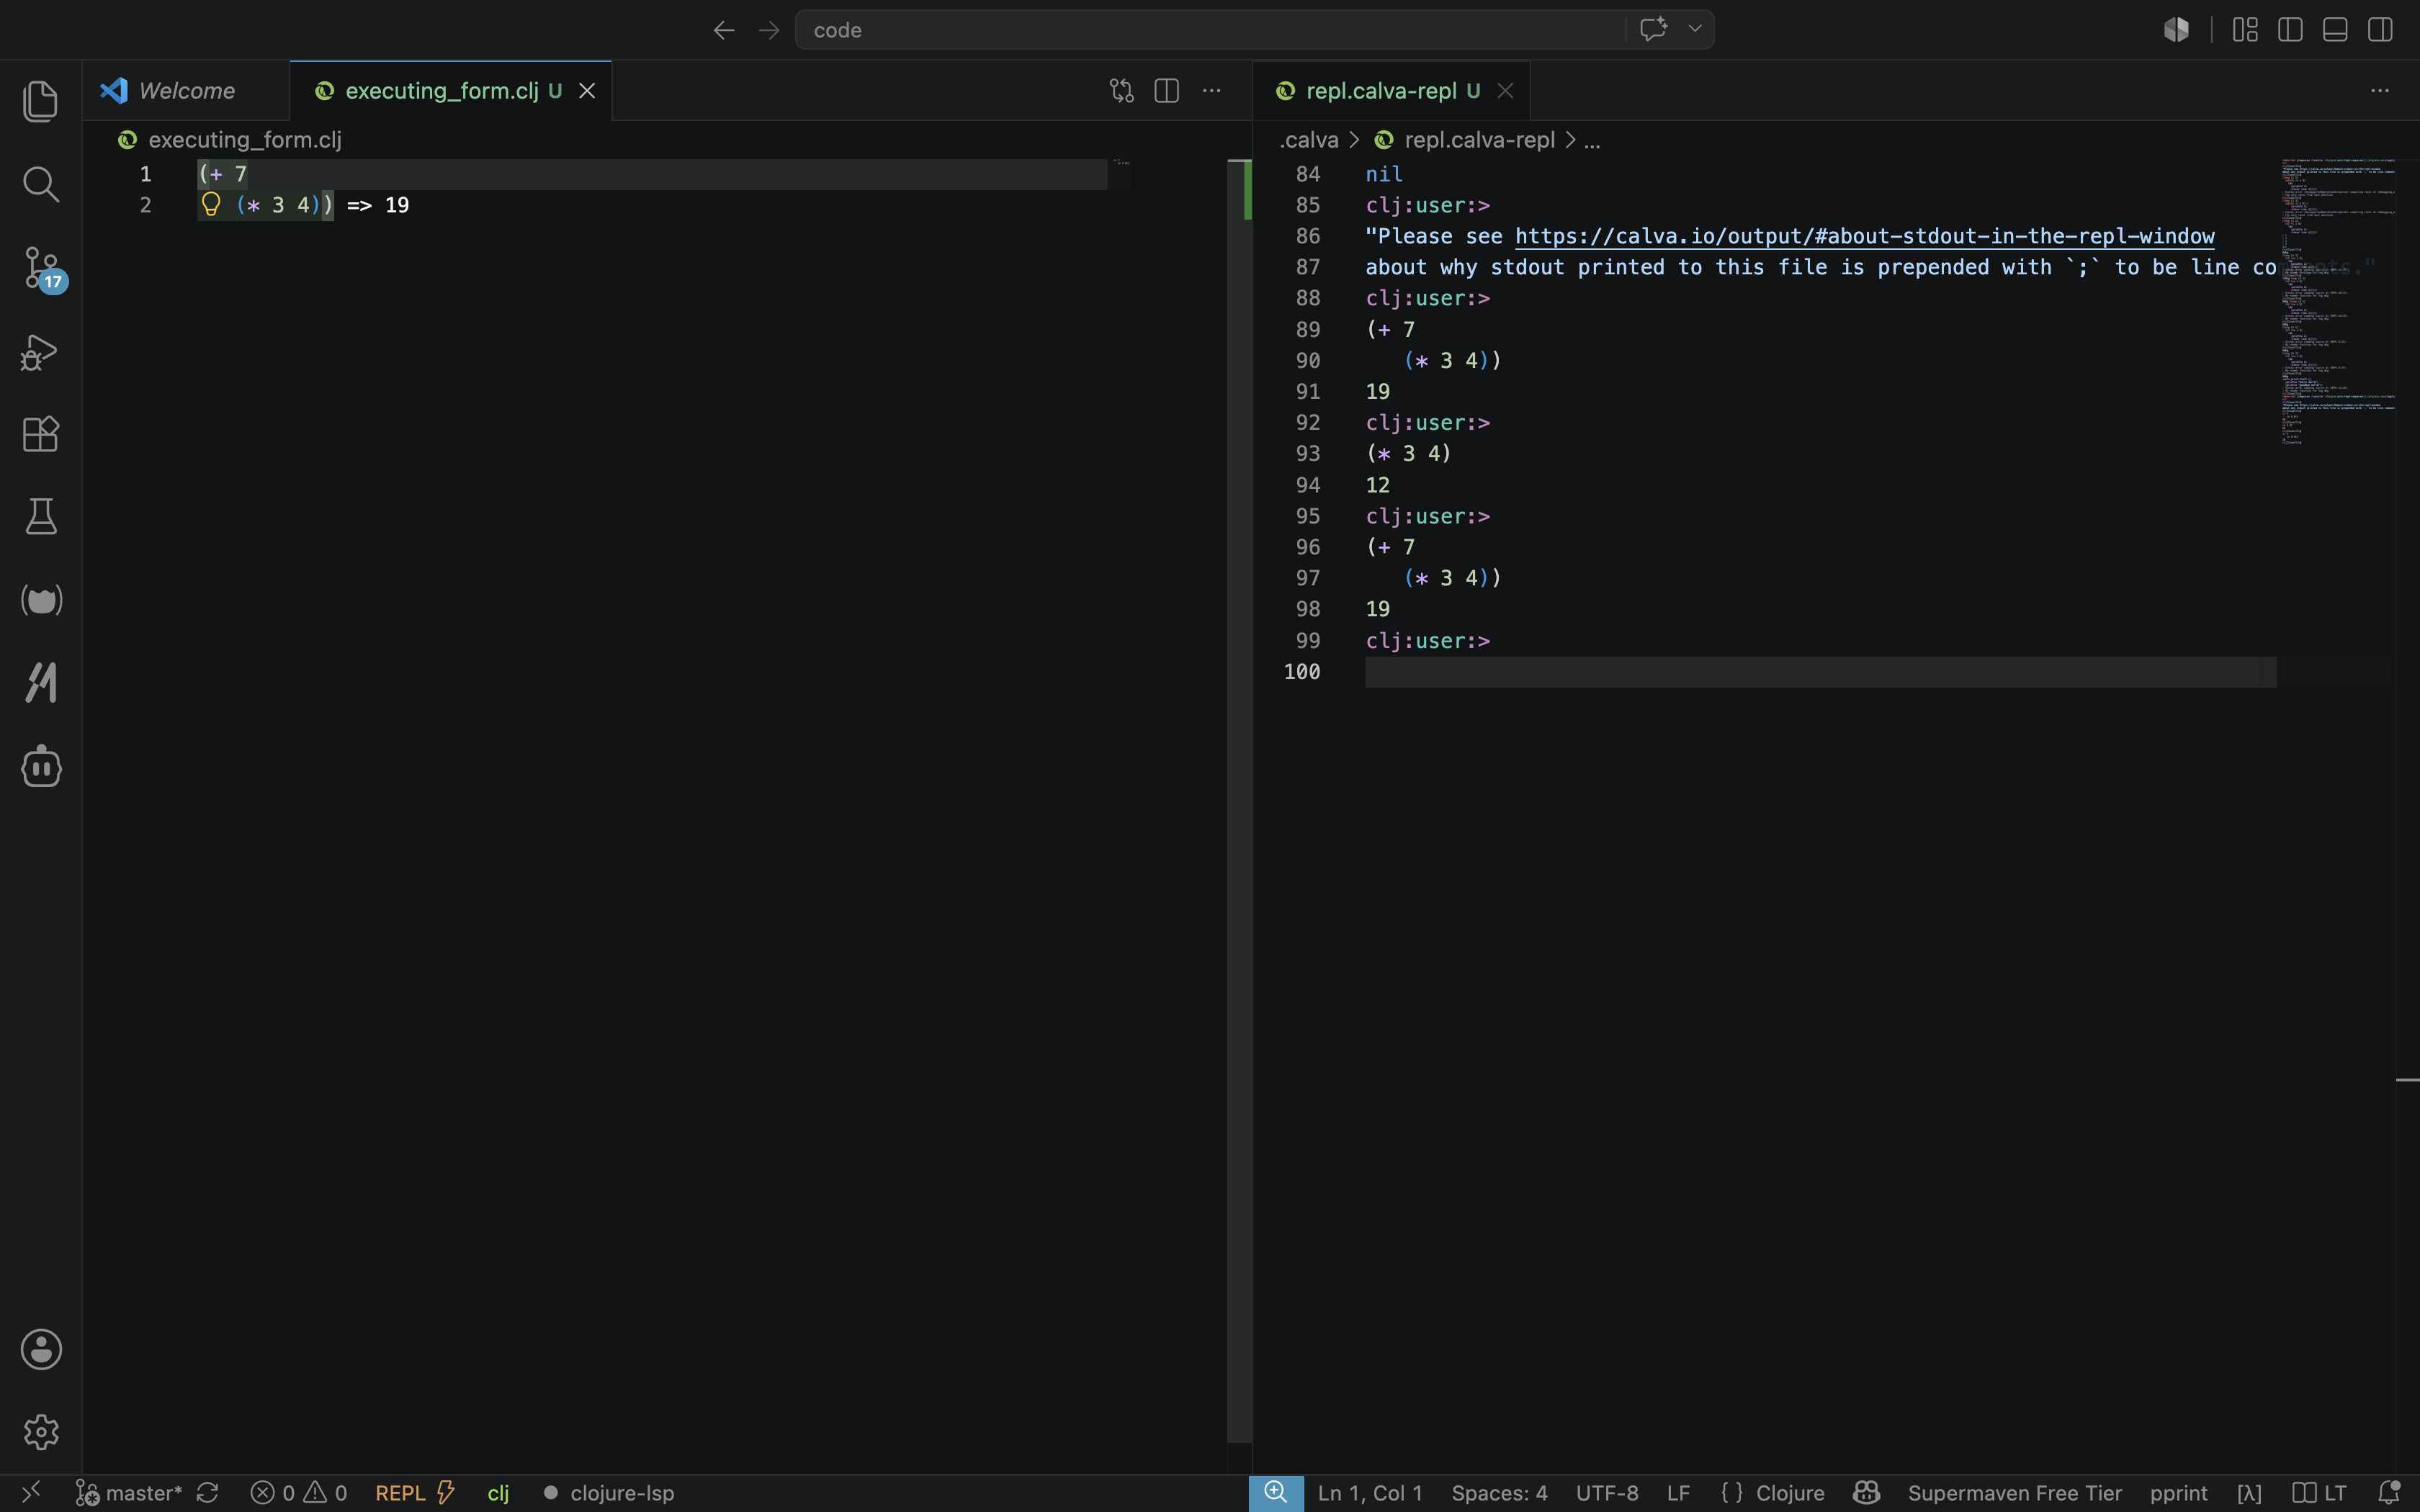
Notice that the result is 19. This is because the cursor was just outside the form (+ 7 (* 3 4)), and ctrl+enter executes the current form, which in this case is the entire top-level form.
The key takeaway from this section is that ctrl+enter executes the current form.
11. Spec
| For this section, you can use the code at https://gitlab.com/clojure-book/code/-/raw/master/spec.clj. Copy and paste the lines one by one into your REPL, whether the REPL runs in your terminal or is integrated with your IDE. |
| Watch video for this section here https://yu7.in/clj-spec |
Clojure programs consist of functions that manipulate data. Data can be of any type, such as Strings, Numbers, Maps, Vectors, and Sets. When data of the incorrect type or format is provided to a function, the function may not behave as expected. To prevent this, Clojure provides built-in libraries to verify data types and formats, known as specs. You can use specs to verify that received data is correct (pre-conditions) or that returned data conforms to the expected format (post-conditions).
To use specs, let’s first require the library:
(require '[clojure.spec.alpha :as s])We have required clojure.spec.alpha as s, so we can call its functions using the s/ prefix (e.g., s/valid? instead of spec.alpha/valid?).
Let’s see how to check if a value is a string:
(s/valid? string? "Hello")Output
true
In the example above, we use s/valid? and pass it the predicate function string?. The string? function returns true if its argument is a string. Since "Hello" is a string, s/valid? returns true.
If we check if the number 42 is a string:
(s/valid? string? 42)Output
false
Since (string? 42) returns false, (s/valid? string? 42) also returns false, failing the validation.
Similarly, we can check if a value is a number:
(s/valid? number? 42)Output
true
Since 42 is a number, (number? 42) returns true and thus (s/valid? number? 42) returns true.
We can also check if a value is an integer:
(s/valid? integer? 123)Output
true
Or if it is a double (a number with a decimal point):
(s/valid? double? 123.45)Output
true
Since 123 does not have a decimal point, the check for a double fails:
(s/valid? double? 123)Output
false
We can also verify collections. For instance, checking if [1 2 3] is a vector:
(s/valid? vector? [1 2 3])Output
true
Checking if a value is a map:
(s/valid? map? { 1 "one" 2 "two"})Output
true
Checking for a set:
(s/valid? set? #{:apple :orange})Output
true
Checking for a keyword:
(s/valid? keyword? :ubuntu)Output
true
Now let’s consider a more complex scenario: validating a percentage for a grading system. A valid percentage must be a number between 0 and 100 (inclusive). We can define a spec for this using s/and:
(def valid-%? (s/and number? #(>= % 0) #(<= % 100)))Output
#'user/valid-%?
To build this spec, we need the value to be a number:
number?And it must be greater than or equal to zero. We use s/and to combine these requirements:
(s/and
  number?
  #(>= % 0))
Finally, it must be less than or equal to 100. We add one more predicate to the s/and form:
(s/and
  number?
  #(>= % 0)
  #(<= % 100))
We assign this spec to the name valid-%?:
(def valid-%?
  (s/and
    number?
    #(>= % 0)
    #(<= % 100)))
For brevity, you can define it on a single line:
(def valid-%? (s/and number? #(>= % 0) #(<= % 100)))Now let’s test our valid-%? spec:
(s/valid? valid-%? 85)Output
true
Because 85 is a number between 0 and 100, it is valid. However, 105% is invalid in this grading system:
(s/valid? valid-%? 105)Output
false
Similarly, -15 is less than 0, so it also returns false:
(s/valid? valid-%? -15)Output
false
Exercise
Write a spec named string-or-keyword? that works as follows:
(s/valid? string-or-keyword? "abc") ;; true
(s/valid? string-or-keyword? :abc) ;; true
(s/valid? string-or-keyword? 42) ;; false
For this exercise, you may want to look at https://clojuredocs.org/clojure.spec.alpha/or
11.1. Specing Collections
| Watch video for this section here https://yu7.in/clj-spec-col |
Let’s see how to spec collections. In the example below, we define string-collection?:
(def string-collection? (s/coll-of string?))Output
#'user/string-collection?
The s/coll-of spec checks if every element in a collection conforms to the provided spec (in this case, string?). Let’s apply string-collection? to a vector of strings:
(s/valid? string-collection? ["Hi" "Hello"])Output
true
It passes because both "Hi" and "Hello" are strings. Note that we pass the spec string-collection? as the first argument to s/valid?, and the vector ["Hi" "Hello"] as the second.
Now let’s handle a more complex case: a collection that can contain either numbers or strings.
(def number-or-string? (s/or :number number? :string string?))Output
#'user/number-or-string?
In the code above, we use s/or. We provide pairs of tags (keywords) and specs: :number number? and :string string?. These tags are useful for reporting which part of the or spec matched or failed during explanation. The s/or spec passes if the value matches any of the provided specs.
Testing it with a number:
(s/valid? number-or-string? 1)Output
true
Testing it with a string:
(s/valid? number-or-string? "Hi")Output
true
To check if a collection contains only numbers or strings, we wrap number-or-string? in s/coll-of:
(def number-or-string-collection? (s/coll-of number-or-string?))Output
#'user/number-or-string-collection?
Now number-or-string-collection? will validate that every element in the collection is either a number or a string.
The following vector passes because it only contains numbers and strings:
(s/valid? number-or-string-collection? [1 "Hi" "India" 42])Output
true
The following vector fails because it contains a keyword (:keyword):
(s/valid? number-or-string-collection? [1 "Hi" "India" 42 :keyword])Output
false
11.2. Inspecting Collections
| Watch video for this section here https://yu7.in/clj-collections |
Let’s see how to validate data within a collection. Suppose we have a vector containing a person’s details: name, age, and gender.
The name should be a string:
:name string?
The age should be a number:
:name string? :age number?
And the gender can be represented by a keyword:
:name string? :age number? :gender keyword?
We can use the s/cat [5] (concatenate) spec to ensure the collection contains these elements in this exact order:
(s/cat :name string? :age number? :gender keyword?)Let’s name this spec valid-person-vector?:
(def valid-person-vector? (s/cat :name string? :age number? :gender keyword?))Output
user/valid-person-vector?
If we pass a vector with a string, a number, and a keyword, it passes:
(s/valid? valid-person-vector? ["Karthik" 40 :male])Output
true
Otherwise, it will fail.
Now let’s look at validating maps. We can use the s/keys [6] spec to ensure a map contains specific keys.
(def valid-person-map?
  (s/keys :req-un [::name
                   ::age
                   ::gender]))
Output
#'user/valid-person-map?
In s/keys, the :req-un argument stands for required and unique. This means the map must contain these keys, and only these keys are being validated here.
The double colon syntax (e.g., ::name) is a shorthand for a namespaced keyword. It tells Clojure to use the keyword :name within the current namespace.
We can now use valid-person-map? to check a map:
(s/valid? valid-person-map? {:name "Karthik"
                             :age 40
                             :gender :male})
Output
true
The map passes because it contains the required keys :name, :age, and :gender.
11.3. Validating Map Values
| Watch video for this section here https://yu7.in/clj-map-spec |
When validating maps, we often want to ensure that specific keys exist and that their associated values conform to certain rules.
First, we can define specs for the individual keys using s/def. For example, the :name key should map to a string:
(s/def ::name string?)Output
:user/name
The :age key should map to an integer:
(s/def ::age int?)Output
:user/age
The :gender key should map to a keyword:
(s/def ::gender keyword?)Output
:user/gender
Now we can combine these into a single spec for a person using s/keys:
(s/def ::person (s/keys :req-un [::name ::age ::gender]))Output
:user/person
The ::person spec now ensures that any map it validates contains the keys :name (string), :age (integer), and :gender (keyword).
Let’s test it:
(s/valid? ::person {:name "Karthik"
                    :age 40
                    :gender :male})
Output
true
If we change :age to a string "40", it will fail:
(s/valid? ::person {:name "Karthik"
                    :age "40"
                    :gender :male})
Output
false
11.4. Explaining Specs
| Watch video for this section here https://yu7.in/clj-exp-spec |
Clojure provides the s/explain function, which gives a human-readable explanation of why a value failed a spec validation.
For example:
(s/explain number? "42")Output
"42" - failed: number?
When a spec passes, s/explain simply returns Success!:
(s/explain number? 42)Output
Success!
(s/explain number-or-string? "56")Output
Success!
If we test a keyword against the number-or-string? spec, we can see specifically which parts of the or spec failed:
(s/explain number-or-string? :56)Output
:56 - failed: number? at: [:number]
:56 - failed: string? at: [:string]
nil
And if the value is a number, it passes:
(s/explain number-or-string? 56)Output
Success!
nil
11.5. Conformity
| Watch video for this section here https://yu7.in/clj-spec-fun |
The s/conform function checks if data conforms to a spec. If it does, it returns the value:
(s/conform number? 42)Output
42
If the data does not conform to the spec, s/conform throws a clojure.spec.alpha/invalid exception:
(s/conform number? "42")Output
clojure.spec.alpha/invalid
(s/conform number-or-string? :56)Output
:clojure.spec.alpha/invalid
11.6. Using Specs in Functions
| Watch video for this section here https://yu7.in/clj-spec-fun |
Why use specs? In Clojure, we typically use simple data types (vectors, maps, sets) rather than complex objects. When functions rely on these simple types, it becomes important to verify the integrity and conformity of the data. Specs provide a powerful way to achieve this.
Consider the following example:
(defn add-two-numbers [a b]
  {:pre [(s/valid? number? a)
         (s/valid? number? b)]}
  (+ a b))
Calling the function with valid numbers:
(add-two-numbers 3 5)Output
8
Calling the function with an invalid argument:
(add-two-numbers 3 "5")Output
; Execution error (AssertionError) at user/add-two-numbers (REPL:100).
; Assert failed: (s/valid? number? b)
The :pre hook checks if arguments a and b are numbers. If the validation fails, the function body does not execute.
Similarly, you can use the :post hook to verify the integrity of the returned data, ensuring that the results do not cause issues further down the line in your application.
12. atom
| For this section, you can use the code at https://gitlab.com/clojure-book/code/-/raw/master/atom.clj. Copy and paste the lines one by one into your REPL, whether the REPL runs in your terminal or is integrated with your IDE. |
| Watch video for this section here https://yu7.in/clj-atom |
Clojure is a functional programming language, meaning it primarily deals with functions. For example, \$f(x) = 2x + 3\$ is a function. It remembers nothing. If you plug in a value, say \$x = 7\$, you will get an output of \$17\$. That is all; it is a pure function.
In the real world, however, you need to store state, and Clojure provides a way to do this. This introduces impurity into the language. In a strictly pure functional language, there would be no way to maintain state between calls. Essentially, a completely pure program would not be able to interact with the outside world, making it practically useless.
Clojure provides a way to store values in memory that persist across function calls; these are called atoms. Think of them as a global library that stores essential facts needed to run a system, such as railway, bus, and aircraft timetables.
To start, let’s define an atom as shown below:
(def counter (atom 0))As with most definitions in Clojure, we start with (def …), followed by the name of the atom. In this case, we call it counter:
(def counter ....)We need to tell Clojure that this is not an ordinary variable but an atom. To do this, we use the atom function:
(def counter (atom .......))Now we assign an initial value; let’s assign 0 to it:
(def counter (atom 0))And so we have defined our counter atom.
| I am not sure why they call storage things as atom in Clojure. |
To retrieve the value of an atom, we use the @ (dereference) operator. To get the value of the counter atom, we use:
@counterOutput
0
It correctly returns 0.
However, if we reference counter without the @ operator, it returns the atom object itself rather than its value:
counterOutput
#object[clojure.lang.Atom 0x537d2c4f {:status :ready, :val 0}]
The swap! function allows us to update an atom. It accepts a function as its second argument, which defines how the atom’s value should be changed. In the example below, the second argument is the inc function, which increments the value of the atom:
(swap! counter inc)Output
1
Once executed, the value of @counter becomes 1. We can verify this by running the following code:
@counterOutput
1
We can change the value of an atom to any specific value using the reset! function. Below, we change the value of counter to 42:
(reset! counter 42)Output
42
@counterOutput
42
Now, let’s define an atom called robo-count to keep track of the number of robots created:
(def robo-count (atom 0))Now, let’s define a function named make-robot:
(defn make-robot [])Whenever make-robot is called, it will increment robo-count by 1:
(defn make-robot []
  (swap! robo-count inc))
Finally, we return a string indicating the total number of robots created:
(defn make-robot []
  (swap! robo-count inc)
  (str "Made a robot. Total robots: " @robo-count))
Let’s run it:
(make-robot)Output
"Made a robot. Total robots: 1"
Let’s run it two more times:
(make-robot)Output
"Made a robot. Total robots: 2"
(make-robot)Output
"Made a robot. Total robots: 3"
The global robo-count atom keeps track of the total number of robots. Since it is accessible from anywhere in the code, we can print its value as follows:
(println (str "Robots made: " @robo-count))Output
Robots made: 3
13. What is Clojure code
| Watch the video for this section here: https://yu7.in/clj-code |
Clojure is a dialect of Lisp. Lisp stands for "List Processing." In Clojure, almost all code is represented as a list data structure. In Lisp, a program is a data structure, and a data structure can be treated as a program, which gives it enormous power.
Clojure’s code follows one consistent pattern:
(function-name argument-1 .... argument-n)As seen above, everything is enclosed in ( and ), which represents a list data structure. As a list-processing language, Clojure is designed specifically to process these structures.
Let’s consider the following example:
(* 5 (+ 1 2 3))The above list can be represented as follows: the * function receives two arguments—the first is 5 and the second is (+ 1 2 3). This can be diagrammatically represented as follows:
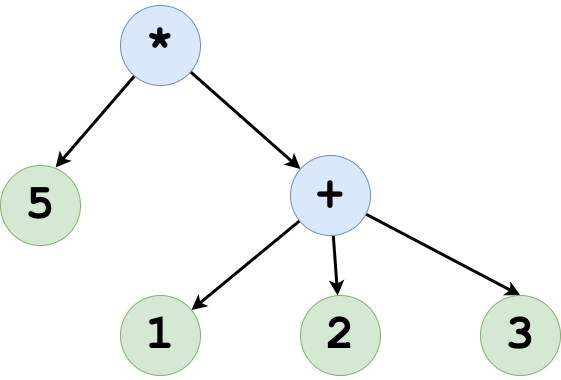
Now look at the deepest blue dots: 1, 2, and 3. They feed into the + function and are reduced to 6, resulting in a new data structure:
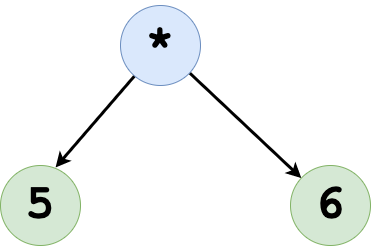
This can be written as:
(* 5 6)
In this expression, 5 and 6 are fed into the * function, which multiplies them, resulting in 30.

Because Clojure is a Lisp, it has excellent uniformity in its code. Unlike Object-Oriented languages, you don’t need to remember complex syntax; it is light on your brain, freeing your neurons to tackle the business problems.
14. Sequence
| For this section, you can use the code at https://gitlab.com/clojure-book/code/-/raw/master/sequence.clj. Copy and paste the lines one by one into your REPL, whether the REPL runs in your terminal or is integrated with your IDE. |
| Watch video for this section here https://yu7.in/clj-sequence |
In Clojure, count counts the number of elements in a list.
(count '(1 2 3 4))Output
4
It counts the number of elements in a vector.
(count [1 2 3 4])Output
4
It also works for sets.
(count #{1 2 3 4})Output
4
And for maps too.
(count {:one 1 :two 2 :three 3 :four 4})Output
4
You might wonder whether count checks the type of the argument and calls a different algorithm for each type, or if it simply converts the argument into a common data type before counting.
There is a function called seq [7], which converts all the above data types to a sequence:
(seq '(1 2 3 4))Output
(1 2 3 4)
(seq [1 2 3 4])Output
(1 2 3 4)
(seq #{1 2 3 4})Output
(1 4 3 2)
(seq {:one 1 :two 2 :three 3 :four 4})Output
([:one 1] [:two 2] [:three 3] [:four 4])
Now all count needs to do is count the elements in a sequence as shown:
(count '(1 2 3 4))Output
4
(count '([:one 1] [:two 2] [:three 3] [:four 4]))Output
4
Now think about partition and other functions that work on collections and try it for yourself:
(seq [1 2 3])Output
(seq '(1 2 3))Output
(seq #{1 2 3})Output
(seq {1 "one" 2 "two" 3 "three"})Output
(partition 2 {1 "one" 2 "two" 3 "three" 4 "four"})Output
(partition 2 (seq {1 "one" 2 "two" 3 "three" 4 "four"}))Output
(partition 2 '(1 2 3 4))Output
(partition 2 (seq '(1 2 3 4)))Output
(partition 2 #{1 2 3 4})Output
(partition 2 (seq #{1 2 3 4}))Output
(partition 2 [1 2 3 4])Output
(partition 2 (seq [1 2 3 4]))Output
Do you think partition implements several algorithms, say one for list, one for vector and so on? Or it has a smarter implementation?
15. Lazy Sequence
| Watch video for this section here https://yu7.in/clj-lzseq |
Some sequences are evaluated only when they need to be, and these are called lazy sequences. For example, you can easily create a lazy sequence of infinite numbers without your computer crashing.
Think of it this way: when someone mentions "infinity," your brain doesn’t crash; it simply understands the concept of infinity and how it fits into mathematics. When you need to use it in a specific context, such as calculus, you are still able to apply and use it.
15.1. repeat
| For this section, you can use the code at https://gitlab.com/clojure-book/code/-/raw/master/lazy_sequence_repeat.clj. Copy and paste the lines one by one into your REPL, whether the REPL runs in your terminal or is integrated with your IDE. |
Let’s take a look at the repeat function. Take a look at the code below:
(def multiverse (repeat "universe"))In the above code, we are creating a variable named multiverse which contains many instances of "universe"; theoretically, it is infinite. Treating it as a sequence, let’s take the first element:
(first multiverse)Output
"universe"
And we get "universe". Now let’s take 5 elements from it:
(take 5 multiverse)Output
("universe" "universe" "universe" "universe" "universe")
We get 5 universes. Let’s get the rest of the sequence:
(rest multiverse) ;; doesn't seem to workThis throws an error. After all, how can you get the rest of an infinite sequence?
Similarly, last also throws an error; how can you get the last element of an infinite sequence?
(last multiverse) ;; doesn't seem to workNow let’s get the 10,001st element:
(nth multiverse 10000)Output
"universe"
Let’s get the 101st element:
(nth multiverse 100)Output
"universe"
The repeat function doesn’t only create infinite sequences; we can create a finite sequence by telling Clojure how many times to repeat. The code below creates only five instances of "universe":
(repeat 5 "universe")Output
("universe" "universe" "universe" "universe" "universe")
If we try to access the 7th element, it throws an exception:
(nth (repeat 5 "universe") 6)Output
; Execution error (IndexOutOfBoundsException) at user/eval2056 (REPL:11).
; null
Since there are only 5 elements in (repeat 5 "universe"), the code below retrieves the 4th element, which works.
(nth (repeat 5 "universe") 3)Output
"universe"
Since (repeat 5 "universe") has a finite number of elements, rest works on it without raising any exceptions:
(rest (repeat 5 "universe"))Output
("universe" "universe" "universe" "universe")
Similarly, last also works on it:
(last (repeat 5 "universe"))Output
"universe"
15.2. cycle
| For this section, you can use the code at https://gitlab.com/clojure-book/code/-/raw/master/lazy_sequence_cycle.clj. Copy and paste the lines one by one into your REPL, whether the REPL runs in your terminal or is integrated with your IDE. |
| Watch video for this section here https://yu7.in/clj-cycle |
Let’s say you want to go through a sequence in a cyclical manner; then cycle is the function to use. Take a look at the code below:
(def multiverse (cycle ["universe" "antiverse"]))Output
#'user/multiverse
The above code creates an infinite sequence and assigns it to the variable multiverse, where every even-indexed element (0, 2, 4, …) is "universe" and every odd-indexed element (1, 3, 5, …) is "antiverse". Thus, the first element is "universe":
(first multiverse)Output
"universe"
The second element is "antiverse":
(second multiverse)Output
"antiverse"
If we take 5 elements, they alternate between "universe" and "antiverse", as shown:
(take 5 multiverse)Output
("universe" "antiverse" "universe" "antiverse" "universe")
We can take any element at an even index, and it will be "universe":
(nth multiverse 2000)Output
"universe"
Similarly, any element at an odd index will be "antiverse":
(nth multiverse 1783)Output
"antiverse"
Now let’s cycle some South Indian tiffin items:
(def tiffin-items
  (cycle ["idli", "vadai", "dosai", "sambar"]))
Output
#'user/tiffin-items
Let’s take the 6th element:
(nth tiffin-items 5)Output
"vadai"
The last element, "sambar", is at index 3. Therefore, the 0th element repeats at index 4, the 1st at index 5, and so on, creating a never-ending loop.
Now let’s take 10 tiffin-items to see how it repeats:
(take 10 tiffin-items)Output
("idli" "vadai" "dosai" "sambar" "idli" "vadai" "dosai" "sambar" "idli" "vadai")
15.3. iterate
| For this section, you can use the code at https://gitlab.com/clojure-book/code/-/raw/master/lazy_sequence_iterate.clj. Copy and paste the lines one by one into your REPL, whether the REPL runs in your terminal or is integrated with your IDE. |
| Watch video for this section here https://yu7.in/clj-iterate |
iterate is a powerful function in Clojure. Let’s look at an example:
(def all-numbers (iterate inc 1))Output
#'user/all-numbers
In the above code, we have (iterate inc 1). In other words, iterate takes a function (like inc) as its first argument and a starting value as its second. This is assigned to all-numbers. Now let’s see what happens when we take the 25th element:
(nth all-numbers 24)Output
25
The output looks as if we applied inc to 1 twenty-four times.
Now let’s take the first 10 elements:
(take 10 all-numbers)Output
(1 2 3 4 5 6 7 8 9 10)
The first element, 1, is the starting value passed to iterate. The second is (inc 1), the third is (inc (inc 1)), and so on. This is consistent with the iterate documentation: https://clojuredocs.org/clojure.core/iterate.
Now let’s create a function that squares a number:
(defn squared [num]
  (Math/pow num 2))
Output
#'user/squared
Now let’s iterate through the squares of 5:
(def squares (iterate squared 5))Output
#'user/squares
Now let’s take the first three squares:
(take 3 squares)Output
(5 25.0 625.0)
Here is the explanation:
The first value, 5, is the starting argument passed to iterate in (def squares (iterate squared 5)); it is returned as-is.
The second value, 25.0, is the result of the first iteration: (squared 5).
The third value, 625.0, is the result of the second iteration: (squared (squared 5)).
16. map, filter, reduce, apply
16.1. map
| Watch video for this section here https://yu7.in/clj-map |
Let’s say you have a function that acts on an argument, such as inc (where (inc 1) gives 2). To apply inc to every element in a collection or sequence, you can use map. Simply pass the function to map, followed by the collection, as shown:
(map inc [1 2 3])Output
(2 3 4)
In this case, map applies the inc function to each element of [1 2 3], collects the results into a sequence, and returns it. This results in (2 3 4) as the output.
In the example below, I pass an anonymous function (fn [x] (+ x 1)) to map and apply it to [1 2 3]:
(map (fn [x] (+ x 1)) [1 2 3])Output
(2 3 4)
This demonstrates that you don’t need a predefined function; in Clojure, you can define small functions on the fly.
The following code works the same way as the previous examples:
(map #(+ % 1) [1 2 3])Output
(2 3 4)
Another way to write the anonymous function (fn [x] (+ x 1)) is (+ % 1). The function body is enclosed in (), and % represents the argument passed to the function. This shorthand is often more concise than (fn [x] (+ x 1)).
Let’s say we have a function that takes two arguments:
(fn [x y]
  (+ (Math/pow x 2)
    (Math/pow y 2)))
This function takes two arguments and returns the sum of their squares. How do we make this function work with sequences? Simply pass it to map as shown:
(map (fn [x y]
       (+ (Math/pow x 2)
          (Math/pow y 2))))
Next, pass the sequence for the first argument (x):
(map (fn [x y]
       (+ (Math/pow x 2)
          (Math/pow y 2))) [1 2 3])
Then, pass the sequence for the second argument (y):
(map (fn [x y]
       (+ (Math/pow x 2)
          (Math/pow y 2))) [1 2 3] [2 3 4])
Output
(5.0 13.0 25.0)
The code works as follows: map takes the first element from [1 2 3] (which is 1) and the first element from [2 3 4] (which is 2) and passes them to:
(fn [x y]
  (+ (Math/pow x 2)
    (Math/pow y 2)))
The function calculates the sum of squares and returns 5.0. map collects this into a sequence, resulting in (5.0).
Then map takes the second element from each sequence (2 and 3), and the function returns 13.0, which is appended to the result sequence. This process is repeated for the third elements, adding 25.0 to the sequence. The final result (5.0 13.0 25.0) is then returned.
In the sample below I have a function called sum-of-squares:
(defn sum-of-squares [x y]
  (+ (Math/pow x 2)
     (Math/pow y 2)))
This is simply giving a name to the anonymous function:
(fn [x y]
  (+ (Math/pow x 2)
    (Math/pow y 2)))
used previously. We use the name sum-of-squares with map and pass two sequences for x and y to get the same result:
(map sum-of-squares [1 2 3] [2 3 4])Output
(5.0 13.0 25.0)
The following function, double-it, doubles the number passed to it:
(defn double-it [x]
  (* x 2))
Output
#'user/double-it
Let’s use it with map to double the numbers in a vector:
(map double-it [1 2 3])Output
(2 4 6)
16.2. filter
| Watch video for this section here https://yu7.in/clj-filter |
filter returns a sequence containing only the elements of the original sequence for which the given predicate function returns true. For example, (odd? 1) returns true, whereas (odd? 2) returns false. Look at the code below:
(filter odd? (range 1 11))Output
(1 3 5 7 9)
In this example, we pass odd? as the first argument and a sequence of numbers from 1 to 10 (generated by (range 1 11)) as the second. Any number for which odd? returns true is kept by filter and included in the result.
Similarly, the example below returns only the even numbers:
(filter even? (range 1 11))Output
(2 4 6 8 10)
In the code below:
(filter #(> % 5) (range 1 11))Output
(6 7 8 9 10)
Here, we pass an anonymous function #(> % 5) to filter. Any number between 1 and 10 that is greater than 5 is returned.
In the example below, all numbers from 1 to 10 that are less than 5 are returned:
(filter #(> 5 %) (range 1 11))Output
(1 2 3 4)
(filter (fn [x] (> x 5)) (range 1 11))Output
(6 7 8 9 10)
Below, I define a function called greater-than-5, which returns true if a number is greater than 5:
(defn greater-than-5 [x]
  (> x 5))
I then use it with filter to find numbers greater than 5:
(filter greater-than-5 (range 1 11))Output
(6 7 8 9 10)
16.3. reduce
| Watch video for this section here https://yu7.in/clj-reduce |
reduce reduces a sequence to a single value by repeatedly applying a function to the current accumulator and the next element of the sequence. Take the example below:
(reduce + [1 2 3 4])Output
10
We pass the + function and the sequence [1 2 3 4] to reduce. You can think of reduce as rewriting the code like this:
(+ 4 (+ 3 (+ 1 2)))This reduces the sequence to the single value 10.
Here is how to multiply the elements of a sequence using reduce:
(reduce * [1 2 3 4])Output
24
Let’s define a function called add that accepts two numbers and returns their sum:
(defn add [a b]
  (+ a b))
Output
#'user/add
We can use it with reduce, just as we did with + previously:
(reduce add [1 2 3 4])Output
10
Similarly, reduce effectively rewrites the code as follows:
(add 4 (add 3 (add 1 2)))Similarly, I have defined a multiply function:
(defn multiply [a b]
  (* a b))
Output
#'user/multiply
and used it with reduce:
(reduce multiply [1 2 3 4])Output
24
16.4. apply
| Watch the video for this section here: https://yu7.in/clj-apply |
The + function can add multiple numbers as follows:
(+ 1 2 3 4)Output
10
However, if you pass a sequence as a single argument, the operation will fail:
(+ [1 2 3 4]) ;; errorOutput
; Execution error (ClassCastException) at java.lang.Class/cast (Class.java:3921).
; Cannot cast clojure.lang.PersistentVector to java.lang.Number
To fix this, we pass the + function and the sequence to apply:
(apply + [1 2 3 4])Output
10
This works because apply effectively expands the sequence into individual arguments, rewriting the code as follows:
(+ 1 2 3 4)A sequence can be a vector, list, or map. In this example, we use apply with a list of numbers:
(apply + '(1 2 3 4))Output
10
Consider a function that takes two arguments and prints them both:
(defn my-function [arg1 arg2]
  (println "Argument 1:" arg1)
  (println "Argument 2:" arg2))
Output
#'user/my-function
We can call this function by providing two arguments:
(my-function "one" "two")Output
Argument 1: one
Argument 2: two
nil
If we pass a vector containing two elements instead of two separate arguments, the function call will fail:
(my-function ["one" "two"]) ;; errorOutput
; Execution error (ArityException) at user/eval2061 (REPL:17).
; Wrong number of args (1) passed to: user/my-function
To resolve this, we pass the function and the sequence to apply:
(apply my-function ["one" "two"])Output
Argument 1: one
Argument 2: two
nil
17. Destructuring
| Watch the video for this section here: https://yu7.in/clj-destructuring |
Clojure provides a rich variety of data types to pack your data, such as lists, vectors, maps, and sets. To perform computations with them, you need to unpack the data, assign the necessary values to variables, and use those variables in your computation. This section explains how to do this.
Take a look at the program vector_destructuring.clj shown below; type it and execute it:
;; vector_destructuring.clj

(def people ["Rehmaan" "Kalaam"])

(let [[musician scientist] people]
  (println "Musician is" musician)
  (println "Scientist is" scientist))
Output
Musician is Rehmaan
Scientist is Kalaam
nil
In the line (def people ["Rehmaan" "Kalaam"]), we pack "Rehmaan" and "Kalaam" into a vector and name it people. Now consider:
(let [[musician scientist] people]
  ;; other code goes here
 )
In the let expression, look at [[musician scientist] people]. The variables musician and scientist point to people. Clojure determines that people contains "Rehmaan" and "Kalaam", then unpacks "Rehmaan" into musician and "Kalaam" into scientist. Finally, we print musician and scientist using the println function as shown below:
(let [[musician scientist] people]
  (println "Musician is" musician)
  (println "Scientist is" scientist))
Take a look at the code in vector_destructuring_2.clj below; type it and execute it.
;; vector_destructuring_2.clj
(def people ["Rehmaan" "Kalaam"])
(let [[musician scientist artist] people]
(println "Musician is" musician)
(println "Scientist is" scientist)
(println "Artist is" artist))Output
Musician is Rehmaan Scientist is Kalaam Artist is nil nil
In the code above, we see that the variable people is assigned to a vector containing only two values: ["Rehmaan" "Kalaam"]. However, in the let block, we are attempting to destructure it into three variables: musician, scientist, and artist, as shown:
(let [[musician scientist artist] people]
;; other stuff goes here
)In this case, the first two variables, musician and scientist, are populated with "Rehmaan" and "Kalaam" respectively, while artist is assigned nil. Consequently, when printed, artist results in nil.
Now look at the code in vector_destructuring_3.clj shown below; type it and execute it.
;; vector_destructuring_3.clj
(def people ["Rehmaan" "Kalaam" "Hussein" "Madhavan"])
(let [[musician scientist artist] people]
(println "Musician is" musician)
(println "Scientist is" scientist)
(println "Artist is" artist))Output
Musician is Rehmaan Scientist is Kalaam Artist is Hussein nil
In the code above, there are four values in people, but it is being destructured into only three variables:
(let [[musician scientist artist] people]
;; other code goes here
)As a result, musician is populated with "Rehmaan", scientist with "Kalaam", and artist with "Hussein", while the final value in people, "Madhavan", is ignored.
In the code below:
;; vector_destructuring_4.clj
(def people ["Rehmaan" "Kalaam" "Hussein" "Madhavan"])
(let [[musician scientist artist actor] people]
(println "Musician is" musician)
(println "Scientist is" scientist)
(println "Artist is" artist)
(println "Actor is" actor))Output
Musician is Rehmaan Scientist is Kalaam Artist is Hussein Actor is Madhavan nil
All values in people are now unpacked correctly into the variables musician, scientist, artist, and actor.
It is a convention to use an underscore for values that will not be used. In the code below, only scientist and actor are needed; the other unused values are captured by .
;; vector_destructuring_5.clj
(def people ["Rehmaan" "Kalaam" "Hussein" "Madhavan"])
(let [[_ scientist _ actor] people]
(println "Scientist is" scientist)
(println "Actor is" actor))Output
Scientist is Kalaam Actor is Madhavan nil
This signals to anyone reading the code that these values are intentionally ignored.
While the examples above demonstrate vector destructuring, the same logic applies to lists. Readers are encouraged to try this out.
Clojure also provides a way to destructure maps. See the code in map_destructuring.clj below; type it and execute it.
;; map_destructuring.clj
(def people
{:musician "Rehmaan"
:scientist "Kalaam"
:artist "Hussein"
:actor "Madhavan"})
(let [{scientist :scientist actor :actor} people]
(println "Scientist is" scientist)
(println "Actor is" actor))Output
Scientist is Kalaam Actor is Madhavan nil
If you look at:
(def people
{:musician "Rehmaan"
:scientist "Kalaam"
:artist "Hussein"
:actor "Madhavan"})We have a map of people, where their profession is the keyword and their name is the string. This map can be destructured using keywords, as shown:
(let [{scientist :scientist actor :actor} people]
;; other stuff here
)In the code above, notice the expression [{scientist :scientist actor :actor} people]; here, the map destructuring pattern {scientist :scientist actor :actor} is applied to people.
The pattern {scientist :scientist actor :actor} looks like a map in reverse. The variable scientist followed by the keyword :scientist extracts the value associated with :scientist from the map and assigns it to the variable scientist. The variable actor is assigned in the same way.
This makes it very easy to selectively extract values from a map and assign them to variables in Clojure.
18. Threading Macros
If you come from other programming languages, don’t confuse threading with threads (which refers to executing chunks of code in parallel). In Clojure, threading refers to a way of writing code that makes sequences of operations more intuitive. This will become clearer as you read this chapter.
18.1. Thread First
Consider the following program and run it:
(-> 5
(Math/pow 2))Output
25.0
The output is 25.0. From this, you might guess that Clojure effectively rewrites your program as follows:
(Math/pow 5 2)The → macro is called 'thread-first'. This means that if you write:
(-> 5)And then follow it with a function, such as Math/pow:
(-> 5
(Math/pow 2))The thread-first macro will place 5 as the first argument to the function Math/pow. It becomes equivalent to:
(Math/pow 5 2)Now consider the code below, where 5 is passed as the first argument to (Math/pow 2) and then to inc. Execute the program:
(-> 5
(Math/pow 2)
inc)Output
26.0
It gives 26.0 as output. The first step of the program can be rewritten as:
(-> (Math/pow 5 2)
inc)Now, the result of (Math/pow 5 2) is passed as the first argument to inc, and the code becomes:
(inc (Math/pow 5 2))So it gives an output of 26.0.
Consider this program and execute it:
(-> 10
inc
(* 2)
(+ 5))Output
27
It can be rewritten as:
(+ (* (inc 10) 2) 5)Which when executed gives 27.
18.2. Thread Last
While thread-first places the threaded value as the first argument to a function, thread-last (→>) places it as the last argument. Let’s look at an example.
Execute the code below:
(->> 5
(Math/pow 2))Output
32.0
Since 5 is passed to the thread-last macro →>, the code above is equivalent to:
(Math/pow 2 5)In other words, 5 is placed at the end of (Math/pow 2), resulting in 32.0.
Consider the following example:
(->> 5
(Math/pow 2)
inc)Output
33.0
This can be rewritten as:
(inc (Math/pow 2 5))Which evaluates to 33.0.
18.3. Thread as
Sometimes you need to pass a threaded value at an arbitrary position within a function. In such cases, you can use the as→ (thread-as) macro.
In the code below:
(as-> 5 x
(Math/pow x 2))Output
25.0
The threaded value is bound to the symbol x, allowing you to place x anywhere within the expression. In the previous example, we placed it as (Math/pow x 2), calculating \$x^2\$.
In the following example:
(as-> 5 x
(Math/pow 2 x))Output
32.0
We pass x as the last argument to Math/pow, calculating \$2^x\$.
18.4. Conditional Threading
If you want to thread values conditionally, you can use conditional threading. Consider the following example:
(let [a 11]
(cond-> []
(odd? a) (conj (* a 2))
(even? a) (conj (/ a 2))))Output
[22]
The cond→ macro is the conditional thread-first operator. In this case, we pass an empty vector [] to it:
(let [a 11]
(cond-> []
....))Following cond→ [] are pairs of conditions and expressions. The expression is executed only if the condition is true. The code above can be rewritten as:
(let [a 11]
(cond
(odd? a) (conj [] (* a 2))
(even? a) (conj [] (/ a 2))))In this example, a is odd, so the expression (conj [] (* a 2)) is executed, resulting in [22].
The following example has a subtle difference: instead of the conditional thread-first macro cond→, we use the conditional thread-last macro cond→>.
Execute the following code:
(let [a 10]
(cond->> 1
(odd? a) (* a 2)
(even? a) (/ a 2)))Output
5
The code above is equivalent to:
(let [a 10]
(cond
(odd? a) (* a 2 1)
(even? a) (/ a 2 1)))Since a is even, the expression (/ a 2 1) is executed. Mathematically, this is $10 \div 2 \div 1$, which results in 5.
19. Regular Expression
| Get source code here https://gitlab.com/clojure-book/code/-/raw/master/regular_expression.cl |
| Watch video for this section here https://yu7.in/clj-regexp |
We know what a string is; it’s a set of characters that’s enclosed between " and " (double quotes). Shown below is a string:
"A string"Output
"A string"
When we look at its type, it does tell us that it’s a string:
(type "A string")Output
java.lang.String
Now what will happen if we enclose a set of characters between " and "? Below I have enclosed regexp between " and ":
#"regexp"Output
#"regexp"
When I query about its type, I find that it’s a java.util.regex.Pattern; that is, it is not a string, it’s a pattern.
(type #"regexp")Output
java.util.regex.Pattern
Regular expressions can be used to find if certain patterns occur in a string. For example, an email address has a pattern. Say my email is mindaslab@protonmail.com: mindaslab is my username followed by an @ symbol, com is a top-level domain, and protonmail is a subdomain of com. The subdomain and top-level domains are separated by a dot. When you see a lot of email addresses, you may think <username>@<subdomain>.<top level domain> is a regular expression of an email.
Similarly, if you see a lot of postal addresses, you might notice that the house number and street name appear at the top, and the pin code or zip code is at the bottom.
These regular expressions help you identify if you are looking at an email address or a postal address when they are presented to you.
Your brain has millions of years of evolution and lots of experience to recognize these things in a jiffy. For computers, we programmers must specify how to scan for patterns in a string and identify what they are.
Now let’s write a regular expression to identify just one digit. It’s "\d". The " marks the start of the regular expression and " marks the end. The \d means we are looking for just one digit. Here, the \ is an escape sequence that makes #"\d" search for a digit rather than the letter d.
There is a function called re-matches which we can use to see if a string matches a regular expression. Let’s see if "There is no number here." matches #"\d":
(re-matches #"\d" "There is no number here.")Output
nil
It doesn’t as there is no number in the string.
Now let’s see if #"\d" matches "4":
(re-matches #"\d" "4")Output
"4"
And it does, as "4" contains just one digit and that’s what #"\d" searches for.
Now let’s see if #"\d" matches "42":
(re-matches #"\d" "42")Output
nil
And it doesn’t, because "42" contains more than one digit.
In order to specify "one or more" in a regular expression, we use the + symbol, so #"\d+" means search for one or more digits. Look at the example below:
(re-matches #"\d+" "42")Output
"42"
It matches because "42" contains one or more digits.
It may be surprising that #"\d+" does not match "42 is the ultimate answer." as shown below:
(re-matches #"\d+" "42 is the ultimate answer.")Output
nil
That’s because re-matches checks if a string exactly matches a regular expression. "42 is the ultimate answer." contains 42 followed by a space and other words, which is not an exact match for #"\d+", hence it returns nil.
In order to find a pattern in a string, we can use re-find as shown:
(re-find #"\d+" "42 is the ultimate answer.")Output
"42"
This does output "42", and hence we can convince ourselves it can fish out a pattern from a string.
Now let’s search for 2-digit numbers as shown below:
(re-find #"\d+" "42 is the ultimate answer, and so is 52.")Output
"42"
If you thought it would find both "42" and "52", you would be disappointed, as you can see only "42" above. re-find returns only the first match:
(re-find #"\d+" "Forty two is the ultimate answer, and so is 52.")Output
"52"
As you can see from the above example, re-find returns only the first match "52".
In order to get all matches, use re-seq:
(re-seq #"\d+" "42 is the ultimate answer, and so is 52.")Output
("42" "52")
This returns a sequence with all strings that match the regular expression; in our case, it’s #"\d+".
19.1. Case sensitive and insensitive matches
Now let’s say we have regular expression #"abc", this would help us to match and find letters abc in a string, but not ABC, because ABC are capital letters, there is a trick in regexp to make it case-insensitive. You can tell Clojure to make the regexp case-insensitive by adding (?i) to regexp as shown:
(re-seq #"(?i)abc" "abc are small letters and ABC are capitals.")Output
("abc" "ABC")
So #"(?i)abc" matches "abc", "ABC", "AbC" and so on.
Below you can see how #"abc" does not match "ABC":
(re-seq #"abc" "abc are small letters and ABC are capitals.")Output
("abc")
In the example below you can see how #"(?i)ABC" matches "abc", "ABC" because it’s case-insensitive:
(re-seq #"(?i)ABC" "abc are small letters and ABC are capitals.")Output
("abc" "ABC")
Another case-insensitive regular expression is #"(?i)abC" in action:
(re-seq #"(?i)abC" "abc are small letters and ABC are capitals.")Output
("abc" "ABC")
19.2. Scanning for range of characters
Now let’s check for ranges. Suppose you want to scan for capital letters—specifically, one or more of them. For that, you must use the + quantifier.
Capital letters range from A to Z, so in a regexp, you can write it as #"[A-Z]+". This means "scan for one or more capital letters in the range A to Z." Let’s try out an example:
(re-seq #"[A-Z]+" "Finds all CAPITAL letter WORDS.")Output
("F" "CAPITAL" "WORDS")
It seems to work.
19.3. Using with string functions
Some string functions in Clojure accept regular expressions too, let’s see them in action.
First, we require the Clojure string library as str:
(require '[clojure.string :as str])In the code below, we have lots of spaces in "There are lots of spaces". We create a regular expression #"\s+", which means "one or more whitespace characters." We then tell the replace function to replace one or more spaces with a single space " ":
(str/replace "There are lots of spaces" #"\s+" " ")Output
"There are lots of spaces"
It works.
In the code below we use a split function:
(str/split "There are lots of spaces" #"\s")Output
["There" "" "" "are" "" "" "" "" "lots" "of" "" "" "spaces"]
We tell the split to split "There are lots of spaces" with a single space #"\s" so we get what we get above, I think this is not the intended result. What we should have done is to tell it to split with one or more spaces as shown below:
(str/split "There are lots of spaces" #"\s+")Output
["There" "are" "lots" "of" "spaces"]
We get a nice split where the words are split.
19.4. Things to remember
There are some things you need to remember, or at least refer from time to time when you want to use regular expressions. Those are mentioned in table below [8].
Thing |
What it means |
. |
Any single character |
\w |
Any word character (letter, number, underscore) |
\W |
Any non-word character |
\d |
Any digit |
\D |
Any non-digit |
\s |
Any whitespace character |
\S |
Any non-whitespace character |
\b |
Any word boundary character |
^ |
Start of line |
$ |
End of line |
\A |
Start of string |
\z |
End of string |
[abc] |
A single character of |
a, b or c |
[^abc] |
Any single character except |
a, b, or c |
[a-z] |
Any single character in the range a-z |
[a-zA-Z] |
Any single character in the range a-z or A-Z |
(…) |
Capture everything enclosed |
(a|b) |
a or b |
a? |
Zero or one of a |
a* |
Zero or more of a |
a+ |
One or more of a |
a{3} |
Exactly 3 of a |
a{3,} |
3 or more of a |
a{3,6} |
Between 3 and 6 of a |
i |
case-insensitive |
m |
make dot match newlines |
x |
ignore whitespace in regex |
o |
perform #{…} substitutions only once |
Don’t panic if you don’t understand it, you will catch up.
19.5. Lots more left out
Regular expressions are a huge topic, and this book provides just an introduction. It introduces the concept of regular expressions, and that’s it. I will try to add more content in upcoming releases. To learn more, you can refer to Mastering Regular Expressions (https://amzn.to/3YvByJM) and the Regular Expression Pocket Reference (https://amzn.to/3DNXvtQ).
20. Splitting Large Programs
| Watch video for this section here https://yu7.in/clj-slp |
A very small, one-line Clojure script can be written in a Clojure REPL, and a larger one can be written in a file. But what happens when a script becomes too large for a single file and becomes difficult to manage? You can split it into multiple files. This section explains how to load scripts from one file into another in your Clojure code.
For example, let’s say you have a program as shown below:
;; calculator.clj
(defn add [a b]
(+ a b))
(defn sub [a b]
(- a b))
(def a 5)
(def b 3)
(println a " + " b " = " (add a b))
(println a " - " b " = " (sub a b))Output
5 + 3 = 8 5 - 3 = 2
This works fine, but you’ll notice that one file is doing two different things. First, it defines the calculation functions add and sub:
(defn add [a b]
(+ a b))
(defn sub [a b]
(- a b))Then, it uses those functions to compute a result:
(def a 5)
(def b 3)
(println a " + " b " = " (add a b))
(println a " - " b " = " (sub a b))Wouldn’t it be better to split this into two different files? We can move the function definitions into a file called calc_lib.clj:
;; calc_lib.clj
(defn add [a b]
(+ a b))
(defn sub [a b]
(- a b))Then, in another file called calc_ui.clj, we write the following code:
;; calc_ui.clj
(load-file "calc_lib.clj")
(def a 5)
(def b 3)
(println a " + " b " = " (add a b))
(println a " - " b " = " (sub a b))Notice the line (load-file "calc_lib.clj"); this loads the calc_lib.clj file into calc_ui.clj. Now we can compute the result of adding and subtracting 5 and 3.
By separating the calculation functions into their own file, you can include them in any other file where you need to perform additions or subtractions. This significantly increases reusability.
21. Records and Protocols
Clojure emerged during an era when Object-Oriented Programming (OOP) was at its peak. Over time, as codebases grew increasingly large and complex, some of the shortcomings of OOP became apparent, leading many to explore functional programming. It is therefore not surprising that Clojure provides ways to create objects and interact with them.
In Clojure, an object is essentially a glorified map—nothing more. While you might not always need them, they are available for your use.
21.1. Creating Objects
| For this section, you can use the code at https://gitlab.com/clojure-book/code/-/raw/master/record.clj. Copy and paste the lines one by one into your REPL, whether the REPL runs in your terminal or is integrated with your IDE. |
| Watch the video for this section here: https://yu7.in/clj-records |
Objects in Clojure are called Records. Let’s create our first record, called Car, which will hold the name and top-speed of a car:
(defrecord Car [name top-speed])Output
user.Car
As you can see from the output, this creates something called user.Car. user is the default namespace, and Car represents the record. If Car were just a variable, the output would have been something like user/Car.
Now let’s define a variable called tata-nano:
(def tata-nano)Of the type Car:
(def tata-nano (->Car))When we created the Car record, we specified name first and then top-speed. Following that same order, let’s give a name to tata-nano:
(def tata-nano (->Car "Tata Nano"))And specify its top speed as 120:
(def tata-nano (->Car "Tata Nano" 120))Let’s now execute the code above:
(def tata-nano (->Car "Tata Nano" 120))Output
#'user/tata-nano
A variable tata-nano has been created in the user namespace. This is not a simple value, but an object containing two values.
Since an object in Clojure is a glorified map, you can access the :name of tata-nano just as you would with a map:
(:name tata-nano)Output
"Tata Nano"
(get tata-nano :name)Output
"Tata Nano"
Similarly, you can access its top speed:
(:top-speed tata-nano)Output
120
(get tata-nano :top-speed)Output
120
Similarly, let’s create another instance of the Car record called ambassador, but notice the difference in the code below:
(def ambassador (map->Car {:name "Ambassador",
:top-speed 240 }))Output
#'user/ambassador
When creating tata-nano, we provided the values positionally. However, look at map→Car. Instead of →Car, we are specifying that we want to pass a map, so we provide this map:
{ :name "Ambassador",
:top-speed 240 }Clojure automatically unpacks the map and assigns the values to the corresponding fields of ambassador. You can also vary the order of the keys as shown:
{ :top-speed 240
:name "Ambassador" }It still works the same way.
Now, let’s retrieve the :name and :top-speed of ambassador:
(:name ambassador)Output
"Ambassador"
(get ambassador :name)Output
"Ambassador"
(:top-speed ambassador)Output
240
(get ambassador :top-speed)Output
240
21.2. Using Records with Functions
| For this section, you can use the code at https://gitlab.com/clojure-book/code/-/raw/master/record_2.clj. Copy and paste the lines one by one into your REPL, whether the REPL runs in your terminal or is integrated with your IDE. |
| Watch the video for this section here: https://yu7.in/clj-rec-fn |
Records can be passed to functions that know how to handle them. Below, we create a record called Car.
(defrecord Car [name top-speed])Output
user.Car
We create a variable named tata-nano, which is an instance of Car:
(def tata-nano (->Car "Tata Nano" 120))Output
#'user/tata-nano
Now, let’s write a function that can work with the record; we’ll call it describe:
(defn describe [vehicle]
(let [{name :name top-speed :top-speed} vehicle]
(str name " has a top speed of " top-speed "Km/hr.")))Output
#'user/describe
The describe function accepts an argument named vehicle. Let’s look at the body of the function:
(let [{name :name top-speed :top-speed} vehicle]
(str name " has a top speed of " top-speed "Km/hr."))Here, we are destructuring the Car record using let [{name :name top-speed :top-speed} vehicle]. In this snippet, the :name of the passed Car record is assigned to the variable name, and :top-speed is assigned to top-speed. We then return a formatted string that describes the car using (str name " has a top speed of " top-speed "Km/hr."), which embeds the name and top-speed into the description.
Now, let’s use describe on an instance of Car:
(describe tata-nano)Output
"Tata Nano has a top speed of 120Km/hr."
Now, let’s create a new record called Ship:
(defrecord Ship [name top-speed])Output
user.Ship
Let’s create a new ship instance called arctic-explorer:
(def arctic-explorer (->Ship "Arctic Explorer" 10))Output
#'user/arctic-explorer
Let’s write a function called describe-ship that describes a ship:
(defn describe-ship [vehicle]
(let [{name :name top-speed :top-speed} vehicle]
(str name " has a top speed of " top-speed " knots.")))Output
#'user/describe-ship
Let’s use describe-ship on arctic-explorer
(describe-ship arctic-explorer)Output
"Arctic Explorer has a top speed of 10 knots."
It works!
21.3. Protocols
| For this section, you can use the code at https://gitlab.com/clojure-book/code/-/raw/master/protocol.clj. Copy and paste the lines one by one into your REPL, whether the REPL runs in your terminal or is integrated with your IDE. |
| Watch the video for this section here: https://yu7.in/clj-protocol |
In the previous section, we saw how to describe a Car using the describe function and a Ship using the describe-ship function. It would be much more convenient if a programmer could use a single describe function for both. We will see how to achieve this using protocols.
Let’s create a protocol called Describe as shown:
(defprotocol Describe
(describe [this]))Output
Describe
Let’s look at the following code:
(defrecord Car [name top-speed]
Describe
(describe [this]
(let [{name :name top-speed :top-speed} this]
(str name " has a top speed of " top-speed "Km/hr."))))Output
user.Car
In this example, we create a record called Car:
(defrecord Car [name top-speed])Next, we include the Describe protocol:
(defrecord Car [name top-speed]
Describe)Then, we provide the implementation of the describe function for Car:
(defrecord Car [name top-speed]
Describe
(describe [this]
(let [{name :name top-speed :top-speed} this]
(str name " has a top speed of " top-speed "Km/hr."))))Note that there is no defn here. We simply have the function name describe, followed by the argument this, and in the body of describe, we destructure this and return a string description.
The this used in the examples in this section is not a special Clojure keyword; it is simply a name given to a variable.
Similarly, for Ship, we implement the describe function as follows:
(defrecord Ship [name top-speed]
Describe
(describe [this]
(let [{name :name top-speed :top-speed} this]
(str name " has a top speed of " top-speed " knots."))))Output
user.Ship
Now, let’s create an instance of Car called tata-nano:
(def tata-nano (->Car "Tata Nano" 120))Output
#'user/tata-nano
Next, let’s create an instance of Ship called arctic-explorer:
(def arctic-explorer (->Ship "Arctic Explorer" 10))Output
#'user/arctic-explorer
When we pass tata-nano to describe, it recognizes that it is of type Car, and the describe implementation defined within Car is called:
(describe tata-nano)Output
"Tata Nano has a top speed of 120Km/hr."
Similarly, it recognizes that arctic-explorer is a Ship, and Ship’s own `describe implementation is called in the code below:
(describe arctic-explorer)Output
"Arctic Explorer has a top speed of 10 knots."
21.3.1. Extending Protocols
| For this section, you can use the code at https://gitlab.com/clojure-book/code/-/raw/master/extend-protocol.clj. Copy and paste the lines one by one into your REPL, whether the REPL runs in your terminal or is integrated with your IDE. |
| Watch the video for this section here: https://yu7.in/clj-ext-pcl |
We have a protocol called Describe:
(defprotocol Describe
(describe [this]))Output
Describe
We used it to implement the describe function for the Car record:
(defrecord Car [name top-speed]
Describe
(describe [this]
(let [{name :name top-speed :top-speed} this]
(str name " has a top speed of " top-speed "Km/hr."))))Output
user.Car
And it works:
(def tata-nano (->Car "Tata Nano" 120))Output
#'user/tata-nano
(describe tata-nano)Output
"Tata Nano has a top speed of 120Km/hr."
Suppose we have code written by someone else that defines a Rocket record. We want to extend the Describe protocol for it without modifying the original Rocket record’s code.
(defrecord Rocket [name orbit])Output
user.Rocket
For this purpose, Clojure provides the extend-protocol function, which can be used to extend the Describe protocol as shown below:
(extend-protocol Describe
Rocket
(describe [this] (str (:name this) " reaches " (:orbit this) " orbit.")))Output
nil
In the code above, we specify that we want to extend a protocol using:
(extend-protocol)We specify that we want to extend Describe by passing it as the first argument:
(extend-protocol Describe)As the second argument, we specify that we want to extend the protocol for the Rocket record:
(extend-protocol Describe
Rocket)Finally, we define the implementation of the describe function:
(extend-protocol Describe
Rocket
(describe [this] (str (:name this) " reaches " (:orbit this) " orbit.")))Now, let’s create a Rocket instance called pslv:
(def pslv (->Rocket "PSLV" "Low Earth"))Output
#'user/pslv
Now, let’s pass it to describe:
(describe pslv)Output
"PSLV reaches Low Earth orbit."
It works!
22. Namespaces
| Get source code here https://gitlab.com/clojure-book/code/-/raw/master/name_space.clj |
| Watch video for this section here https://yu7.in/clj-ns |
The same word can have different meanings depending on the context. For example, 'booking' a hotel means one thing, a 'book' in a library means another, and to 'book' someone in a police station means something else entirely. Similarly, a 'page' in a book is different from a 'page' in an operating system, which is further different from 'Page' as a person’s last name.
To resolve such ambiguities in coding, Clojure provides a feature called namespaces. Consider the program name_space.clj below; try typing and executing it.
;; name_space.clj
(ns lawyer)
(def about-me "I never speak truth.")
(ns politician)
(def about-me "I loot the nation.")
(ns engineer)
(def about-me "I apply science.")
(println lawyer/about-me)
(println politician/about-me)
(println about-me)
(ns politician)
(println about-me)Execute it using clj as shown:
$ clj name_space.clj
Output:
I never speak truth. I loot the nation. I apply science. I loot the nation.
Now let’s see how the above program works. Look at this code:
(ns lawyer)
(def about-me "I never speak truth.")
(ns politician)
(def about-me "I loot the nation.")
(ns engineer)
(def about-me "I apply science.")First, we create a namespace called lawyer:
(ns lawyer)In it, we define a variable called about-me with a specific value:
(ns lawyer)
(def about-me "I never speak truth.")Next, we define a namespace called politician with its own variable called about-me:
(ns lawyer)
(def about-me "I never speak truth.")
(ns politician)
(def about-me "I loot the nation.")The about-me definition in the lawyer namespace is not overwritten by (def about-me "I loot the nation.") because they reside in different namespaces; the lawyer still does not speak the truth.
Now we create another namespace called engineer and define another about-me within that namespace:
(ns lawyer)
(def about-me "I never speak truth.")
(ns politician)
(def about-me "I loot the nation.")
(ns engineer)
(def about-me "I apply science.")Now let’s see how to access these three different about-me definitions in different namespaces.
We are currently in the engineer namespace. To access about-me in the lawyer namespace, we need to use lawyer/about-me, as shown in the last line of the code snippet below:
(ns engineer)
(def about-me "I apply science.")
(println lawyer/about-me)This will print I never speak truth.. Similarly, look at the last line in the code snippet below:
(ns engineer)
(def about-me "I apply science.")
(println lawyer/about-me)
(println politician/about-me)By printing politician/about-me, we access the value of about-me in the politician namespace, resulting in the output I loot the nation. on the terminal.
Since we are in the engineer namespace, there is no need to use engineer/about-me, although doing so would make the code more explicit. Look at the last line in the snippet below:
(ns engineer)
(def about-me "I apply science.")
(println lawyer/about-me)
(println politician/about-me)
(println about-me)Since this about-me is called within the engineer namespace, it prints I apply science..
Finally, let’s switch the namespace to politician using the following line:
(ns politician)Now that we have switched to the politician namespace, printing about-me:
(println about-me)prints I loot the nation. once again.
23. Exception Handling
| Watch video for this section here https://yu7.in/clj-exh |
The world is a big and complex place. While you code, you look into a tiny set of precise rules that best describe the problem thrown at you, and there is a chance that the logic you create does not satisfy the world’s needs. Something unexpected might happen, and you may need to handle it in your code. Welcome to exception handling.
Let’s say you want to read from a file, but the file does not exist. To read a file, we use (slurp "does_not_exist.txt"); this will throw an exception because does_not_exist.txt does not exist. To handle this, we wrap it and tell Clojure to try it as shown:
(try
(slurp "does_not_exist.txt"))Still, when an exception occurs, we need to capture it. We can use (catch Exception e (println (str "caught exception: " (.getMessage e)))) as shown below:
(try
(slurp "does_not_exist.txt")
(catch Exception e (println (str "caught exception: " (.getMessage e)))))Output
caught exception: does_not_exist.txt (No such file or directory)
When we execute the code above, we get the output shown above. That is, the exception is caught in variable e, and we retrieve the message using (.getMessage e) and print it out.
Whenever an exception occurs or the code breaks, the subsequent code does not get executed. Execute the code below:
(try
(slurp "does_not_exist.txt")
(println "this won't be printed")
(catch Exception e (println (str "caught exception: " (.getMessage e)))))Output
caught exception: does_not_exist.txt (No such file or directory)
In the above example, since (slurp "does_not_exist.txt") throws an exception, the line (println "this won’t be printed") is not executed. The exception is caught and the message is printed via (catch Exception e (println (str "caught exception: " (.getMessage e)))).
Suppose that when an exception occurs, you still need to perform an action—perhaps logging it in a file so that the programmer is aware of it. You can do this using a form that includes the finally clause:
(try
(slurp "does_not_exist.txt")
(println "this won't be printed")
(catch Exception e (println (str "caught exception: " (.getMessage e))))
(finally (println "code something that will deal with this exception")))Output
caught exception: does_not_exist.txt (No such file or directory) code something that will deal with this exception
The finally form is executed even if an exception occurred, which is why we see the string code something that will deal with this exception printed out.
Until now, we have caught exceptions using a very general form: (catch Exception e (println (str "caught exception: " (.getMessage e)))). However, in real coding situations, it is helpful to catch exceptions in a more specific form. For example, if you are trying to open a file, you should check specifically for a FileNotFoundException.
You might wonder where FileNotFoundException comes from. You can refer to https://docs.oracle.com/javase/8/docs/api/java/io/package-summary.html and look for the "Exception Summary" section.
|
Take a look at the code below and execute it:
(try
(slurp "does_not_exist.txt")
(println "this won't be printed")
(catch java.io.FileNotFoundException e (println (str "caught exception: " (.getMessage e))))
(finally (println "code something that will deal with this exception")))Output
caught exception: does_not_exist.txt (No such file or directory) code something that will deal with this exception
Here, instead of using a general Exception catch, we use (catch java.io.FileNotFoundException e (println (str "caught exception: " (.getMessage e)))), and it works. A good programmer should anticipate what could go wrong in their code and catch specific exceptions to deal with them appropriately.
One can catch multiple exceptions in a try block. In the example below, we catch NumberFormatException, NullPointerException, and a general Exception to catch any others that were missed. Let’s execute the code:
(try
;; Code that might throw an exception
(let [x (Integer/parseInt "not-a-number")]
(println x))
(catch NumberFormatException e
(println "Caught a NumberFormatException:" (.getMessage e)))
(catch NullPointerException e
(println "Caught a NullPointerException:" (.getMessage e)))
(catch Exception e
(println "Caught a generic exception:" (.getMessage e))))Output
Caught a NumberFormatException: For input string: "not-a-number"
Therefore, a NumberFormatException is thrown because the string not-a-number cannot be converted to an integer. Let’s try the same code with NullPointerException and Exception as shown below:
(defn print-length [s]
(println "Length of the string is:" (.length s)))
;; Calling the function with a non-null string
(print-length "Hello, World!") ;; Works fine
;; Calling the function with nil
(print-length nil)
(try
;; Code that might throw an exception
(print-length nil)
(catch NumberFormatException e
(println "Caught a NumberFormatException:" (.getMessage e)))
(catch NullPointerException e
(println "Caught a NullPointerException:" (.getMessage e)))
(catch Exception e
(println "Caught a generic exception:" (.getMessage e))))Output
Caught a NullPointerException: nil
When the above code is executed, a NullPointerException is thrown because nil is passed to the print-length function, and hence its length cannot be calculated in (.length s). As a result, this code block:
(catch NullPointerException e
(println "Caught a NullPointerException:" (.getMessage e)))gets triggered, and Caught a NullPointerException: nil is printed.
24. Testing
| Watch the video for this section here: https://yu7.in/clj-test |
Testing is an integral part of coding. Suppose you write a piece of code that is used millions of times. If a colleague modifies it and it fails in certain cases, how can they identify those failures? When you write code, you should also write tests for it. This ensures that when someone modifies your code, they can run the corresponding tests to verify that everything still works correctly.
Since tests are written in code, testing is automated. Because computers can run these tests very quickly, it saves a significant amount of time.
A robust test suite allows you to refactor your code with confidence, knowing that the tests will verify that the code still works as expected.
Let’s consider the piece of code shown below:
;; calc_lib.clj
(defn add [a b]
(+ a b))
(defn sub [a b]
(- a b))This code is in a file called calc_lib.clj and contains two functions that add and subtract two numbers. Now, let’s write tests for it.
First, let’s create a Clojure file called calc_lib_test.clj. Note that the file we are testing is calc_lib.clj, and the corresponding test file is calc_lib_test.clj. We simply append _test to the filename to indicate it is a test file.
;; calc_lib_test.cljFrom the Clojure test library [9], we will require three functions: deftest, which is used to define a test; testing, which is used to create a named subspace within deftest; and is, which is used to assert a condition and print a message if the assertion fails.
Our file now looks like this:
;; calc_lib_test.clj
(require '[clojure.test :refer [deftest is testing]])Next, we load calc_lib.clj, the file we want to test:
;; calc_lib_test.clj
(require '[clojure.test :refer [deftest is testing]])
(load-file "calc_lib.clj")Now, let’s define a test function called calc_lib_test:
;; calc_lib_test.clj
(require '[clojure.test :refer [deftest is testing]])
(load-file "calc_lib.clj")
; nest within `deftest` in source file
(deftest calc_lib_test)As shown above, it is defined using (deftest calc_lib_test). Now, let’s add a description for what we are testing, "calc_lib", using (testing "calc_lib"):
;; calc_lib_test.clj
(require '[clojure.test :refer [deftest is testing]])
(load-file "calc_lib.clj")
; nest within `deftest` in source file
(deftest calc_lib_test
(testing "calc_lib"))Now, let’s first test the add function by adding another testing block:
;; calc_lib_test.clj
(require '[clojure.test :refer [deftest is testing]])
(load-file "calc_lib.clj")
; nest within `deftest` in source file
(deftest calc_lib_test
(testing "calc_lib"
(testing "add")))We want to verify that (add 2 2) equals 4:
(= 4 (add 2 2))Now, we pass this assertion to the is function:
(is (= 4 (add 2 2)))Finally, we pass it as the second argument to the testing function that describes the "add" test:
;; calc_lib_test.clj
(require '[clojure.test :refer [deftest is testing]])
(load-file "calc_lib.clj")
; nest within `deftest` in source file
(deftest calc_lib_test
(testing "calc_lib"
(testing "add"
(is (= 4 (add 2 2))))))Now, let’s call calc_lib_test to run the test:
;; calc_lib_test.clj
(require '[clojure.test :refer [deftest is testing]])
(load-file "calc_lib.clj")
; nest within `deftest` in source file
(deftest calc_lib_test
(testing "calc_lib"
(testing "add"
(is (= 4 (add 2 2))))))
(calc_lib_test)Run the file using clj:
$ clj calc_lib_test.clj
Nothing is printed because the test passes.
Now, change 4 to 5 in the code to simulate a failure:
;; calc_lib_test.clj
(require '[clojure.test :refer [deftest is testing]])
(load-file "calc_lib.clj")
; nest within `deftest` in source file
(deftest calc_lib_test
(testing "calc_lib"
(testing "add"
(is (= 5 (add 2 2))))))
(calc_lib_test)Run the file again:
$ clj calc_lib_test.clj WARNING: Implicit use of clojure.main with options is deprecated, use -M FAIL in (calc_lib_test) (calc_lib_test.clj:11) calc_lib add expected: (= 5 (add 2 2)) actual: (not (= 5 4))
As you can see, since the assertion fails, the output indicates that within calc_lib and add, an assertion failed, showing both the expected and actual results.
The more detailed descriptions you provide in testing blocks, the easier it is to identify what went wrong. The line number of the failure is also printed.
;; calc_lib_test.clj
(require '[clojure.test :refer [deftest is testing]])
(load-file "calc_lib.clj")
; nest within `deftest` in source file
(deftest calc_lib_test
(testing "calc_lib"
(testing "add"
(is (= 5 (add 2 2)) "adding 2 and 2 should give the correct output"))))
(calc_lib_test)We have added a second argument to the is function to describe the test. Let’s run the file:
$ clj calc_lib_test.clj WARNING: Implicit use of clojure.main with options is deprecated, use -M FAIL in (calc_lib_test) (calc_lib_test.clj:11) calc_lib add adding 2 and 2 should give the correct output expected: (= 5 (add 2 2)) actual: (not (= 5 4))
When a test fails, the description passed to is is printed, providing more clues for debugging.
Let’s revert to the passing code:
;; calc_lib_test.clj
(require '[clojure.test :refer [deftest is testing]])
(load-file "calc_lib.clj")
; nest within `deftest` in source file
(deftest calc_lib_test
(testing "calc_lib"
(testing "add"
(is (= 4 (add 2 2))))))
(calc_lib_test)Now, let’s add a second assertion to check if 3 and 4 add up to 7:
;; calc_lib_test.clj
(require '[clojure.test :refer [deftest is testing]])
(load-file "calc_lib.clj")
; nest within `deftest` in source file
(deftest calc_lib_test
(testing "calc_lib"
(testing "add"
(is (= 4 (add 2 2)))
(is (= 7 (add 3 4))))))
(calc_lib_test)Finally, we can test the sub function by adding another testing block:
;; calc_lib_test.clj
(require '[clojure.test :refer [deftest is testing]])
(load-file "calc_lib.clj")
; nest within `deftest` in source file
(deftest calc_lib_test
(testing "calc_lib"
(testing "add"
(is (= 4 (add 2 2)))
(is (= 7 (add 3 4))))
(testing "sub"
(is (= 0 (sub -2 -2)))
(is (= 7 (sub 3 -4))))))
(calc_lib_test)25. Macros
| Get the code for this section here https://gitlab.com/clojure-book/code/-/raw/master/macro.clj |
| Watch video for this section here https://yu7.in/clj-macros |
Lets say you want to add 2 and 3 and you will write it like this:
(+ 2 3)Where + is a function and 2 and 3 are arguments. But let’s say that I am more comfortable writing it as (2 + 3) rather than (+ 2 3), how I can do that in Clojure?
When you consider any Clojure code like (+ 2 3) it’s basically a list, you can verify it in REPL as shown
user=> (type '(+ 2 3))
clojure.lang.PersistentListThe single quote here '(+ 2 3) tells to Clojure that not to execute the list. The basic thing is, any program in Clojure is a list. So even (2 + 3) is a list. Now all we need to do is convert (2 + 3) to (+ 2 3) and let it execute.
So let’s imagine we capture (2 + 3) in a variable called a-list:
(def a-list '(2 + 3))We take the first element:
(first a-list) ; This gets the 2Then after the first we get the last element:
(first a-list) ; This gets the 2
(last a-list) ; This gets the 3We need to grab the plus sign and put it in front, and we see the plus is in the middle of a-list which is (2 + 3), that is the + is the second element:
(second a-list)
(first a-list) ; This gets the 2
(last a-list) ; This gets the 3Now we pack it into a list:
(list ; convert (2 + 3) to (+ 2 3)
(second a-list)
(first a-list)
(last a-list))And we say the above thing is a macro named calculate which take a single argument called a-list as input:
(defmacro calculate [a-list]
(list ; convert (2 + 3) to (+ 2 3)
(second a-list)
(first a-list)
(last a-list)))Now one can try this code:
;; macro.clj
(defmacro calculate [a-list]
(list ; convert (2 + 3) to (+ 2 3)
(second a-list)
(first a-list)
(last a-list)))
(println
(calculate (2 + 3)))This will give 5 as output.
You can also use macroexpand keyword to expand a macro, see the code below:
(println
(macroexpand
'(calculate (2 + 3))))Will print out:
(+ 2 3)That’s what macro calculate is supposed to do after you give (2 + 3) as input.
The entire macro.clj code is listed below:
;; macro.clj
(defmacro calculate [a-list]
(list ; convert (2 + 3) to (+ 2 3)
(second a-list)
(first a-list)
(last a-list)))
(println
(calculate (2 + 3)))
(println
(macroexpand
'(calculate (2 + 3))))Run it and you should get output like this:
5
(+ 2 3)25.1. Templates
| Get the code for this section here https://yu7.in/iD9KAU |
| Watch video for this section here https://yu7.in/Q39kCj |
There is a better way of writing macros, that is using templates. In this section we will see how its done.
You know Clojure has if method in it, it can be used as follows:
(if (even? 1) "even" "odd")Output
oddSo if (even? 1) is true then it will return "even" else it will return "odd". That is if the condition is true, the second argument will be returned, else the third will be returned.
Now let’s code an unless macro, it looks as follows:
(defmacro unless [pred then else]
(list 'if (list 'not pred) then else))As seen above, if the prediction is not true, then it returns the second argument, else it returns the third. It’s just the opposite of if. Let’s execute it:
(unless (even? 1) "odd" "even")Output
odd
Seems to work.
Now what if I say there is a shorter way to write it? Look at the code below:
(defmacro unless-templating [pred then else]
`(if (not ~pred) ~then ~else))(unless-templating (even? 1) "odd" "even")Output:
odd
We execute it and it seems to work. So let’s see how to write it.
First we have this defmacro, which is used to define a macro:
(defmacro)Then we have the macro name, which is unless-templating:
(defmacro unless-templating)Then we get the arguments, which are pred and then and else:
(defmacro unless-templating [pred then else])Now we need to return:
(if (not pred) then else)But this should not be executed, it should be built and returned, so we use the back tick ` (which is called quote), and it becomes something like this:
(defmacro unless-templating [pred then else]
`(if (not pred) then else))Now when I try unless-templating macro:
(unless-templating (even? 1) "odd" "even")Output
Syntax error compiling at (.calva/output-window/output.calva-repl:69:1). No such var: user/pred
I get the error above. That’s because in my macro definition, I’m treating pred, then, and else as variables, but they’re actually macro arguments that need to be inserted into the generated code. In the backtick-quoted expression, I need to unquote these arguments using ~. So here is the corrected code:
(defmacro unless-templating [pred then else]
`(if (not ~pred) ~then ~else))Now when I try unless-templating macro:
(unless-templating (even? 1) "odd" "even")Output
odd
It works!
26. Java Power
| The code for this section can be obtained here https://yu7.in/YYg1Lt |
| The video for this section can be watched here https://yu7.in/iWM6PT. I will soon put a dedicated video for this section of this book. |
Clojure is a hosted language, which means it neatly wraps around the language it targets. Traditionally, Java is its host. There are other incarnations of Clojure that wrap around JavaScript, Dart, .NET, C++, and so on. This book focuses on Clojure running on the JVM (Java Virtual Machine).
Clojure can use the power of the base language it’s hosted upon. In the following pages, we are going to see how we can tap into the power of the vast Java ecosystem from your Clojure code.
First, create a Clojure file named power_of_java.clj and add a namespace to it.
(ns power-of-java)Now, there is a Java class (built into Java) called LocalDate [10]. Let’s import it into our Clojure file:
(ns power-of-java
(:import [java.time LocalDate]))Execute the code in the REPL.
Output
nil
Now let’s create an instance of LocalDate:
(. LocalDate now)Output
#object[java.time.LocalDate 0x5a17e7da "2025-08-23"]
If you look at the above code, we have a list (). To use the class LocalDate, we provide it as the first argument to the dot operator: (. LocalDate). Since the now() method in LocalDate returns the current date, we call it like this: (. LocalDate now).
There is another, more idiomatic way to call it:
(LocalDate/now)Output
#object[java.time.LocalDate 0xc0d150b "2025-08-23"]
Isn’t (LocalDate/now) much simpler than (. LocalDate now)? Let’s use this notation from now on.
Now, let’s say that I want to create an instance of LocalDate for a specific date, such as 2025-07-05. I can use the of method as shown:
(. LocalDate (of 2025 7 5))Output
#object[java.time.LocalDate 0x4a379f2c "2025-07-05"]
In the code above, 2025 is the year, 7 is the month, and 5 is the day. These are passed as arguments to the of method. Similarly, if I want to create an instance of LocalDate for 2025-07-10, I can use the of method as follows:
(. LocalDate (of 2025 7 10))Output
#object[java.time.LocalDate 0x1d897344 "2025-07-10"]
Instead of the above code, we can use the of method like this:
(LocalDate/of 2025 7 10)Output
#object[java.time.LocalDate 0x4ad9050b "2025-07-10"]
Let me define two dates named start-date and end-date:
(def start-date (LocalDate/of 2025 7 5))
(def end-date (LocalDate/of 2025 7 10))now and of are static class methods. Now, let’s say I want to add a day to an instance of LocalDate. I can use the plusDays method as follows:
(.plusDays (LocalDate/now) 1)Output
#object[java.time.LocalDate 0x1a3a0c1b "2025-08-24"]
plusDays acts on an instance of LocalDate, so we call it like this: (.plusDays (LocalDate/now) 1). Functions like plusDays are called instance methods.
Note how we are using the function plusDays directly and not the class LocalDate. We are not writing it like this:
(LocalDate/plusDays (LocalDate/now) 1)That’s because (LocalDate/now) returns an instance of LocalDate, and Clojure can pull plusDays from the LocalDate class because it knows the type of the instance.
Now, let me write a function inc-day which will increment the date by one day.
(defn inc-day [date-time]
(.plusDays date-time 1))Next, let me generate a lazy sequence of dates using the function sequence-of-days.
(defn sequence-of-days []
(iterate inc-day (LocalDate/now)))Time to see if our code works. Let’s take a sequence of 7 days.
(take 7 (sequence-of-days))Output
( #object[java.time.LocalDate 0x59a25fd8 "2025-08-23"] #object[java.time.LocalDate 0x4829ecb8 "2025-08-24"] #object[java.time.LocalDate 0x65649752 "2025-08-25"] #object[java.time.LocalDate 0x192a07a6 "2025-08-26"] #object[java.time.LocalDate 0x523dd7c4 "2025-08-27"] #object[java.time.LocalDate 0x5d374cf0 "2025-08-28"] #object[java.time.LocalDate 0x61883365 "2025-08-29"] )
It works!
Now let’s create a function next-n-days which will return the next n days.
(defn next-n-days)It takes an argument n:
(defn next-n-days [n])And it returns the next n days from today:
(defn next-n-days [n]
(take n (sequence-of-days)))If no argument is given:
(defn next-n-days
([n]
(take n (sequence-of-days)))
([]))It should return the next 7 days:
(defn next-n-days
([n]
(take n (sequence-of-days)))
([]
(next-n-days 7)))Let’s test it out.
(next-n-days)Output
( #object[java.time.LocalDate 0x5d4edd4c "2025-08-23"] #object[java.time.LocalDate 0x7f234335 "2025-08-24"] #object[java.time.LocalDate 0x1977020a "2025-08-25"] #object[java.time.LocalDate 0x483e3b96 "2025-08-26"] #object[java.time.LocalDate 0x63b13b60 "2025-08-27"] #object[java.time.LocalDate 0x66ef6c8 "2025-08-28"] #object[java.time.LocalDate 0x27a8c35d "2025-08-29"] )
Now let’s generate the next 5 days:
(next-n-days 5)Output
( #object[java.time.LocalDate 0x5d184a50 "2025-08-23"] #object[java.time.LocalDate 0x71950d03 "2025-08-24"] #object[java.time.LocalDate 0x725327ff "2025-08-25"] #object[java.time.LocalDate 0x51dd6fcc "2025-08-26"] #object[java.time.LocalDate 0x4e08f56d "2025-08-27"] )
In this section, we have seen how to import a Java class and use its functions in Clojure code. The ability to use the power of the hosted language is a very powerful feature that Clojure exploits. By learning Clojure, you have the power to tap into many tried-and-tested ecosystems (in this book its the Java ecosysyem) that have been perfected over decades.
27. Projects With Leiningen
Leiningen is a tool that allows you to create Clojure projects. It helps you maintain dependencies, use external libraries, and bundle your project into a JAR file.
There is also a deps.edn way of creating projects; I will write about it once I am more familiar with it.
|
In this section, let’s create a small Leiningen project that wishes us "Hello".
27.1. Creating a Leiningen Project
| code for this section can be found in https://yu7.in/mGydAO |
| Watch video for this section here https://yu7.in/clj-lein-proj |
Fire up your terminal. We’ll name this project wish-me, so let’s create the app as shown:
$ lein new app wish-meNow you will see a folder named wish-me. If you go into it, you will see the following structure:
wish-me
├── CHANGELOG.md
├── LICENSE
├── README.md
├── doc
│ └── intro.md
├── pom.xml
├── project.clj
├── resources
├── src
│ └── wish_me
│ └── core.clj
├── target
└── test
└── wish_me
└── core_test.clj| A Clojure expert would explain what all these files mean. But I don’t claim such greatness; I’m just a Clojure learner. |
Concentrate on the file src/wish_me/core.clj; you will see code as shown:
(ns wish-me.core
(:gen-class))
(defn -main
"I don't do a whole lot ... yet."
[& args]
(println "Hello, World!"))Now, in the terminal, go into the wish-me folder and type:
$ lein runYou will see this output:
Hello, World!If you’ve guessed correctly, the output came from (println "Hello, World!") in src/wish_me/core.clj. If you’re wondering how lein run knew that the -main function was in src/wish_me/core.clj, look at the project.clj file:
project.clj
(defproject wish-me "0.1.0-SNAPSHOT"
:description "FIXME: write description"
:url "http://example.com/FIXME"
:license {:name "EPL-2.0 OR GPL-2.0-or-later WITH Classpath-exception-2.0"
:url "https://www.eclipse.org/legal/epl-2.0/"}
:dependencies [[org.clojure/clojure "1.11.1"]]
:main ^:skip-aot wish-me.core
:target-path "target/%s"
:profiles {:uberjar {:aot :all
:jvm-opts ["-Dclojure.compiler.direct-linking=true"]}})The :main ^:skip-aot wish-me.core line tells lein run where to start executing.
27.2. Printing args
| code for this section can be found in https://yu7.in/kkXmN5 |
Now, let’s pass some command-line arguments to lein run. Modify the program as follows:
(ns wish-me.core
(:gen-class))
(defn -main
"I don't do a whole lot ... yet."
[& args]
(println args))To implement the code above, remove (println "Hello, World!") from src/wish_me/core.clj and replace it with (println args). The variable args will contain the command-line arguments passed. Now run:
$ lein run KarthikThis will print a list containing "Karthik" as an element, as shown:
(Karthik)27.3. Saying Hello
| code for this section can be found in https://yu7.in/qChinL |
Instead of printing the arguments, let’s wish the person hello if their name is passed. Replace (println args) with (println (str "Hello " (first args) "!")), and you will get code as shown:
(ns wish-me.core
(:gen-class))
(defn -main
"I don't do a whole lot ... yet."
[& args]
(println (str "Hello " (first args) "!")))Now run:
$ lein run KarthikYou should get this output:
Hello Karthik!27.4. Decorating Output
| code for this section can be found in https://gitlab.com/clojure-book/wish-me/-/tree/decorating-output |
You shouldn’t have a single file that is so large it comprises the entire project. Instead, divide your program into multiple files. Now, create a file src/wish_me/decorator.clj and add this code:
(ns wish-me.decorator)
(defn print-stars []
(println "************************************"))Now let’s include it in core.clj
(ns wish-me.core
(:gen-class)
(:require [wish-me.decorator :as d]))
(defn -main
"I don't do a whole lot ... yet."
[& args]
(d/print-stars)
(println (str "Hello " (first args) "!"))
(d/print-stars))In the program above, the line (:require [wish-me.decorator :as d]) includes the decorator namespace as d. We then call (d/print-stars) before and after the greeting.
Now run:
$ lein run KarthikOutput
************************************
Hello Karthik!
************************************You now have a nice greeting with a decorative star line at the top and bottom. This is how you include other files in your program in a Leiningen project.
27.5. Including External Libraries
| code for this section can be found in https://gitlab.com/clojure-book/wish-me/-/tree/external-library |
| Watch video for this section here https://yu7.in/clj-ext-lib |
These days, you rarely code in isolation. Leiningen itself is a tool you downloaded from the internet, and with it you’ve created the wish-me project. If you look at the project.clj file, you’ll see something like:
:dependencies [[org.clojure/clojure "1.11.1"]]Now add the line [hiccup "2.0.0-RC2"] to the dependencies, and it will look like this:
:dependencies [[org.clojure/clojure "1.11.1"]
[hiccup "2.0.0-RC2"]]Your project.clj should look like this:
project.clj
(defproject wish-me "0.1.0-SNAPSHOT"
:description "FIXME: write description"
:url "http://example.com/FIXME"
:license {:name "EPL-2.0 OR GPL-2.0-or-later WITH Classpath-exception-2.0"
:url "https://www.eclipse.org/legal/epl-2.0/"}
:dependencies [[org.clojure/clojure "1.11.1"]
[hiccup "2.0.0-RC2"]]
:main ^:skip-aot wish-me.core
:target-path "target/%s"
:profiles {:uberjar {:aot :all
:jvm-opts ["-Dclojure.compiler.direct-linking=true"]}}Hiccup (https://clojars.org/hiccup) is a library for creating HTML. Now, we’ll modify our program so that if you run lein run Someone --html, rather than printing Hello Someone!, it will create a file called hello.html with HTML content that wishes you hello.
Modify the code in core.clj as follows:
(ns wish-me.core
(:gen-class)
(:require [wish-me.decorator :as d]
[hiccup2.core :as h]))
(defn print-to-console [name]
(d/print-stars)
(println (str "Hello " name "!"))
(d/print-stars))
(defn print-to-html [name]
(spit "hello.html"
(h/html [:html
[:body
[:h1 "Hello " name "!"]]])))
(defn -main
"I don't do a whole lot ... yet."
[& args]
(if (= "--html" (second args))
(print-to-html (first args))
(print-to-console (first args))))Now run:
$ lein run Karthik --htmlYou should now see a file named hello.html. Open it in your browser, and you will see a page like this:

We’ve included the Hiccup library and used it to generate a webpage. Thanks to Leiningen, the process is very straightforward.
27.6. Jar
| Watch video for this section here https://yu7.in/clj-jar |
You can pack your application into one standalone JAR file. Just run:
$ lein uberjarYou will see two JAR files generated in the target/default+uberjar folder:
Compiling wish-me.core
Compiling wish-me.decorator
Created /Users/karthik/code/wish-me/target/default+uberjar/wish-me-0.1.0-SNAPSHOT.jar
Created /Users/karthik/code/wish-me/target/default+uberjar/wish-me-0.1.0-SNAPSHOT-standalone.jarI’m not sure what wish-me-0.1.0-SNAPSHOT.jar is, but you can run wish-me-0.1.0-SNAPSHOT-standalone.jar as follows:
$ java -jar target/default+uberjar/wish-me-0.1.0-SNAPSHOT-standalone.jar KarthikThis will print the greeting:
************************************
Hello Karthik!
************************************Alternatively, passing the --html flag will generate an HTML file:
$ java -jar target/default+uberjar/wish-me-0.1.0-SNAPSHOT-standalone.jar Karthik --html27.7. REPL
| Watch video for this section here https://yu7.in/clj-test-lein |
| code for this section can be found in https://gitlab.com/clojure-book/wish-me/-/tree/repl |
REPL-driven development can significantly accelerate your Clojure development process. In previous sections, you might have used lein repl to start a REPL, but since this is now a Leiningen project, things are a bit easier.
Press Cmd+P (Mac) or Ctrl+P (Linux/Windows), and type > jack in into the prompt:
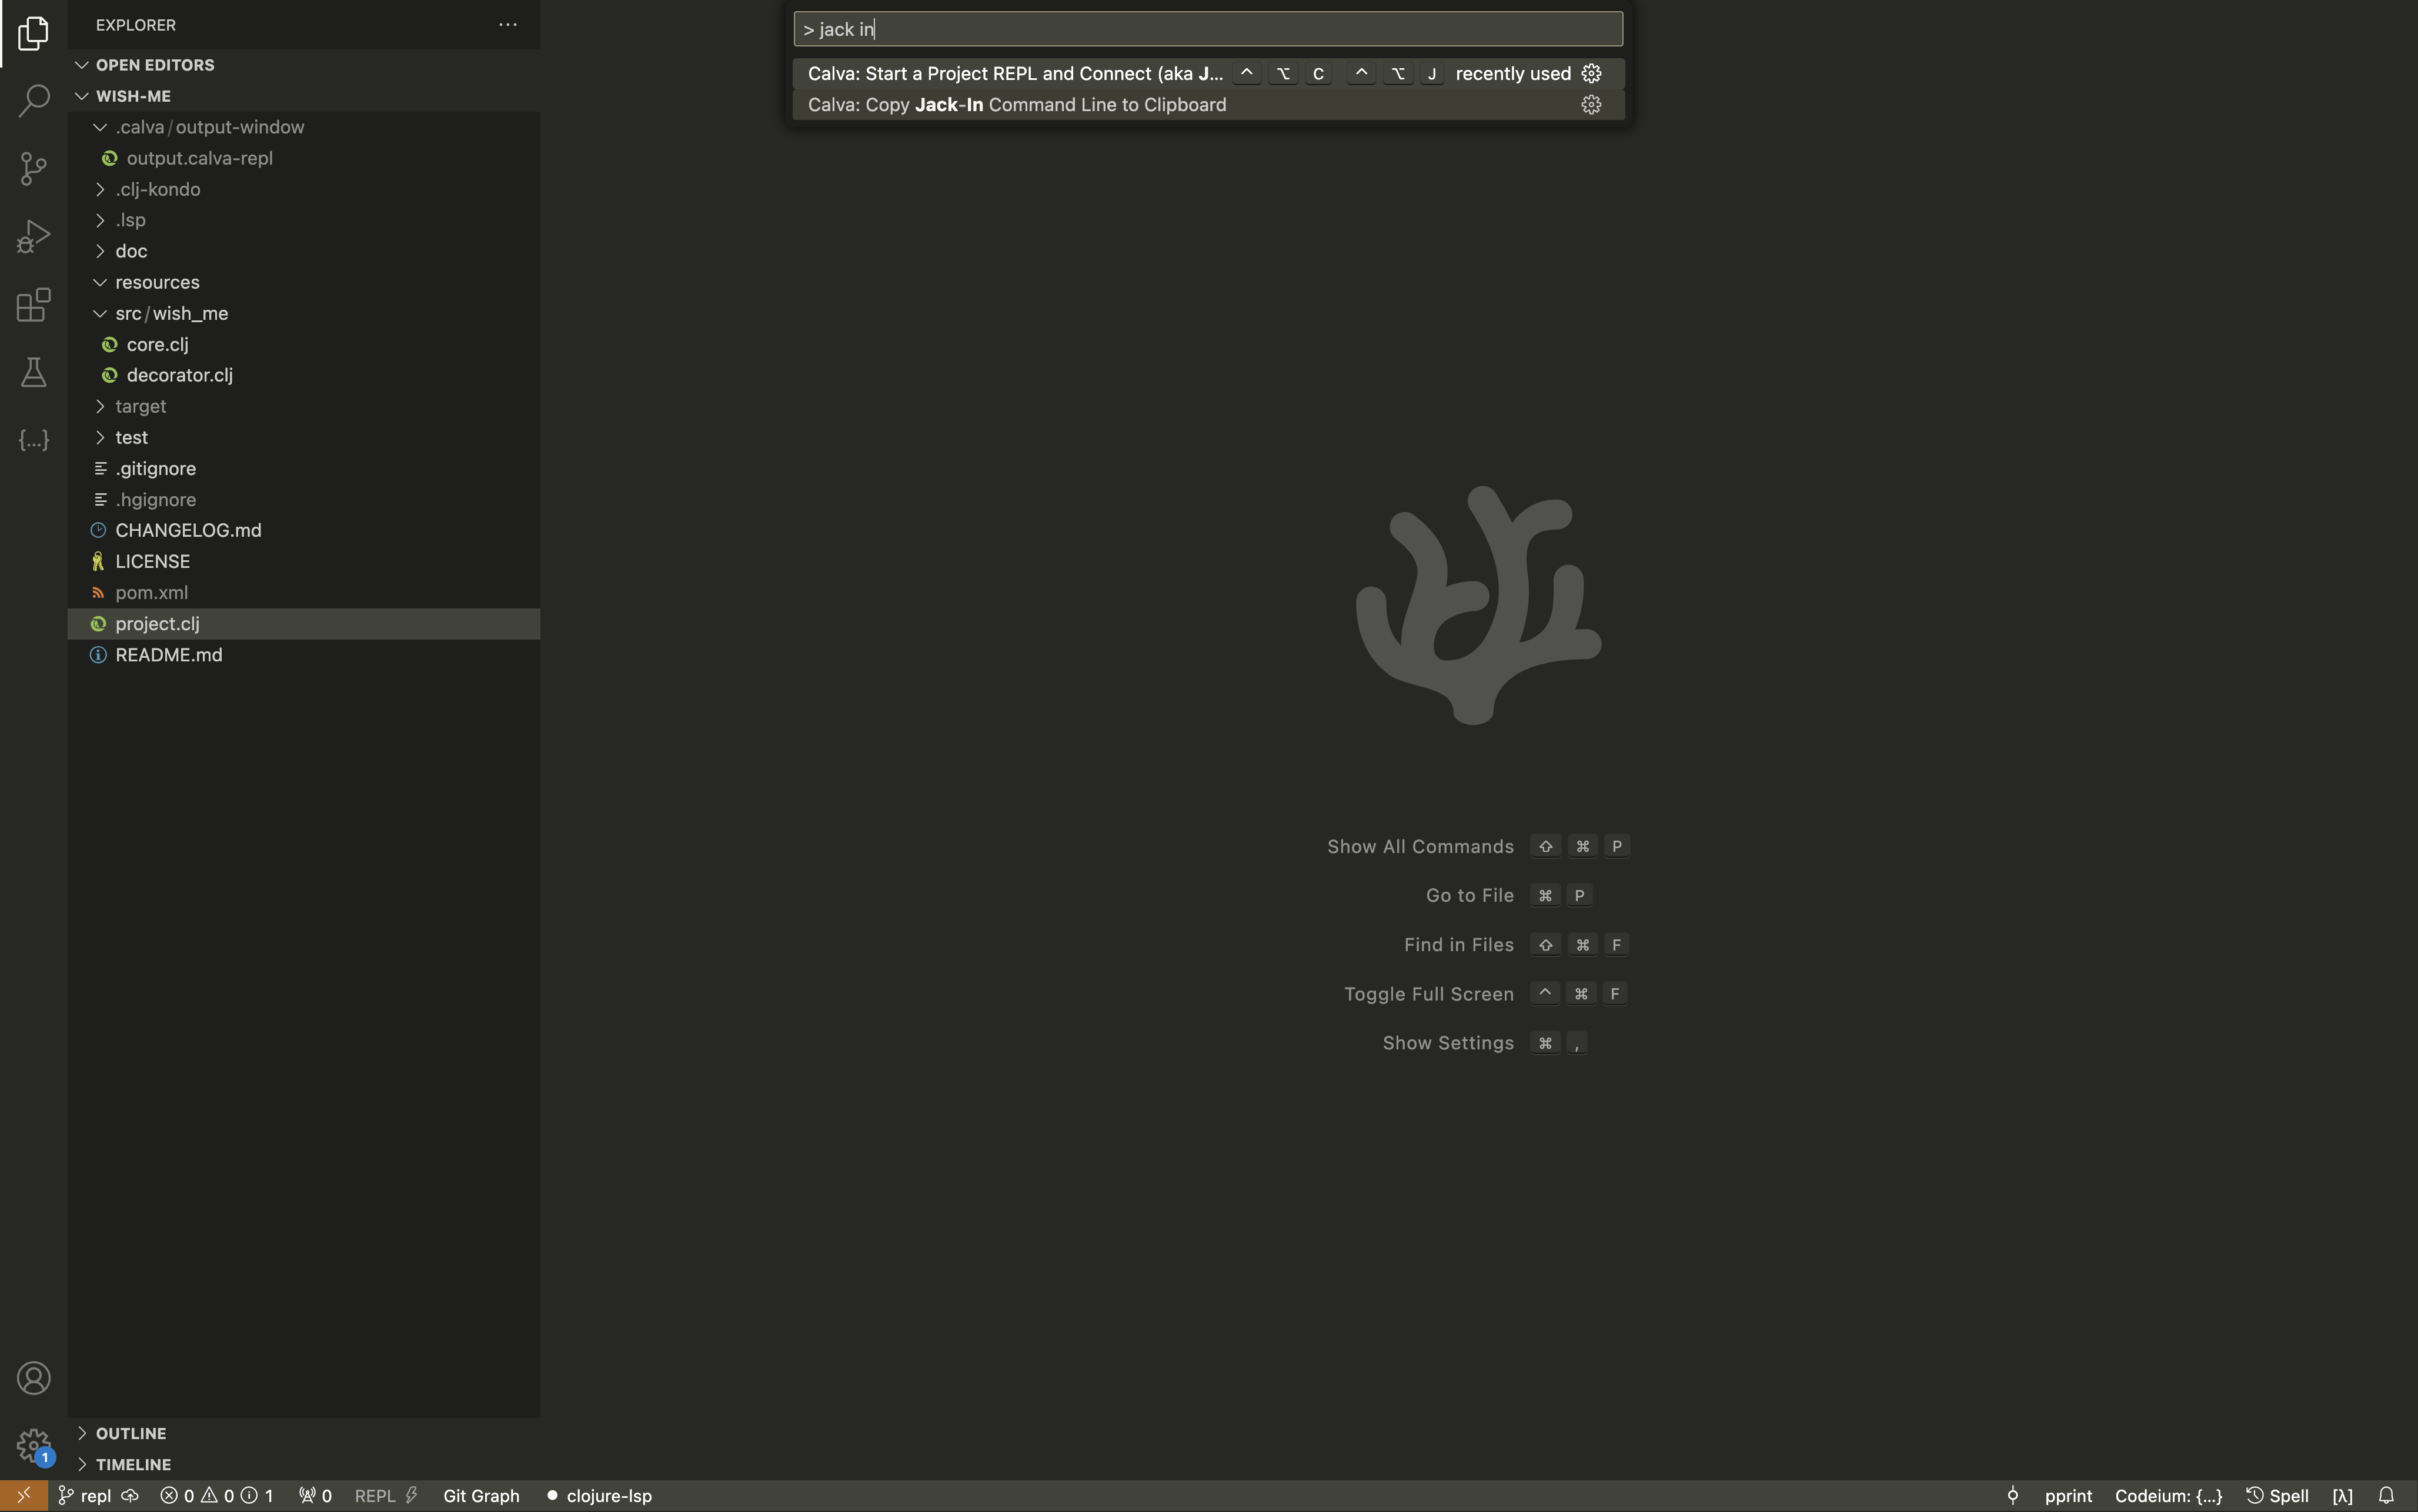
You will see two options: one to "Start a Project REPL" and another to "Copy the jack in command". Select "Start a Project REPL". Next, Calva will present several options; select "Leiningen":
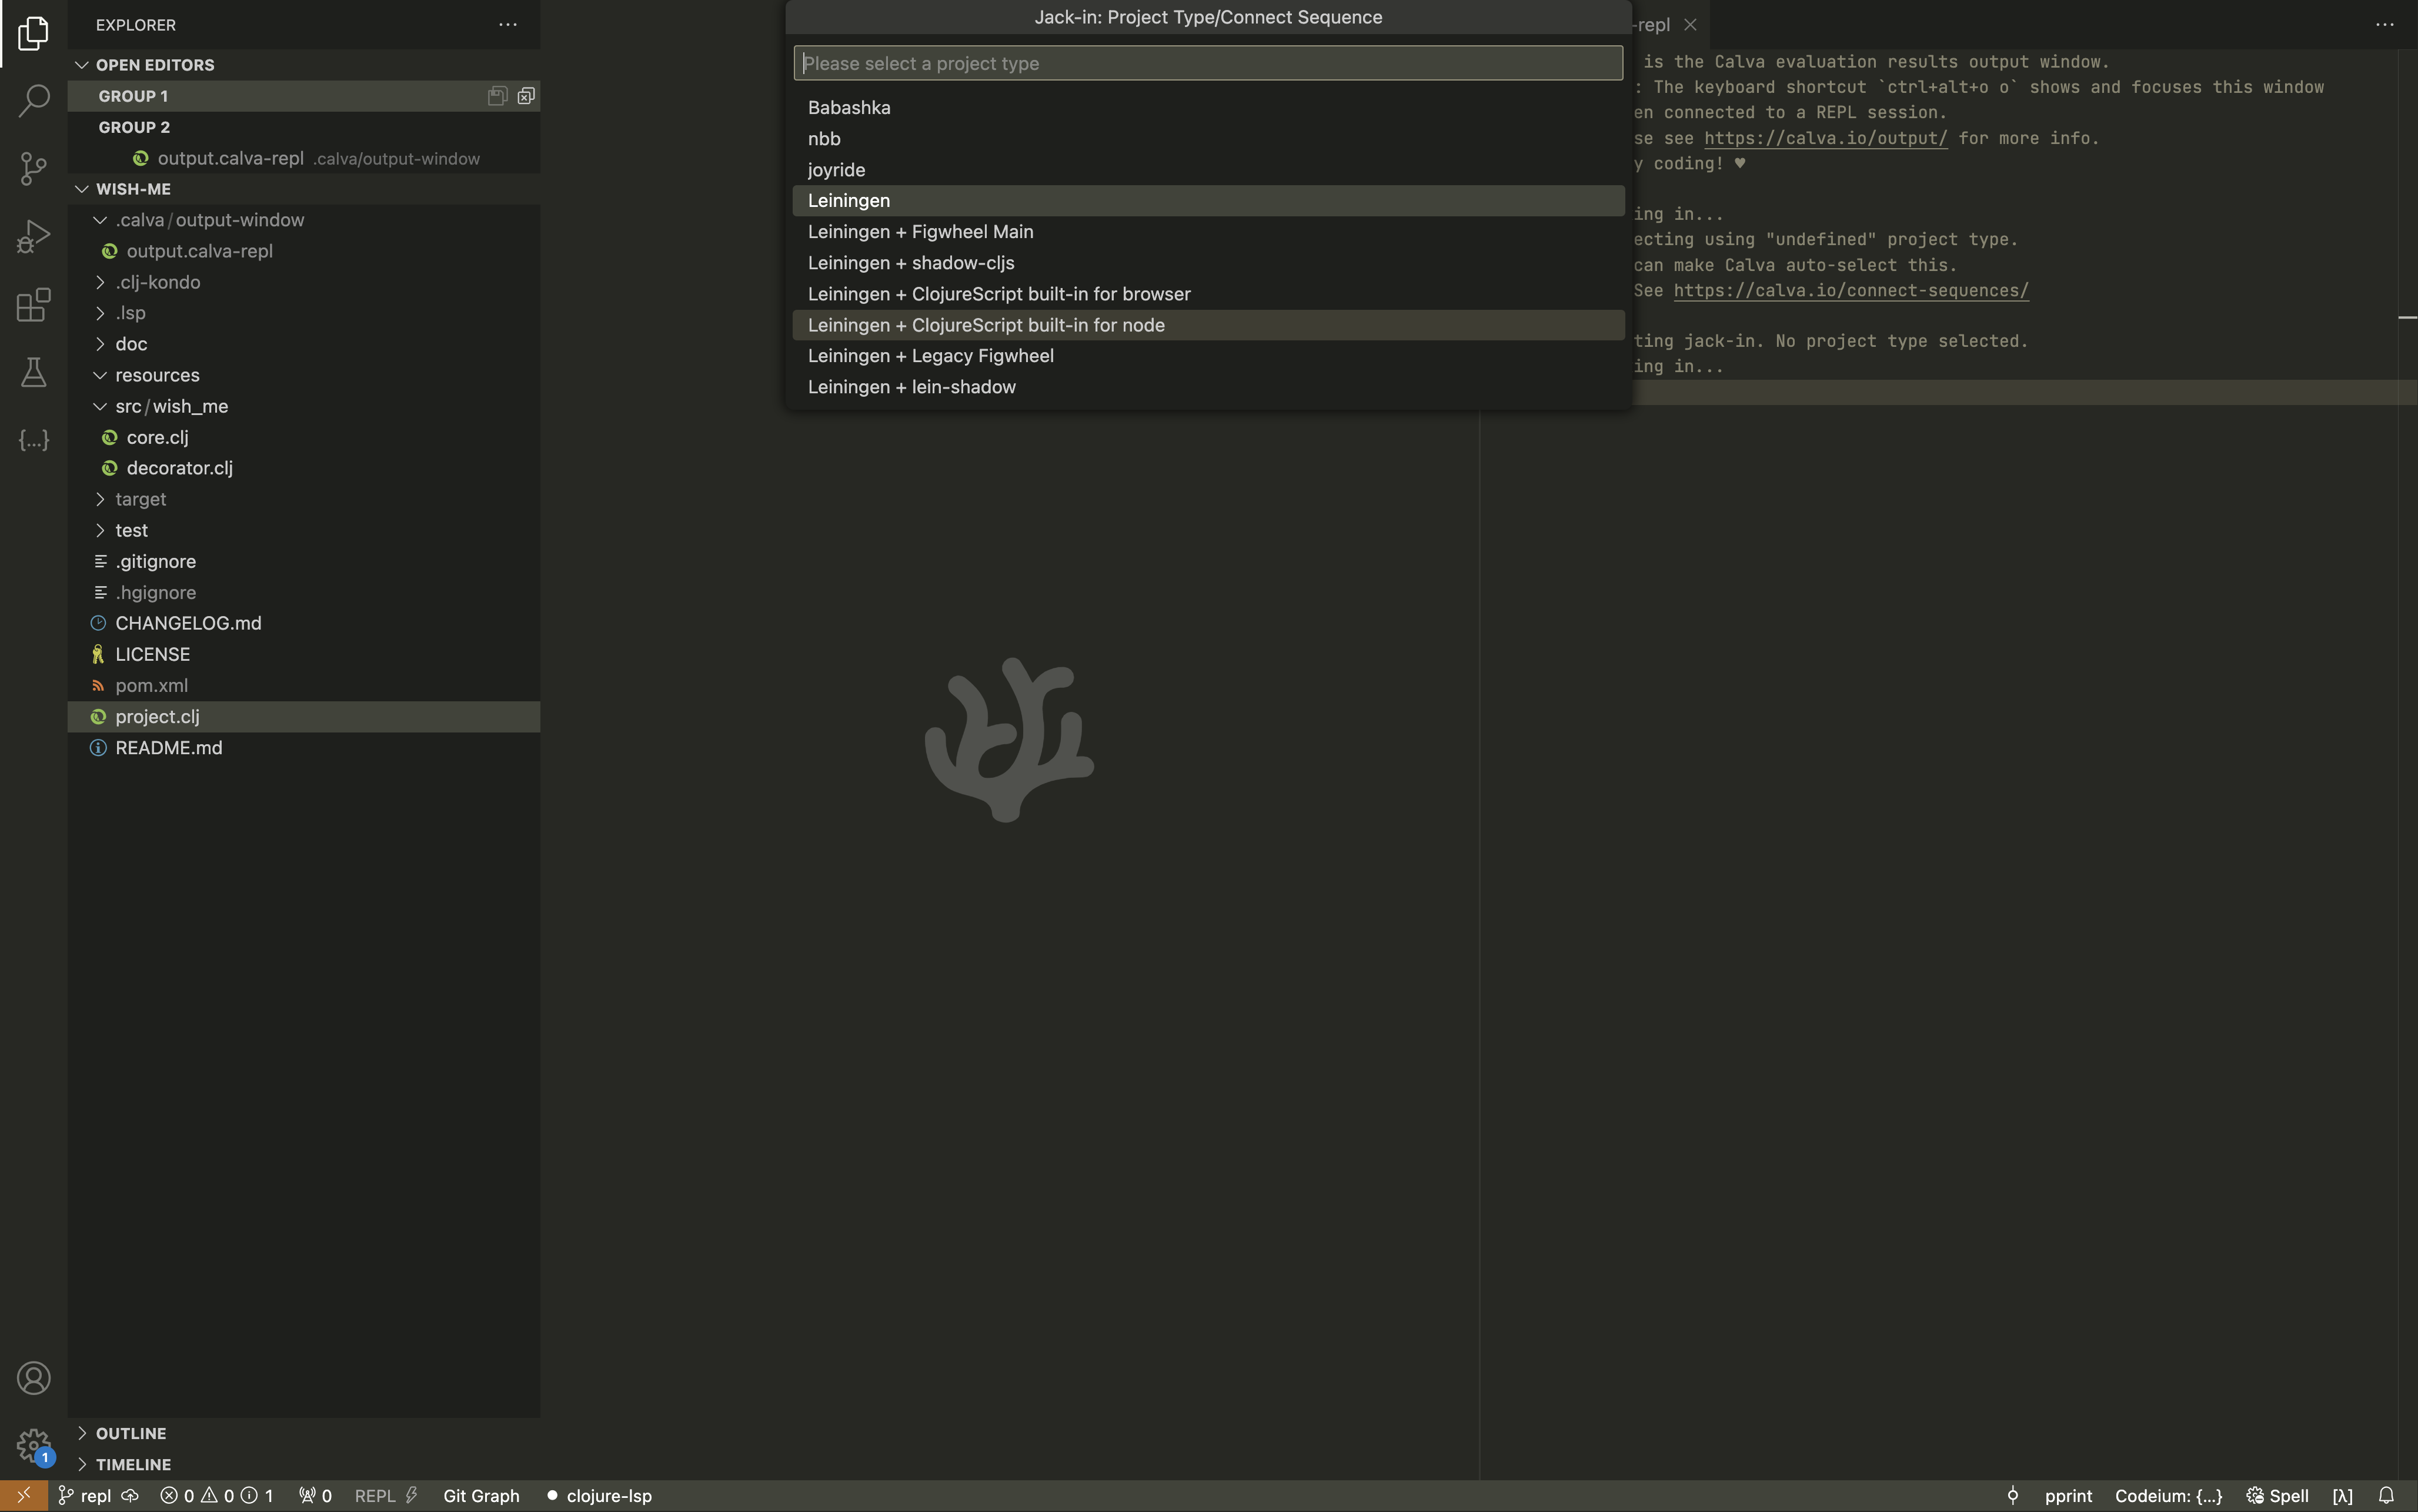
Calva may mention :uberjar as shown below; if you’re unsure, just press Enter.
The REPL will then "jack in" as shown:
Now, let’s create a file named src/wish_me/repl.clj and add this code:
repl.clj
(ns wish-me.repl)
(defn testing-repl []
"Hello repl!")to test the REPL. Place your cursor on testing-repl and press Ctrl+Enter (Linux/Windows) or kbd[Option + Enter] (Mac). You will see the function loaded in the REPL.
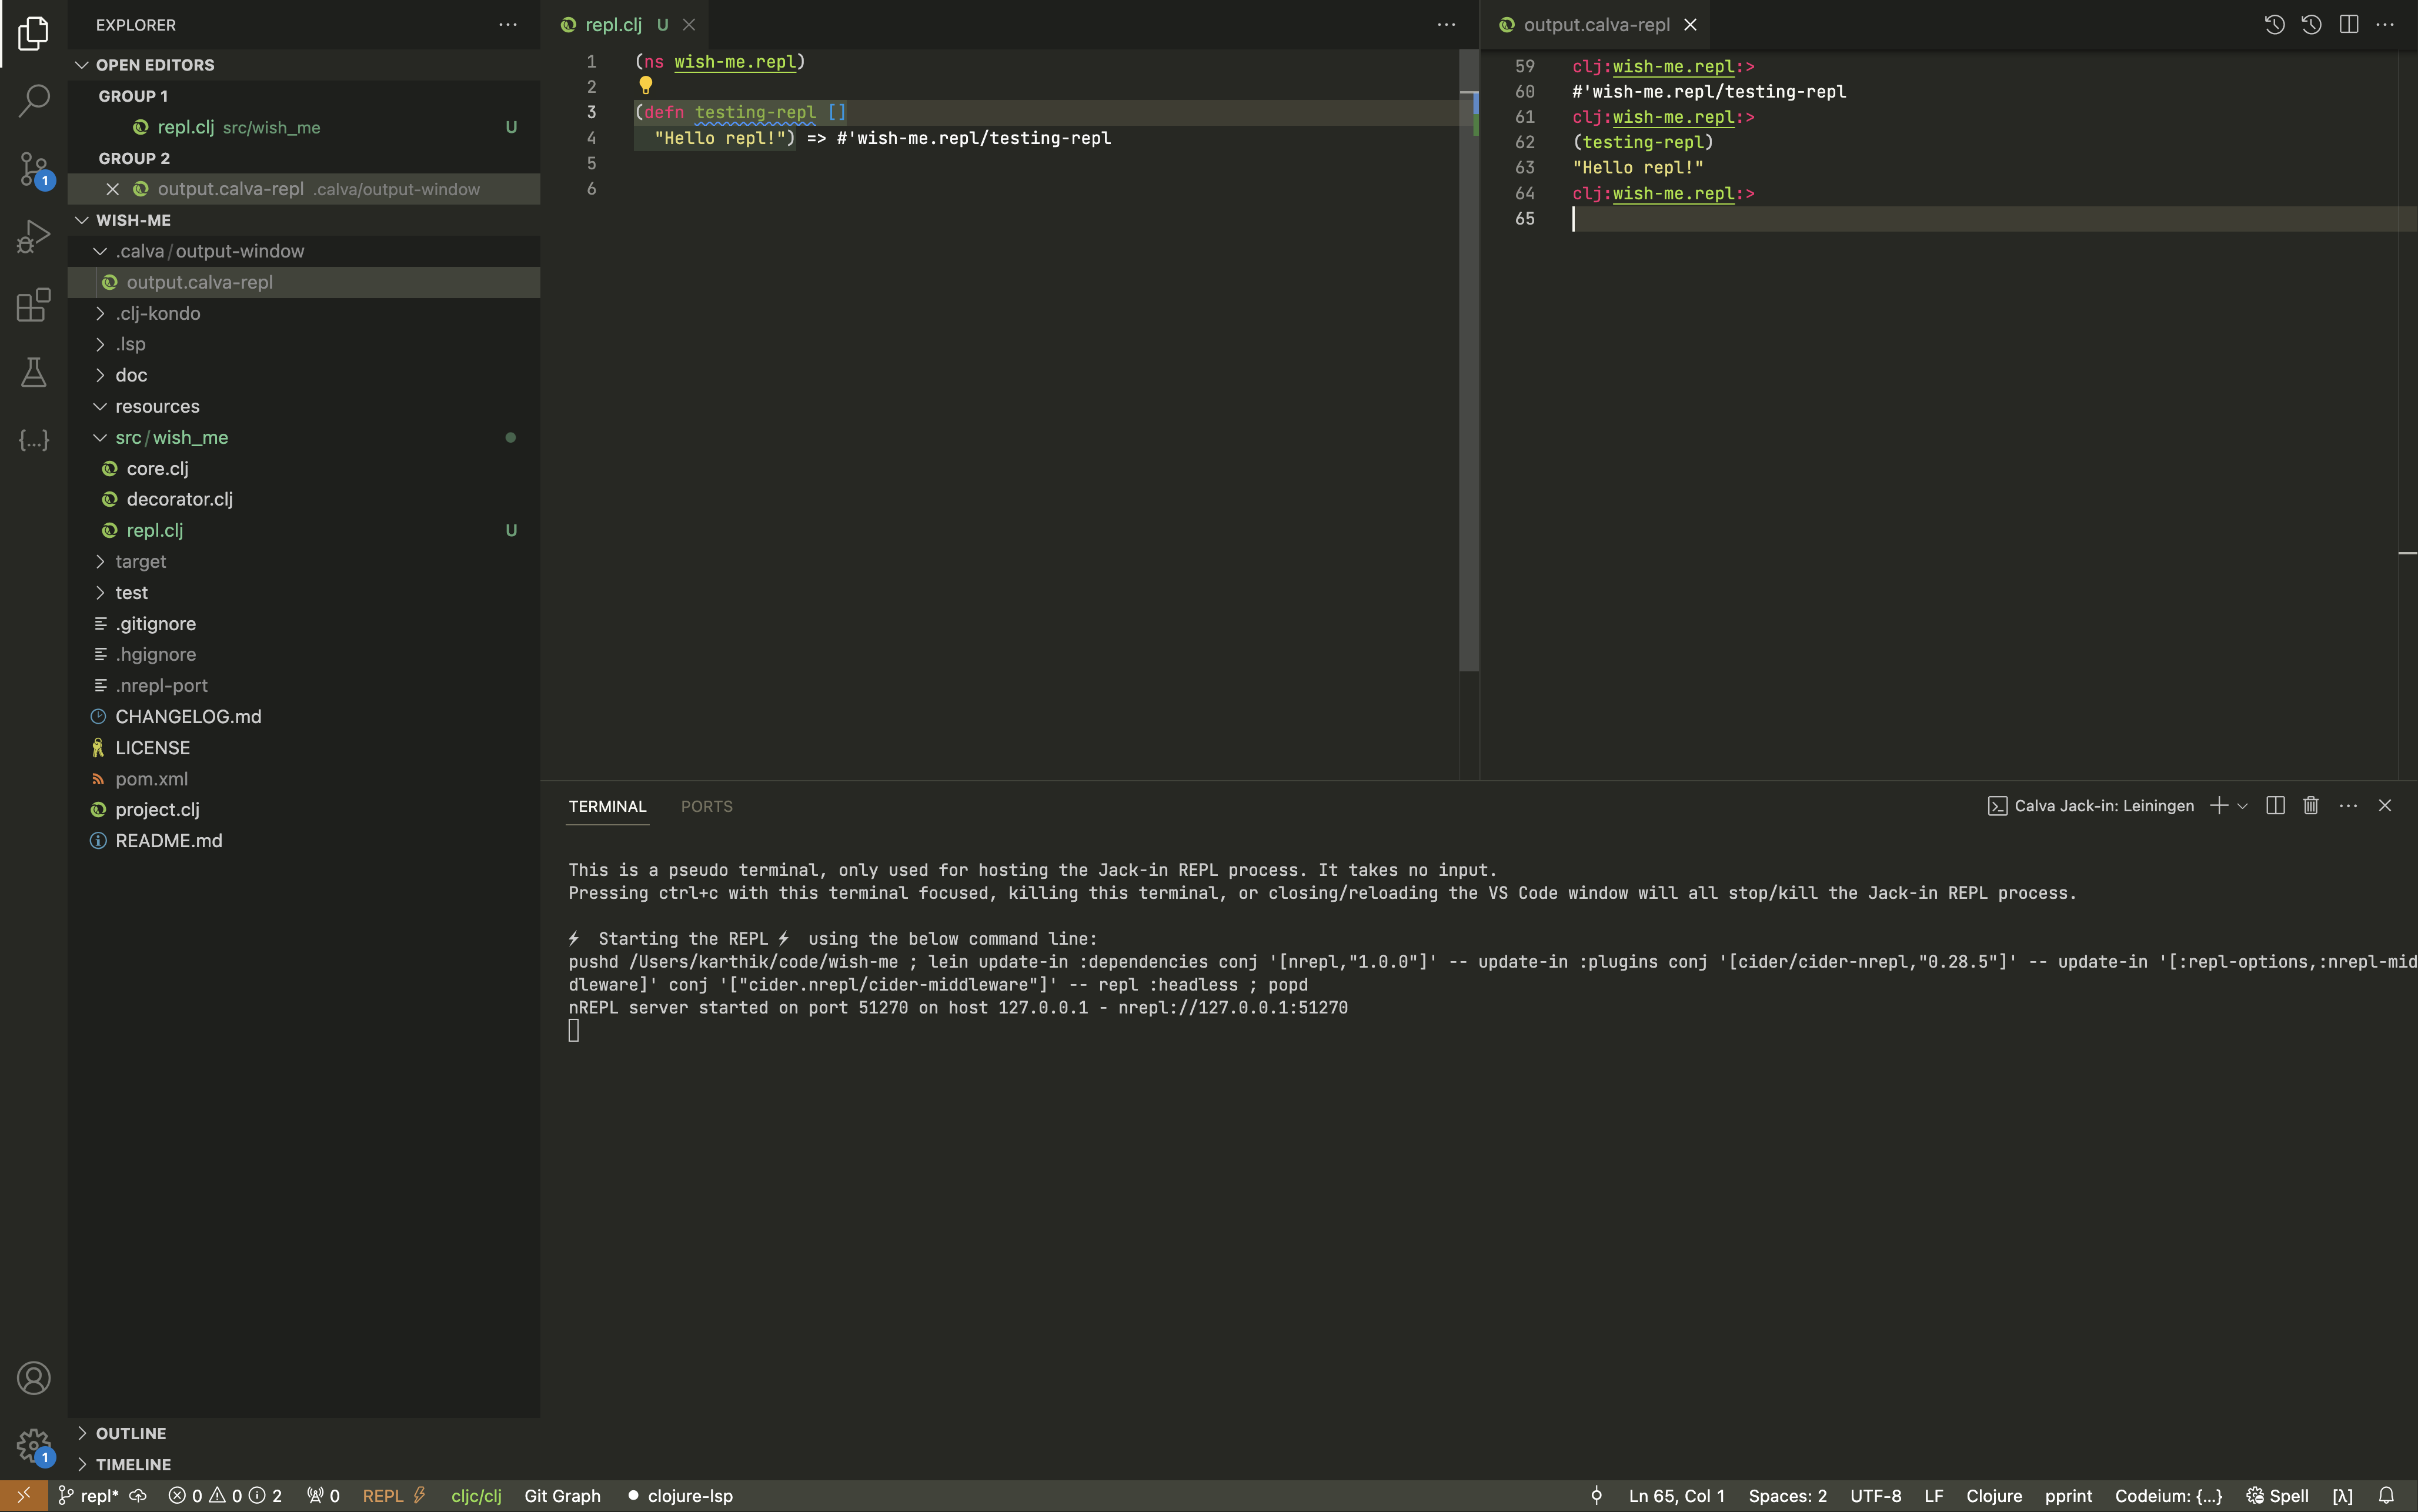
Now, in the REPL, call (testing-repl), and you’ll see "Hello repl!" as the output:
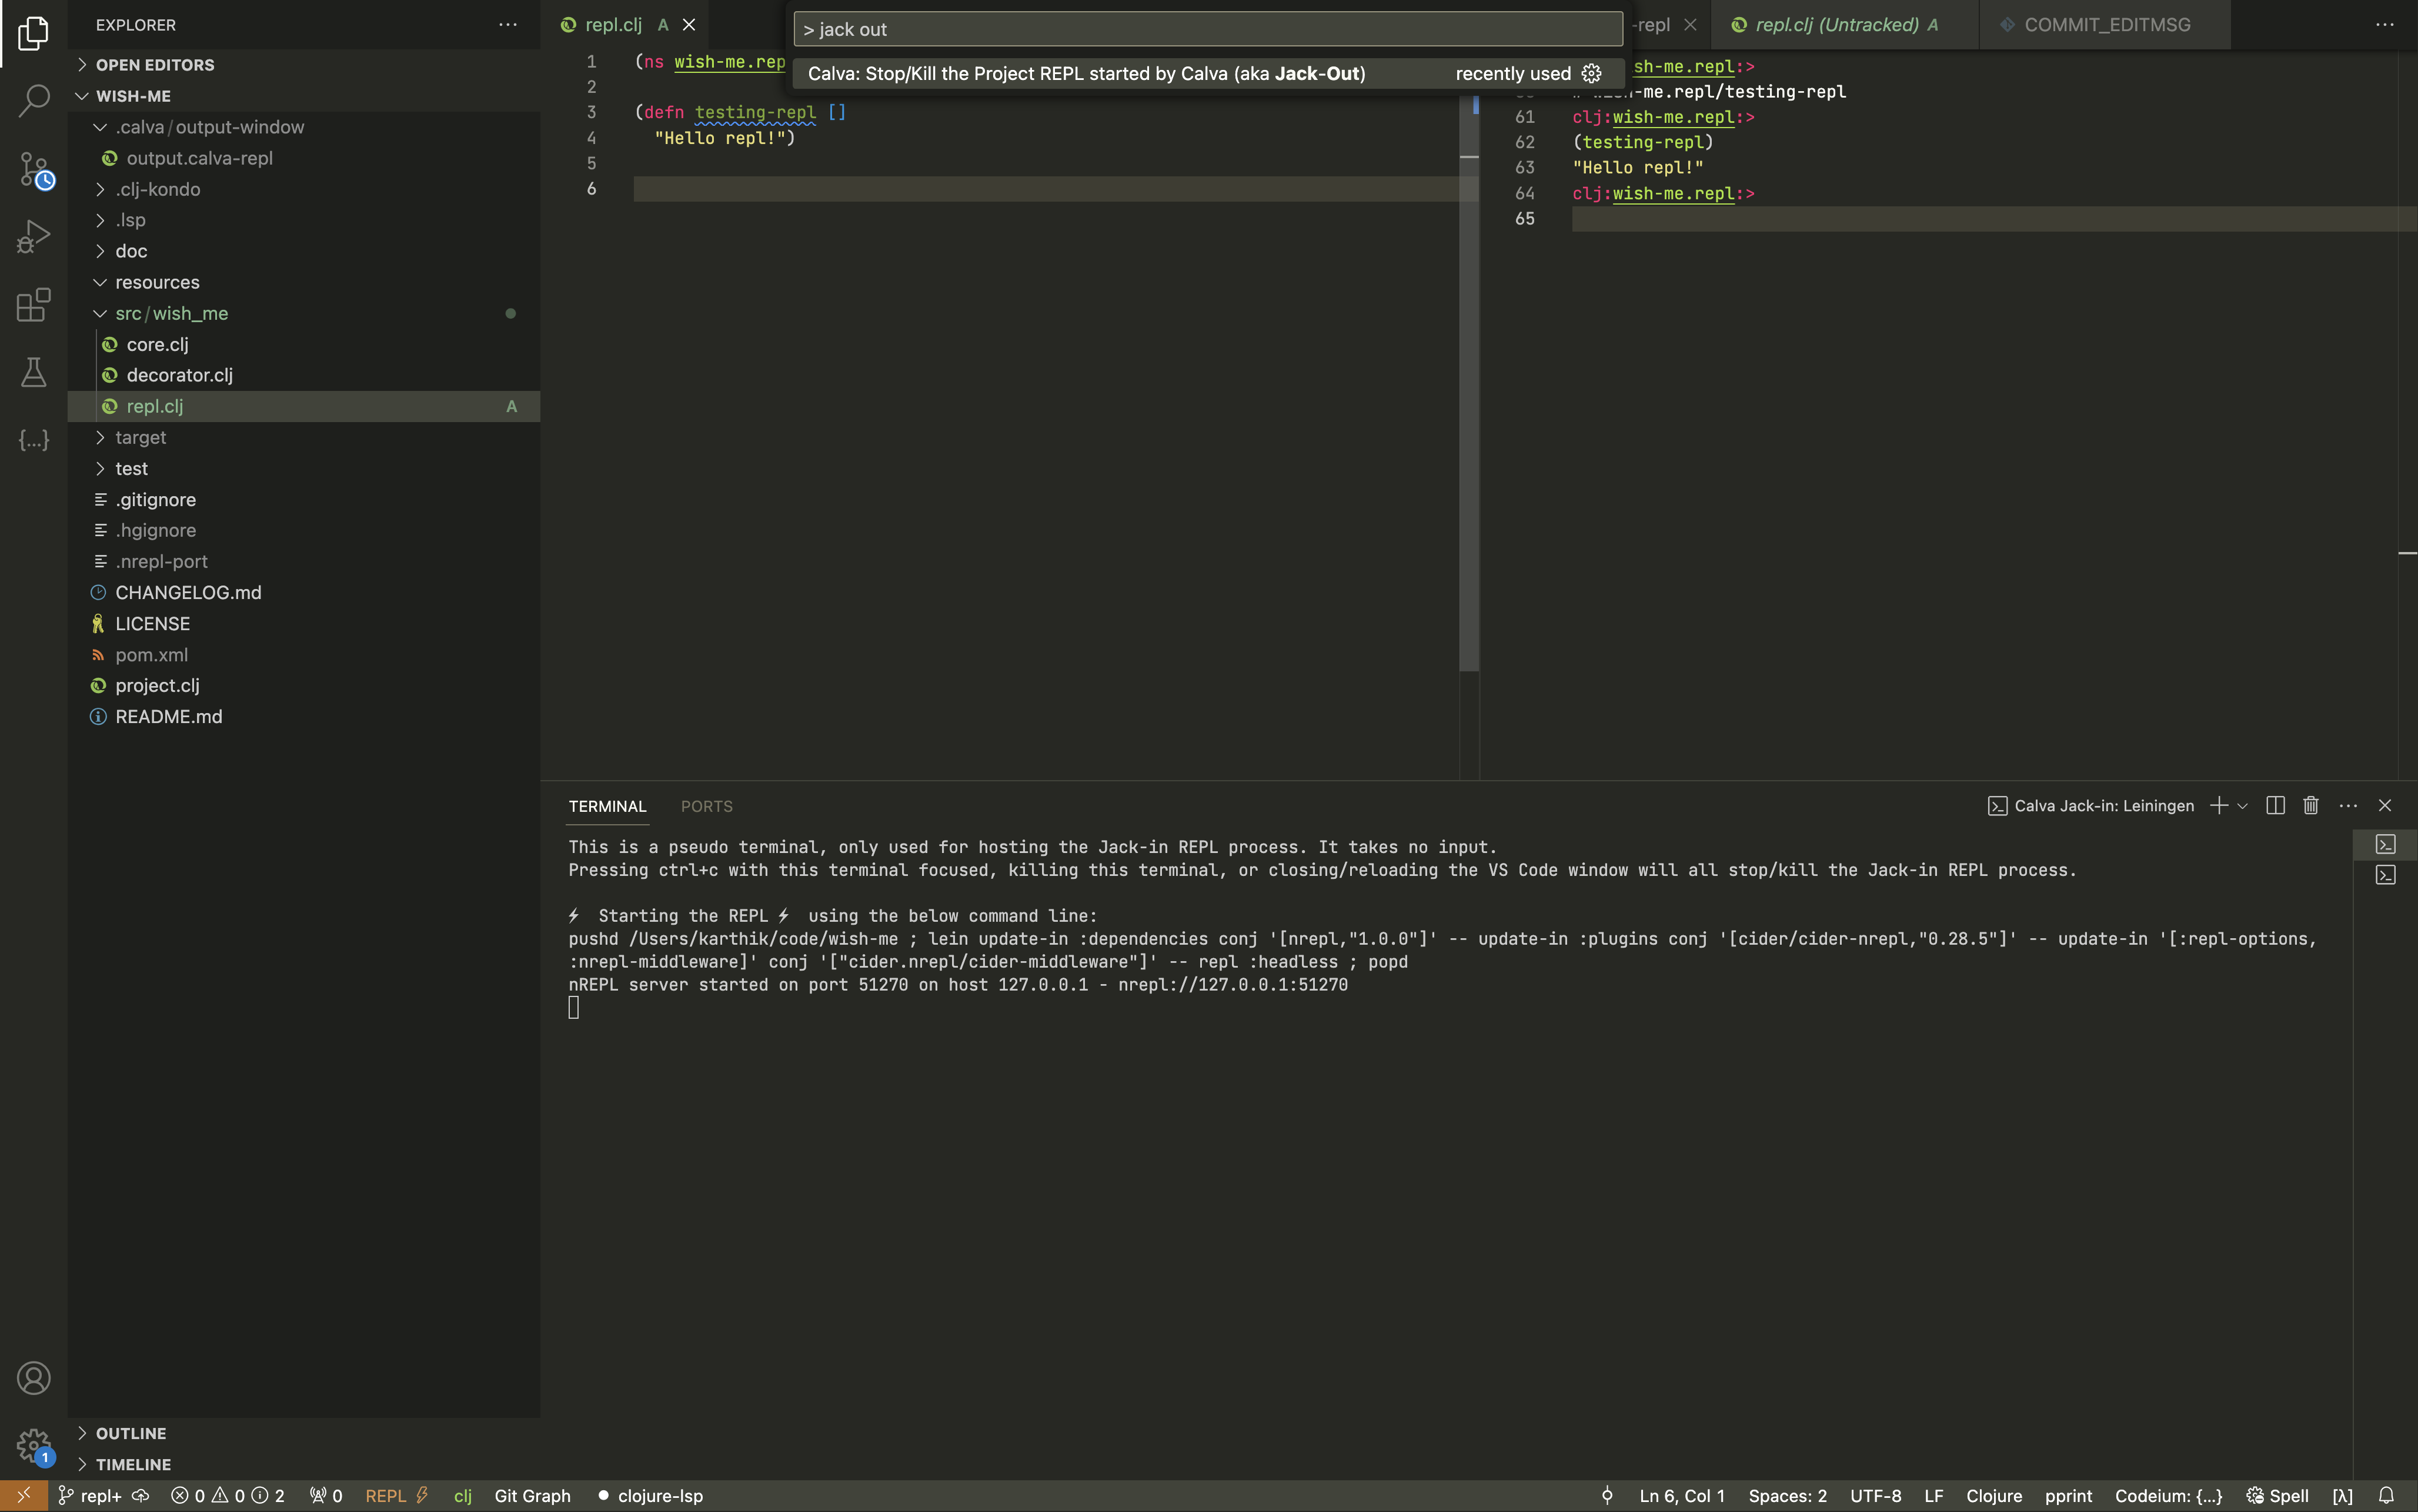
To stop the REPL, press Cmd+P or Ctrl+P and type > jack out in the prompt. Select the "Jack out" option and the REPL will stop as shown:
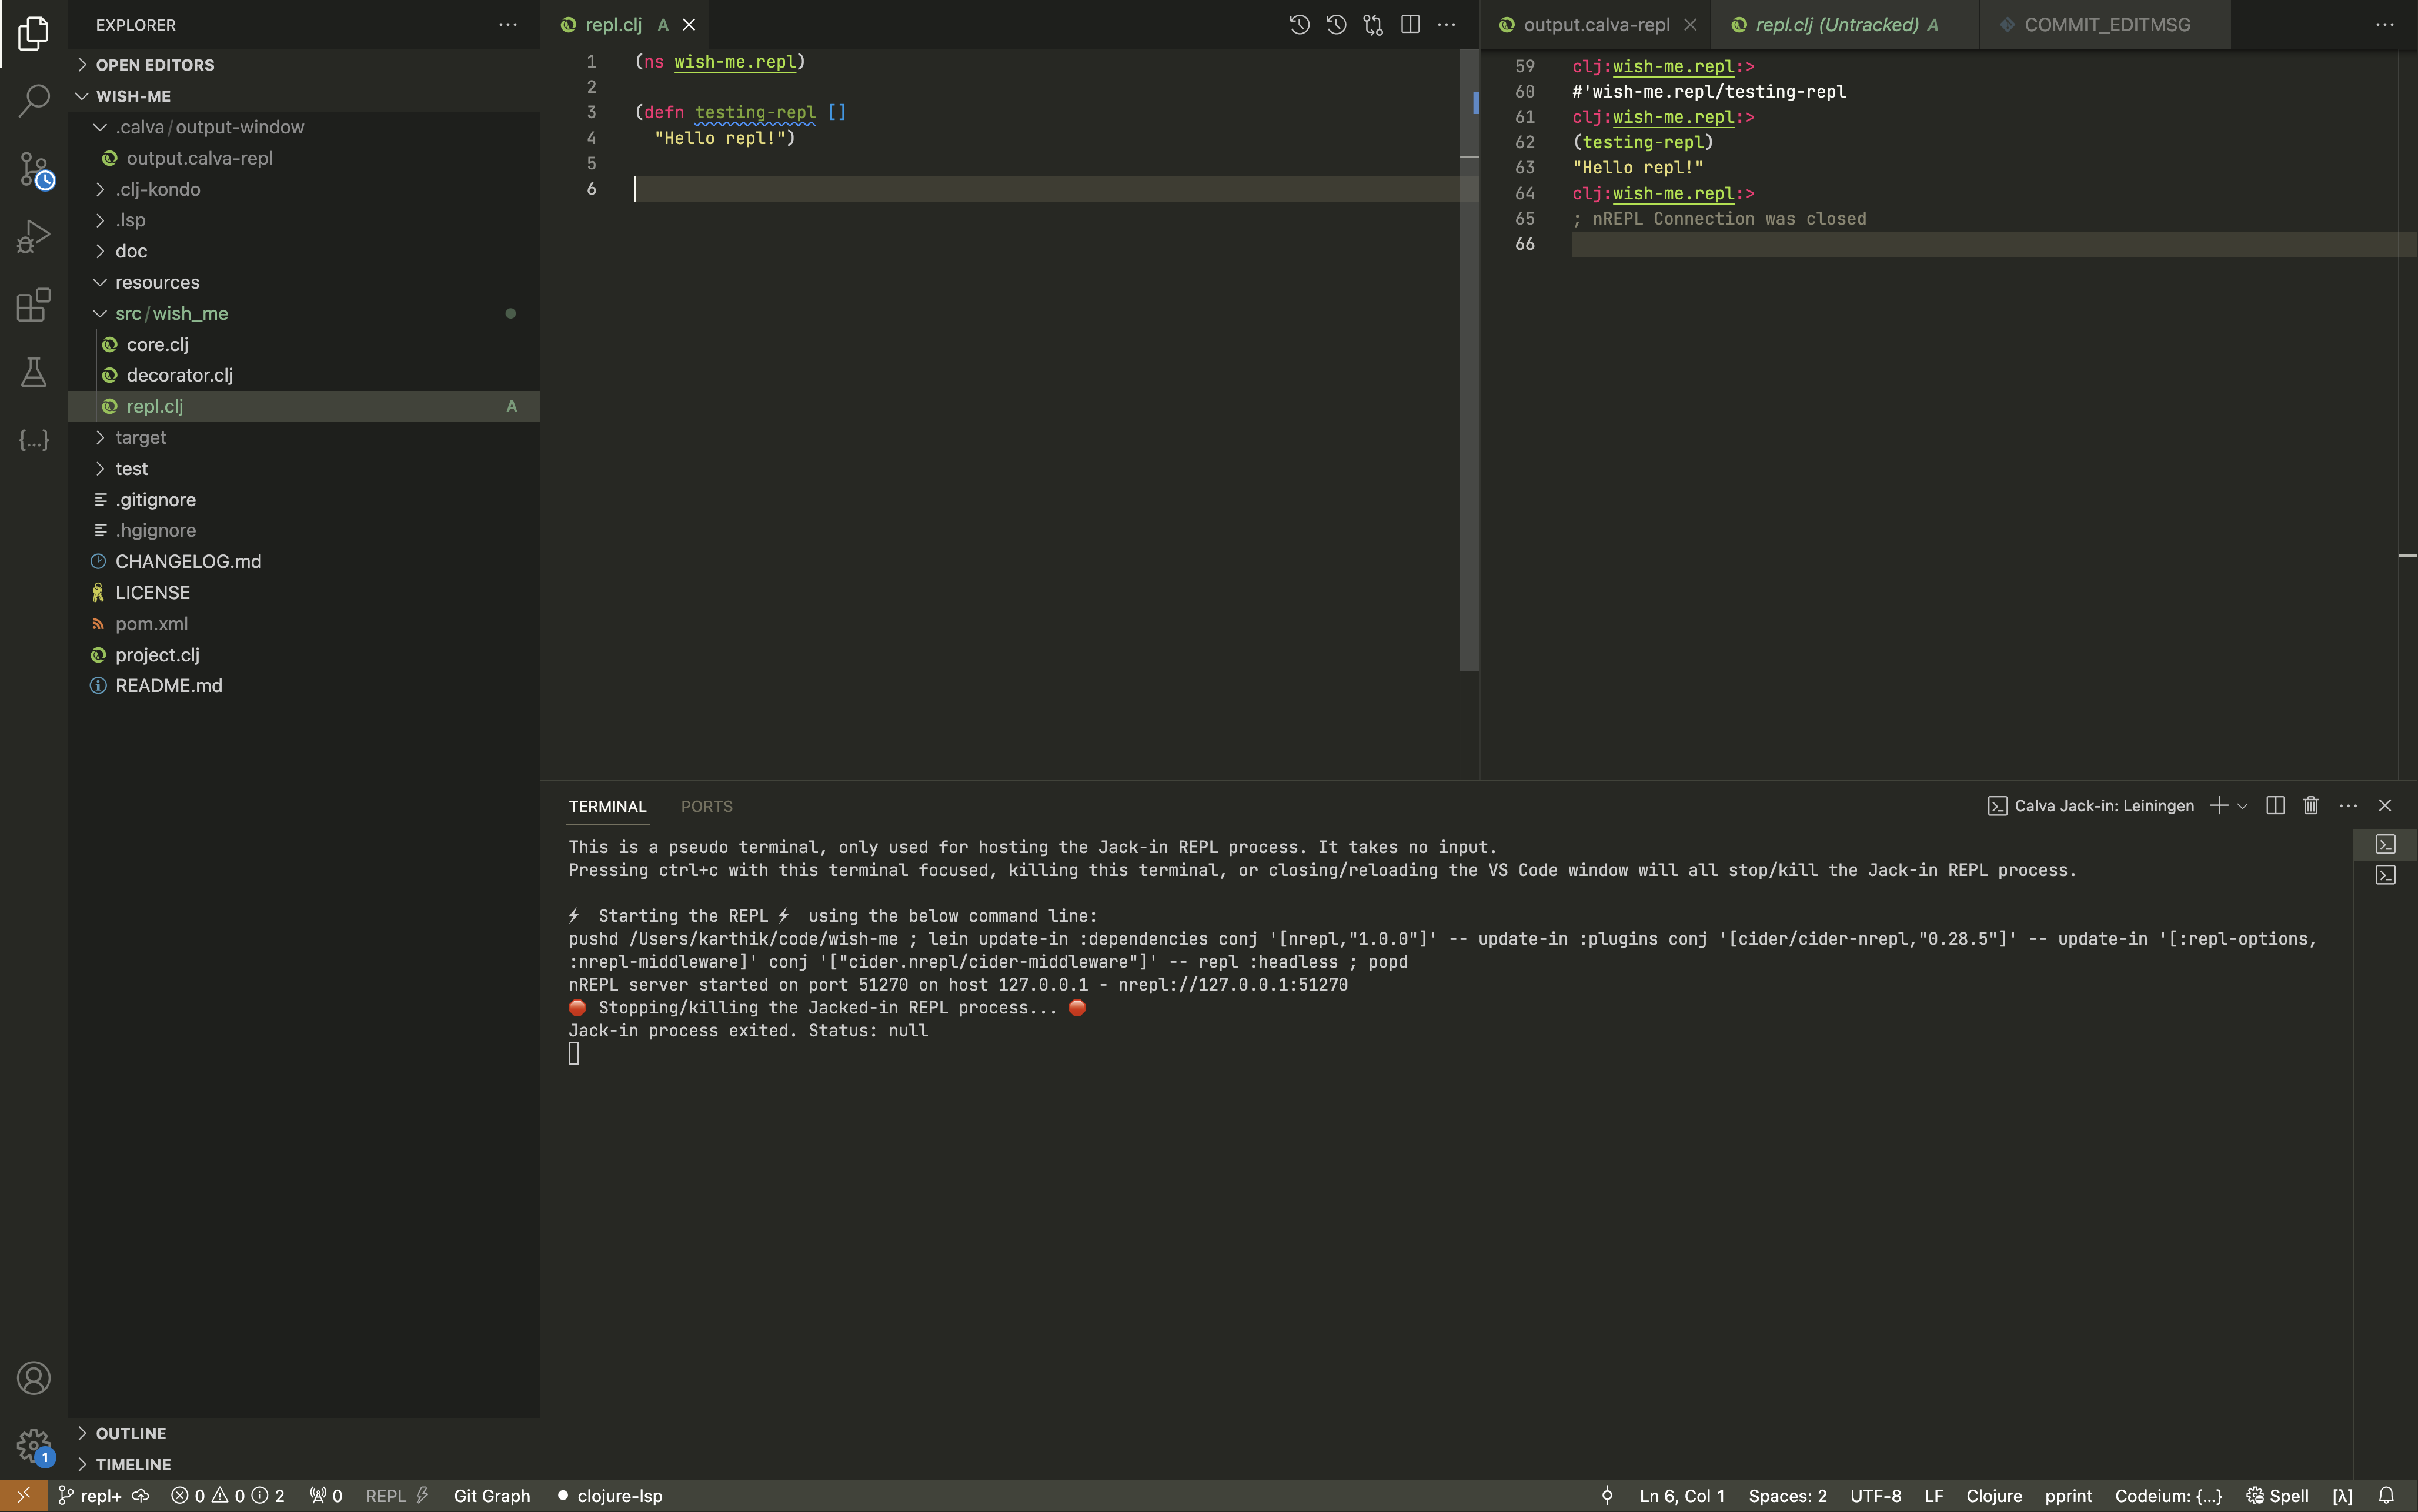
27.8. Testing
| Watch video for this section here https://yu7.in/clj-test-lein |
Now, let’s test our code by testing the testing-repl function in repl.clj. This is the code in src/wish_me/repl.clj:
repl.clj
(ns wish-me.repl)
(defn testing-repl []
"Hello repl!")Create a file at test/wish_me/repl_test.clj and add the following code:
repl_test.clj
(ns wish-me.repl-test
(:require [clojure.test :refer :all]
[wish-me.repl :refer :all]))
(deftest testing-repl-test
(is (= "Hello repl!" (testing-repl))))Let’s see what this code does:
(ns wish-me.repl-test)This line declares that we are in the wish-me.repl-test namespace.
(ns wish-me.repl-test
(:require [clojure.test :refer :all]))The (:require [clojure.test :refer :all]) line imports all functions from clojure.test into the current namespace. To see which functions are available in clojure.test, you can visit https://clojuredocs.org/clojure.test/.
Since we’re testing wish-me.repl, we’ll also refer to all functions in that namespace:
(ns wish-me.repl-test
(:require [clojure.test :refer :all]
[wish-me.repl :refer :all]))Now, let’s add a test for testing-repl in repl-test.clj:
(ns wish-me.repl-test
(:require [clojure.test :refer :all]
[wish-me.repl :refer :all]))
(deftest testing-repl-test)The code above defines a test named testing-repl-test using the deftest macro. deftest is defined in clojure.test and is used to create test cases.
Now look at the code below:
(ns wish-me.repl-test
(:require [clojure.test :refer :all]
[wish-me.repl :refer :all]))
(deftest testing-repl-test
(is (= "Hello repl!" (testing-repl))))We’ve added (is (= "Hello repl!" (testing-repl))) inside the testing-repl-test function. The is function from clojure.test is used to assert that a condition is true; you can learn more about it here: https://clojuredocs.org/clojure.test/is/.
We use (= "Hello repl!" (testing-repl)) to check if testing-repl returns "Hello repl!". If it does, the test passes; otherwise, it fails.
Now, let’s test it. Run the following command in your terminal:
$ lein test :only wish-me.repl-testlein test runs the tests in the Leiningen project. To run only the wish-me.repl-test namespace, we use the :only option:
The output will show that one test and one assertion ran with no failures or errors:
lein test wish-me.repl-test
Ran 1 tests containing 1 assertions.
0 failures, 0 errors.To run all tests in the project, run:
$ lein testIn this case, one test fails. You can examine core_test.clj and try to fix the issue.
lein test wish-me.core-test
lein test :only wish-me.core-test/a-test
FAIL in (a-test) (core_test.clj:7)
FIXME, I fail.
expected: (= 0 1)
actual: (not (= 0 1))
lein test wish-me.repl-test
Ran 2 tests containing 2 assertions.
1 failures, 0 errors.
Subprocess failed (exit code: 1)To run a specific test within a namespace, such as testing-repl-test, use the following command:
$ lein test :only wish-me.repl-test/testing-repl-testAs shown below, the test ran and the assertion passed:
lein test wish-me.repl-test
Ran 1 tests containing 1 assertions.
0 failures, 0 errors.28. Private Functions
| Find the video for this section here: https://yu7.in/private-functions-in-clojure |
| Get the code for this section here: https://gitlab.com/clojure-book/private_functions |
When coding a Clojure namespace, it is not always necessary to expose all its functions to the outside world. It is often enough to expose only the necessary ones. Private functions can be used to reduce complexity and make the code more manageable. We can hide these functions by declaring them as private. In this section, we will see how to define private functions and how to use them.
First, let’s create a Leiningen project named private_functions.
$ lein new private_functions
Let’s create a file named src/private_functions/private_and_public_functions.clj and add the following content:
(ns private-functions.private-and-public-functions)
(defn public-fn []
"A public function")Now, let’s create a file named src/private_functions/core.clj and add the following content:
(ns private-functions.core
(:require [private-functions.private-and-public-functions :as f]))
(f/public-fn)Notice that we are requiring the private-and-public-functions namespace as f. We then call the public function public-fn using (f/public-fn). After you jack-in the project and execute (f/public-fn), you should see the following output:
"A public function"
Now let’s add a private function to private-and-public-functions.clj. Take a look at the code below:
(ns private-functions.private-and-public-functions)
(defn public-fn []
"A public function")
(defn- private-fn []
"A private function")Notice the use of defn- instead of defn:
(defn- private-fn []
"A private function")By using defn-, we create a private function. In this case, the function simply returns the string "A private function".
Now let’s try to call this private function from core.clj:
(ns private-functions.core
(:require [private-functions.private-and-public-functions :as f]))
(f/public-fn)
(f/private-fn) ;; This will not work; you cannot access a private function from another namespace.As expected, calling (f/private-fn) will fail because private functions cannot be accessed from other namespaces.
To allow controlled access to a private function, we can write a public wrapper function called access-private-fn:
(ns private-functions.private-and-public-functions)
(defn public-fn []
"A public function")
(defn- private-fn []
"A private function")
(defn access-private-fn []
(private-fn))In the code above, we call private-fn inside the public function access-private-fn. Now, access-private-fn can be called from core.clj:
(ns private-functions.core
(:require [private-functions.private-and-public-functions :as f]))
(f/public-fn)
;; (f/private-fn) ;; This still won't work.
(f/access-private-fn)When we execute (f/access-private-fn), we get the following output:
"A private function"
There is another way to mark a function as private using the ^:private metadata. Let’s examine the following code:
(ns private-functions.private-and-public-functions)
(defn public-fn []
"A public function")
(defn- private-fn []
"A private function")
(defn access-private-fn []
(private-fn))
(defn ^:private another-private-fn []
"Another private function")
(defn access-another-private-fn []
(another-private-fn))Notice the metadata:
(defn ^:private another-private-fn []
"Another private function")Here, another-private-fn is marked as private using ^:private. We can then call another-private-fn from within the same namespace using access-another-private-fn:
(ns private-functions.private-and-public-functions)
......
(defn ^:private another-private-fn []
"Another private function")
(defn access-another-private-fn []
(another-private-fn))Now, access-another-private-fn can be accessed in core.clj:
(ns private-functions.core
(:require [private-functions.private-and-public-functions :as f]))
(f/public-fn)
;; (f/private-fn) ;; Won't work.
(f/access-private-fn)
(f/access-another-private-fn)When (f/access-another-private-fn) is executed, the output will be:
"Another private function"
28.1. Testing Private Functions
To test a private function, we can use a special syntax to access it. Let’s create a file named test/private_functions/private_and_public_functions_test.clj and add the following content:
(ns private-functions.private-and-public-functions-test
(:require [clojure.test :refer :all]
[private-functions.private-and-public-functions :as f]))
(deftest private-fn-test
(testing "A private function"
(let [fun #'f/private-fn]
(is (= (fun) "A private function")))))In the code above, [clojure.test :refer :all] makes all functions from the clojure.test library available, such as deftest, is, and testing. We also require the private-functions.private-and-public-functions namespace as f.
Let’s break down the test. First, we define the test using deftest and give it a name, private-fn-test:
(deftest private-fn-test)Next, we add a description using testing:
(deftest private-fn-test
(testing "A private function"))Then, we define a variable called fun and assign it the function f/private-fn using let. Pay close attention to the assignment:
(deftest private-fn-test
(testing "A private function"
(let [fun #'f/private-fn]))))The #' symbol before f/private-fn is the "var" syntax, which allows us to access the function regardless of its privacy status. We assign this to the variable fun, which we can then use to call the function:
(deftest private-fn-test
(testing "A private function"
(let [fun #'f/private-fn]
(is (= (fun) "A private function")))))The line (is (= (fun) "A private function")) calls the function fun and asserts that it returns the expected string "A private function".
Now, let’s run the test:
$ lein test
The output will indicate that the tests have passed:
lein test Ran 1 tests containing 1 assertions. 0 failures, 0 errors.
29. Debugging in Leiningen project with Calva and nREPL
| Official Calva debugger documentation https://calva.io/debugger/ |
| Code for this section can be found here https://gitlab.com/clojure-book/projects/dbg_and_break |
There is an excellent library called nREPL that allows you to debug Clojure code step-by-step, set up breakpoints, and inspect values, enabling you to better understand the code execution.
To get started, let’s create a Leiningen project called dbg_and_break.
$ lein new dbg_and_breakNow, move into the project directory:
$ cd dbg_and_breakOpen project.clj, and you should see something like this:
(defproject dbg_and_break "0.1.0-SNAPSHOT"
:description "FIXME: write description"
:url "http://example.com/FIXME"
:license {:name "EPL-2.0 OR GPL-2.0-or-later WITH Classpath-exception-2.0"
:url "https://www.eclipse.org/legal/epl-2.0/"}
:dependencies [[org.clojure/clojure "1.12.4"]]
:repl-options {:init-ns dbg-and-break.core})Take a look at the dependencies:
:dependencies [[org.clojure/clojure "1.12.4"]]Let’s add the wonderful nREPL library. The dependencies should now look like this:
:dependencies [[org.clojure/clojure "1.12.4"]
[nrepl "1.7.0"]]Your project.clj should now look like this:
(defproject dbg_and_break "0.1.0-SNAPSHOT"
:description "FIXME: write description"
:url "http://example.com/FIXME"
:license {:name "EPL-2.0 OR GPL-2.0-or-later WITH Classpath-exception-2.0"
:url "https://www.eclipse.org/legal/epl-2.0/"}
:dependencies [[org.clojure/clojure "1.12.4"]
[nrepl "1.7.0"]]
:repl-options {:init-ns dbg-and-break.core})Create a file called src/dbg_and_break/loop.clj and add the following code to it:
(ns dbg-and-break.loop)
(loop [i 1]
(when (<= i 5)
(println i)
(recur (inc i))))Jack in and run the code; you should see output like this:
Output
; 1 ; 2 ; 3 ; 4 ; 5 nil
If everything is working correctly, we can proceed.
29.1. #dbg
In VS Code, press ctrl+shift+p or command+shift+p, or type > in the top search bar and then type instrument. You will see an option like this:
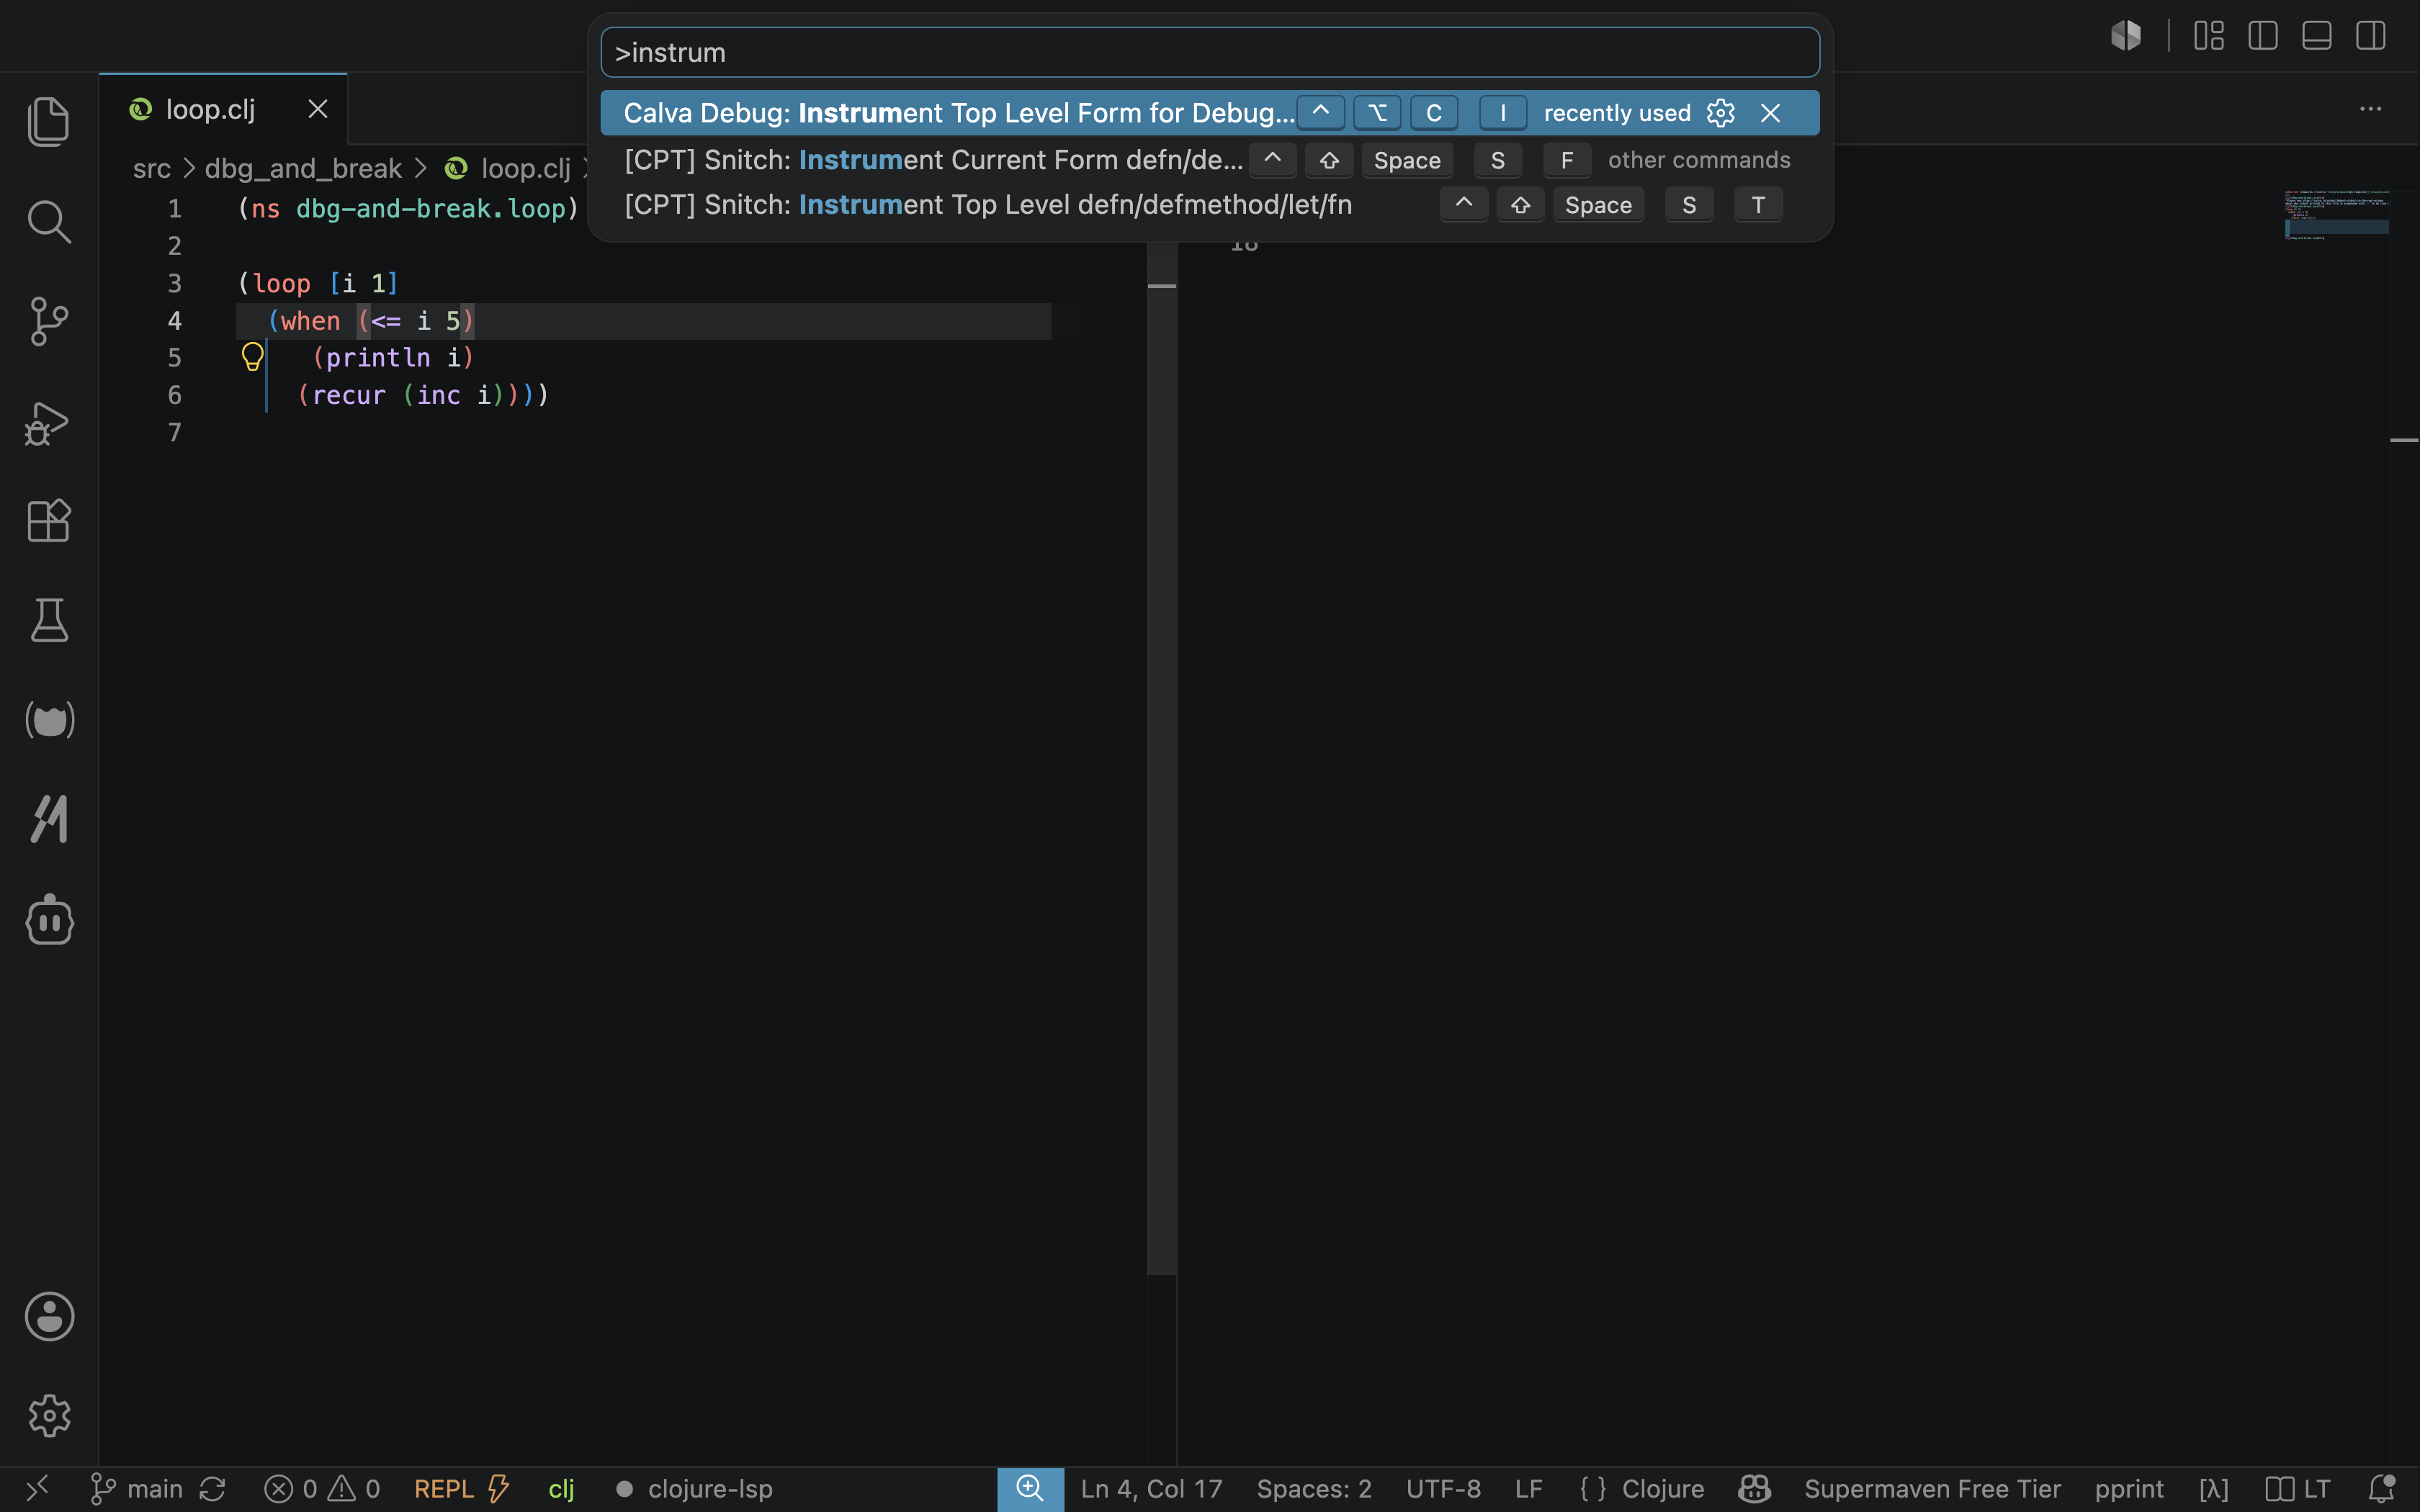
Select Instrument Top Level Form for Debug. Note on the right side of the image below, your code now appears with #dbg at the top. This #dbg tells the nREPL library added in project.clj that you are in debug mode. This process is called instrumentation.
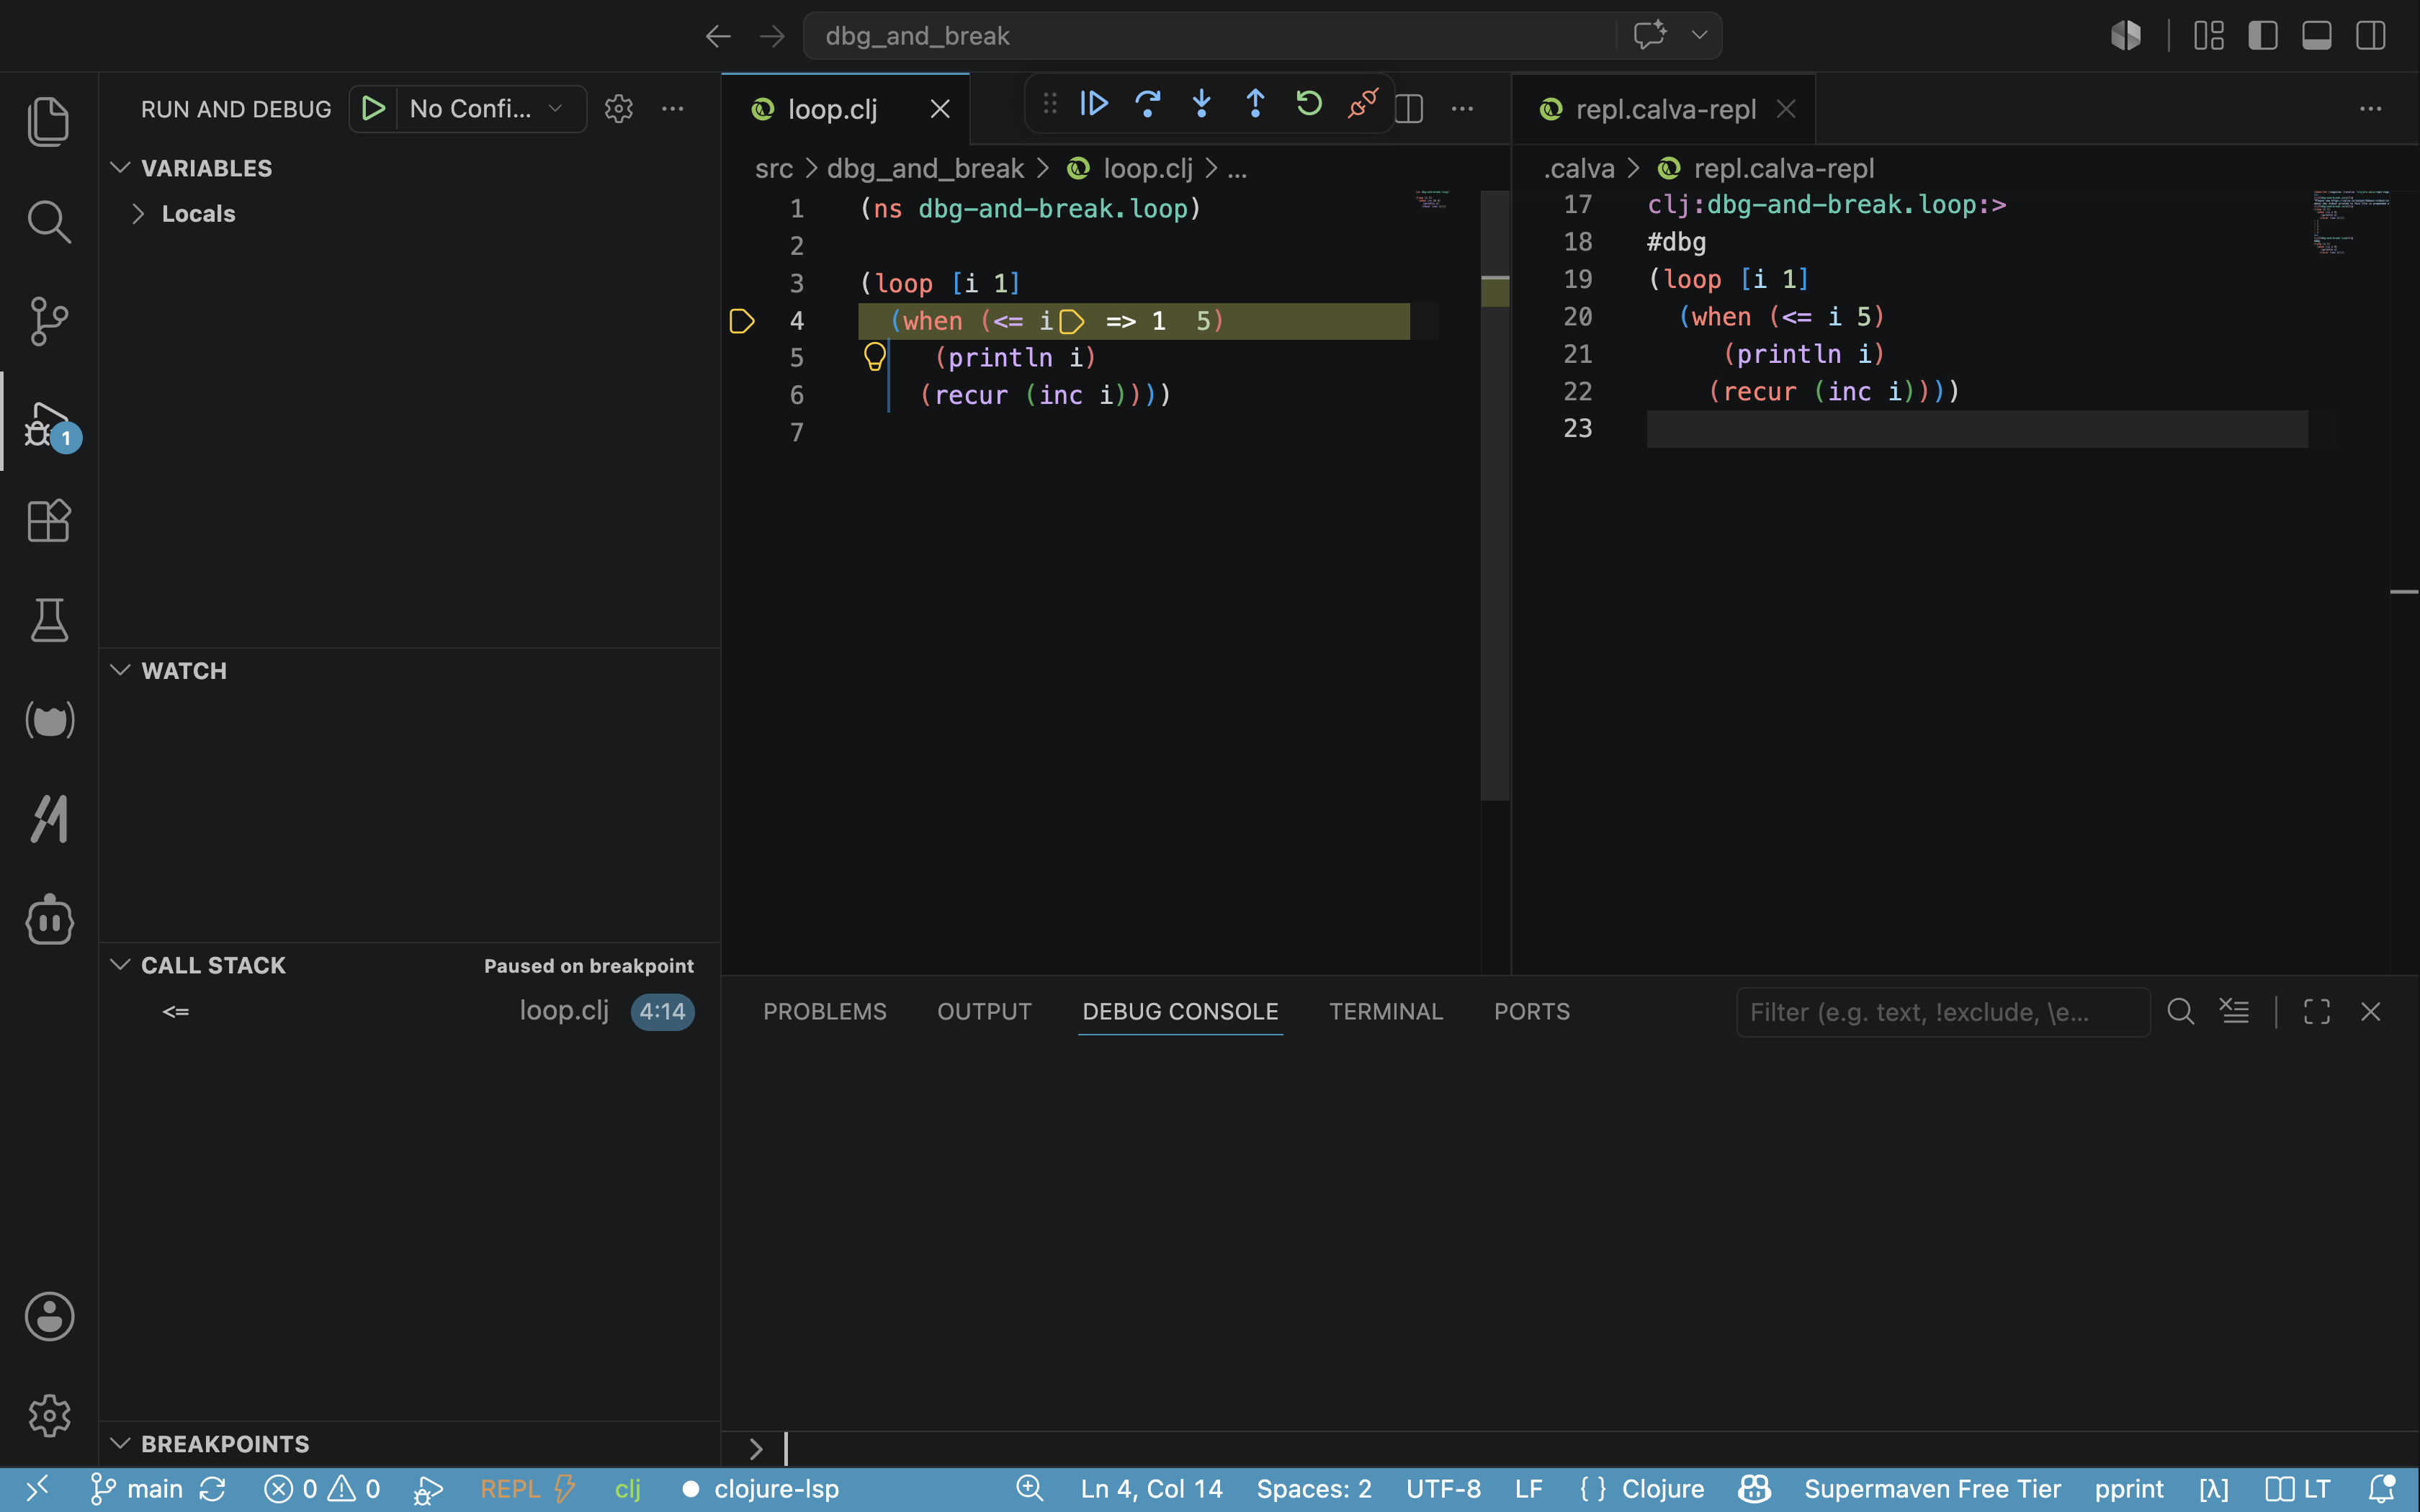
At the top of your editor, you should see the following debugger controls:

The buttons are as follows:
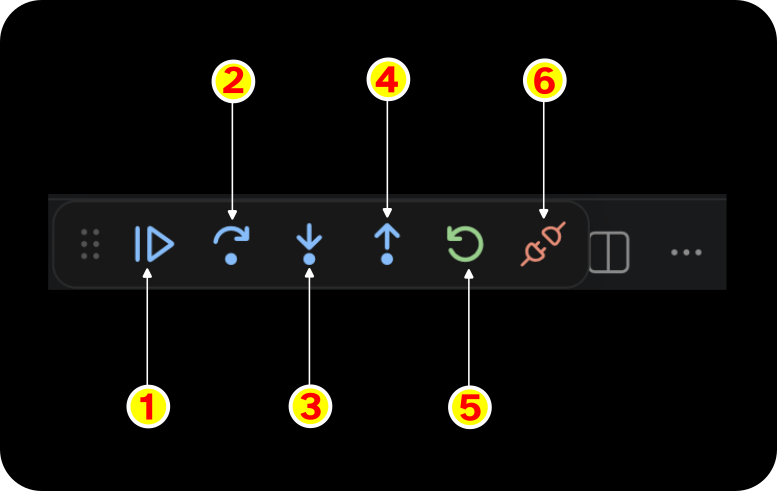
-
Continue
-
Step Over
-
Step Into
-
Step Out
-
Restart
-
Disconnect
I will focus on the three buttons that are most commonly used here.
As soon as you instrument the form, the (loop …) starts running and pauses at the (when (⇐ i 5)) condition, as shown below:
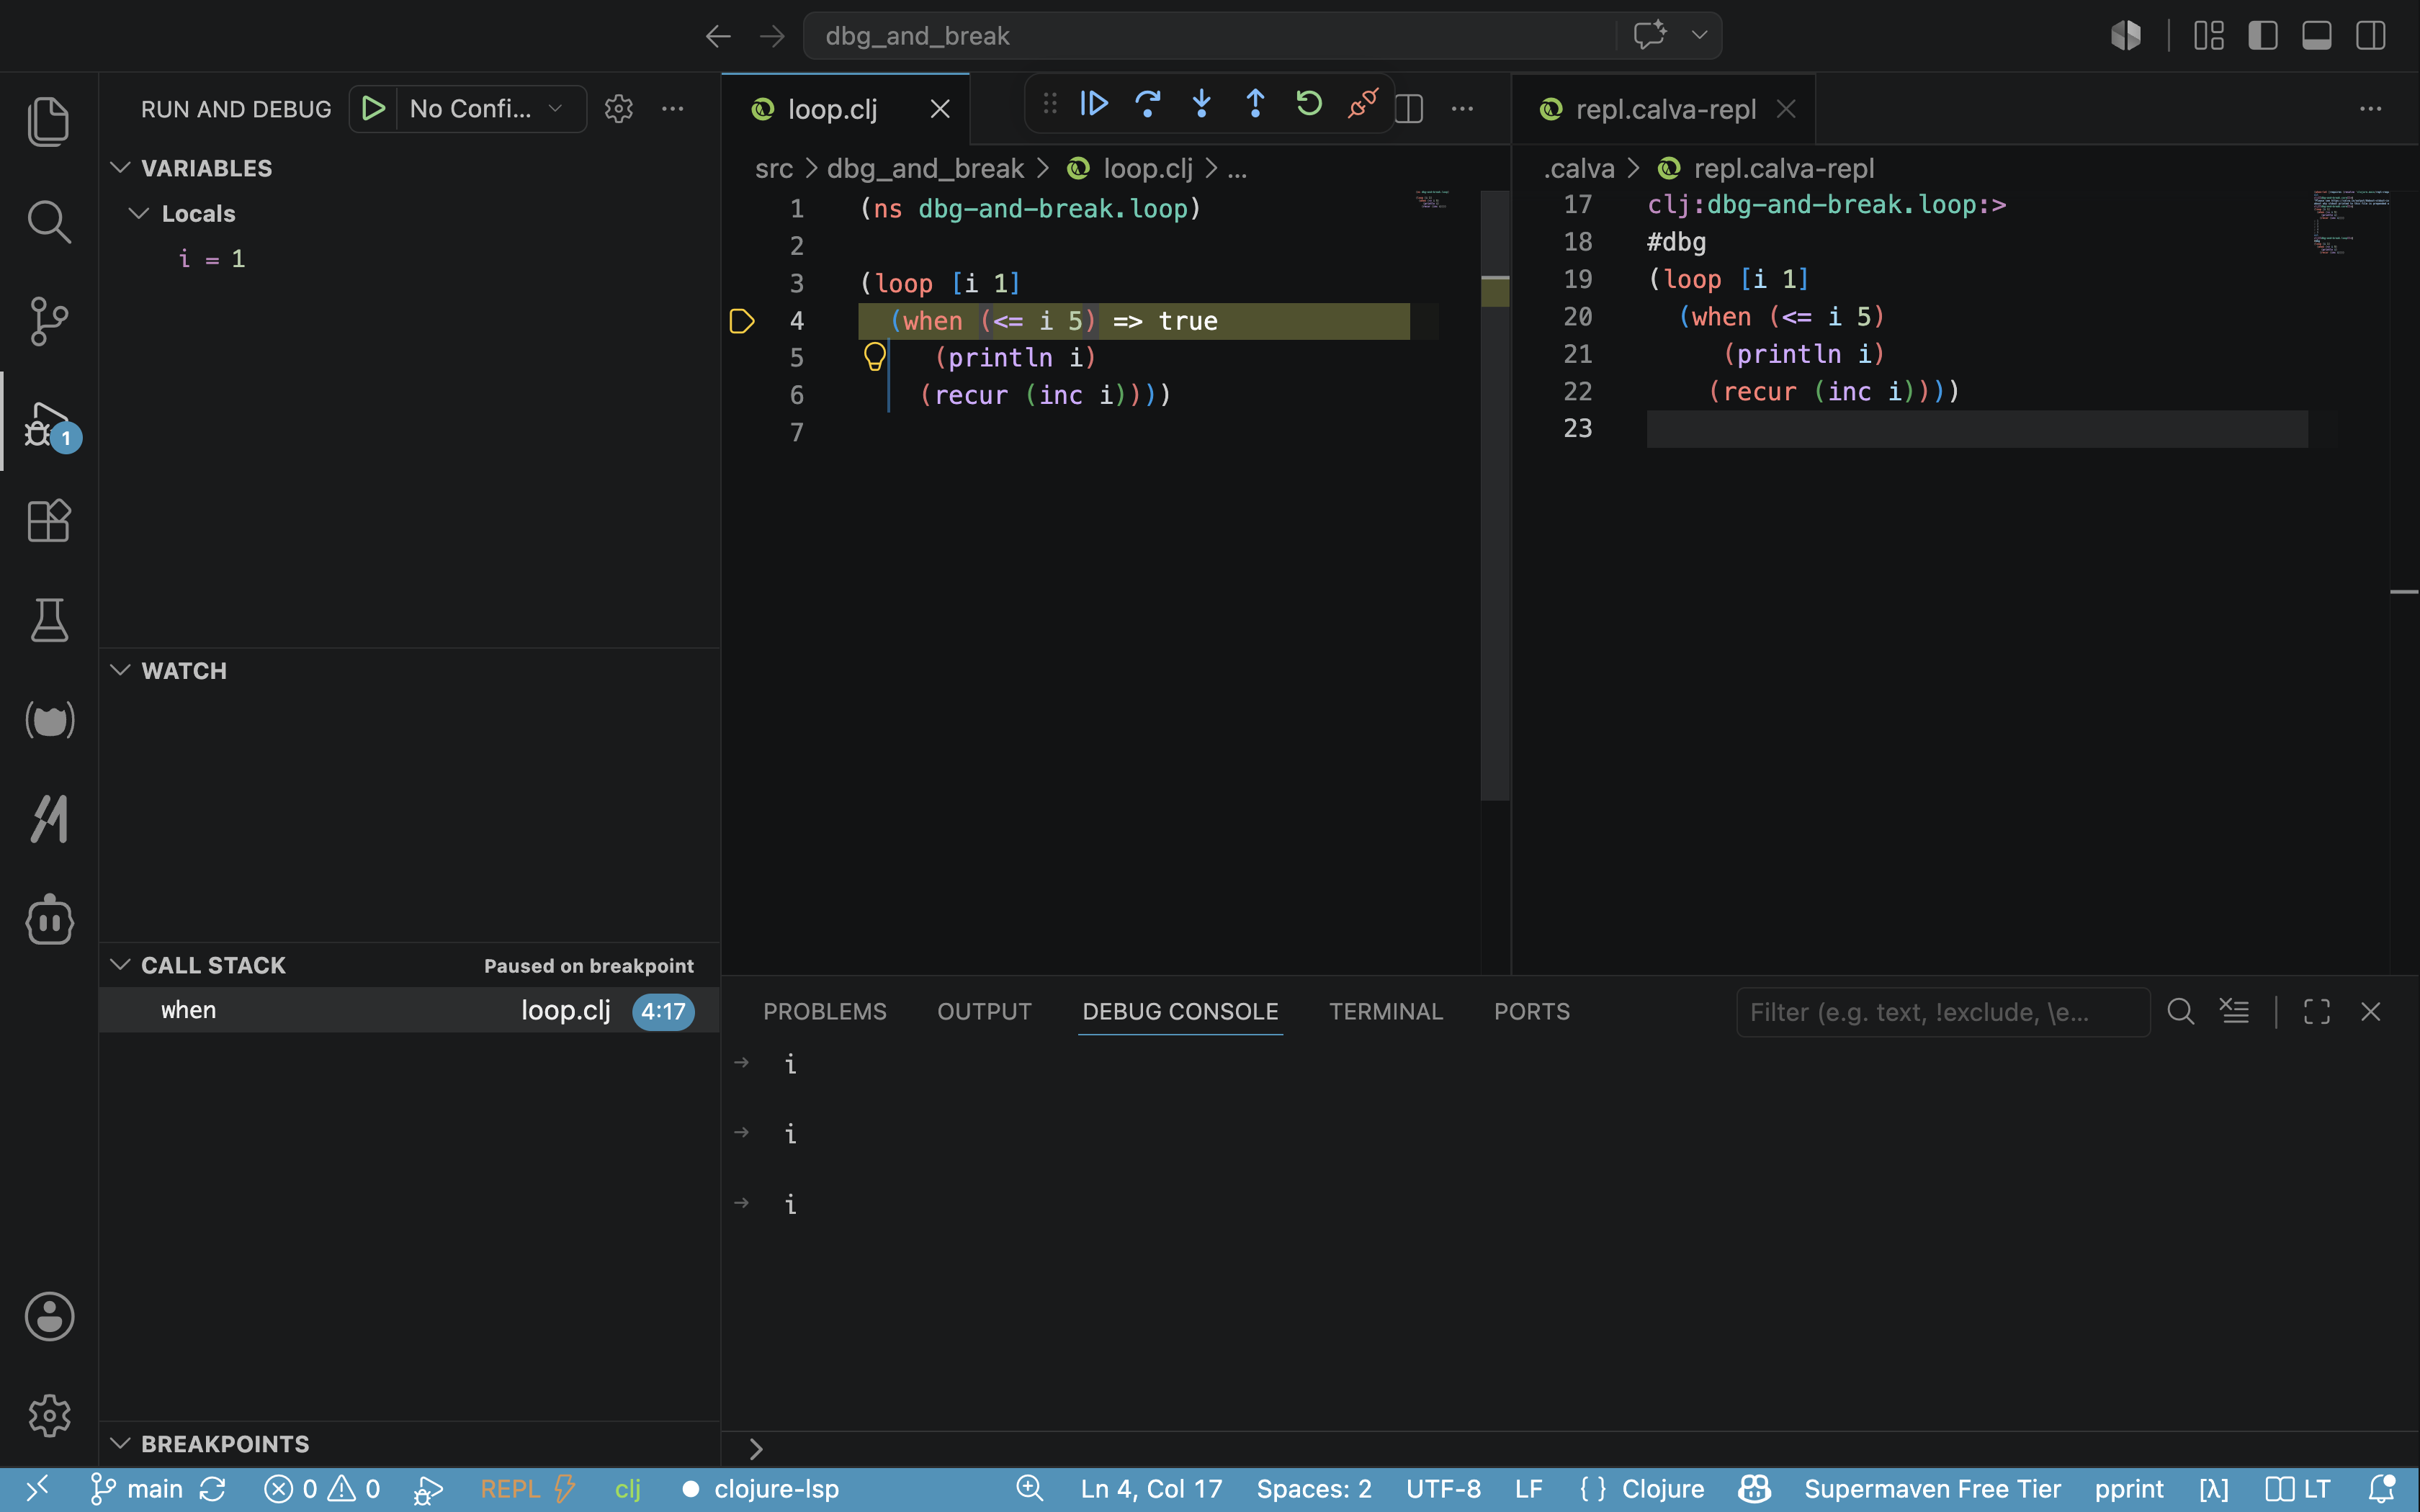
You can see that the debugger indicates (⇐ i 5) returns true in your editor. On the left, Calva shows that the current value of i is 1. This provides a very rich debugging experience.
Now hit the Step Into button (the one with the downward arrow). You should see the following:
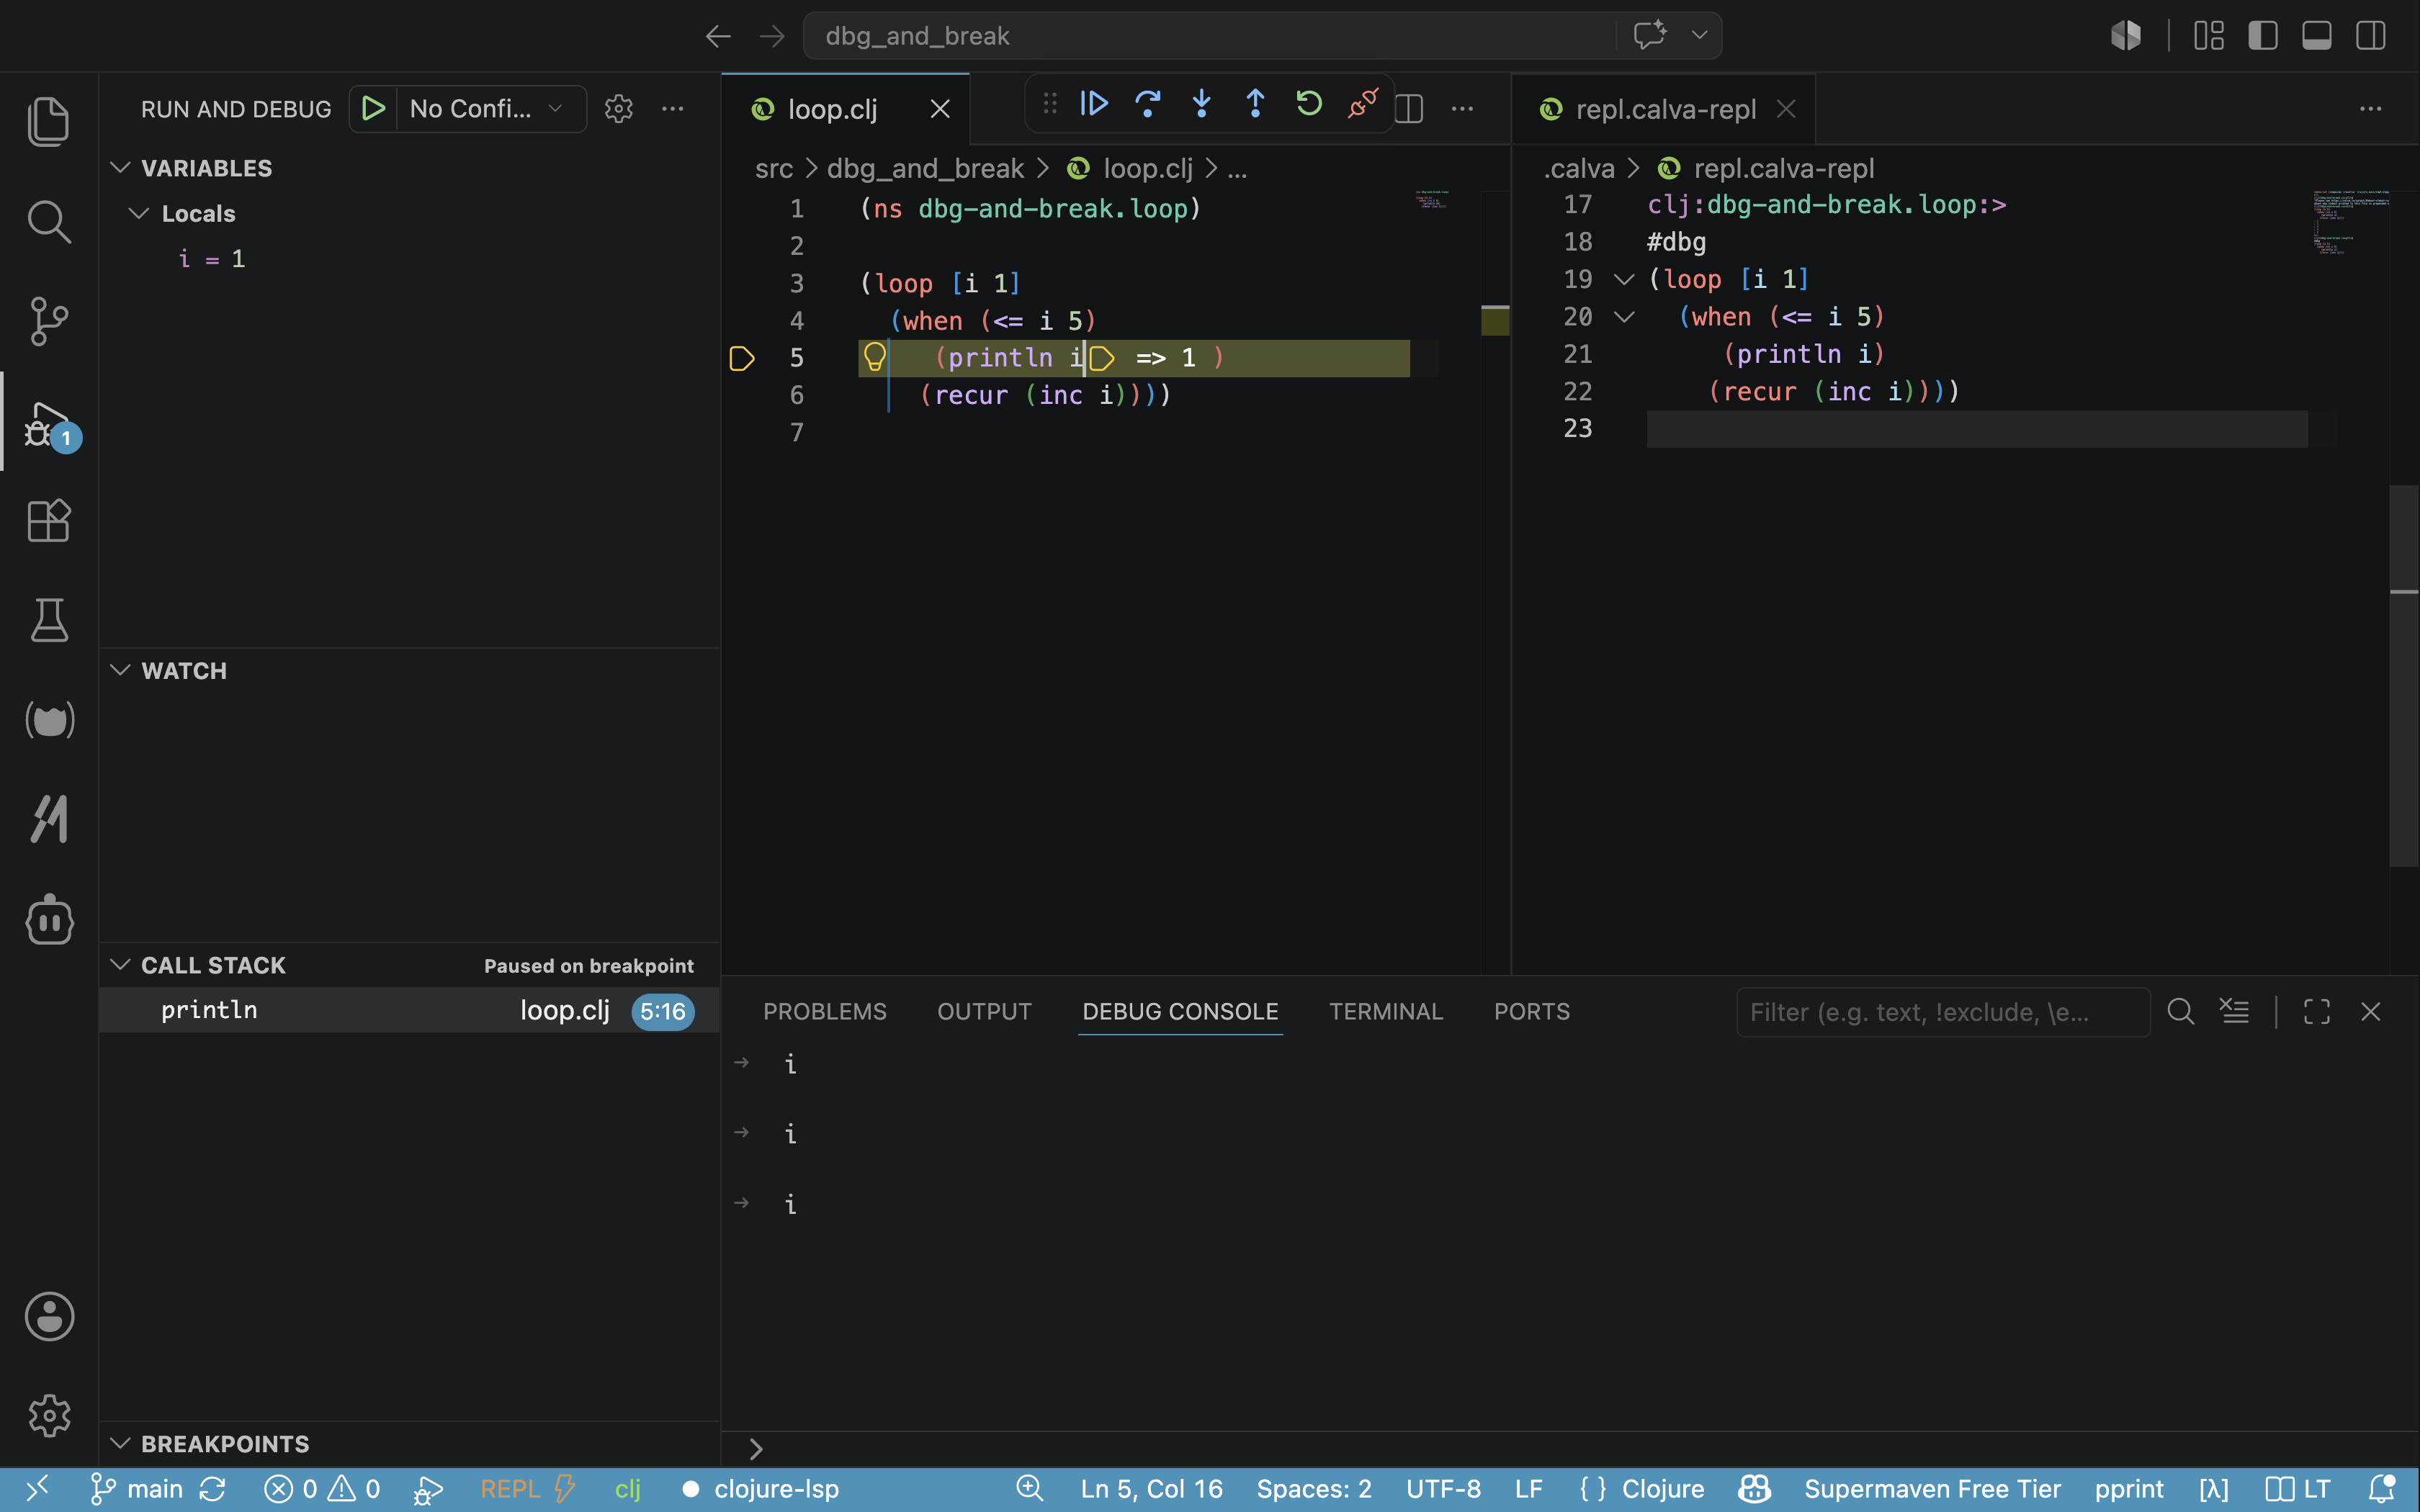
As seen in the image above, the value of i is still 1, but the debugger has stopped at the (println i) line. Press Step Into again; you will see that println has returned nil, and the value of i is printed in the Calva REPL output at the right side (see the image below).
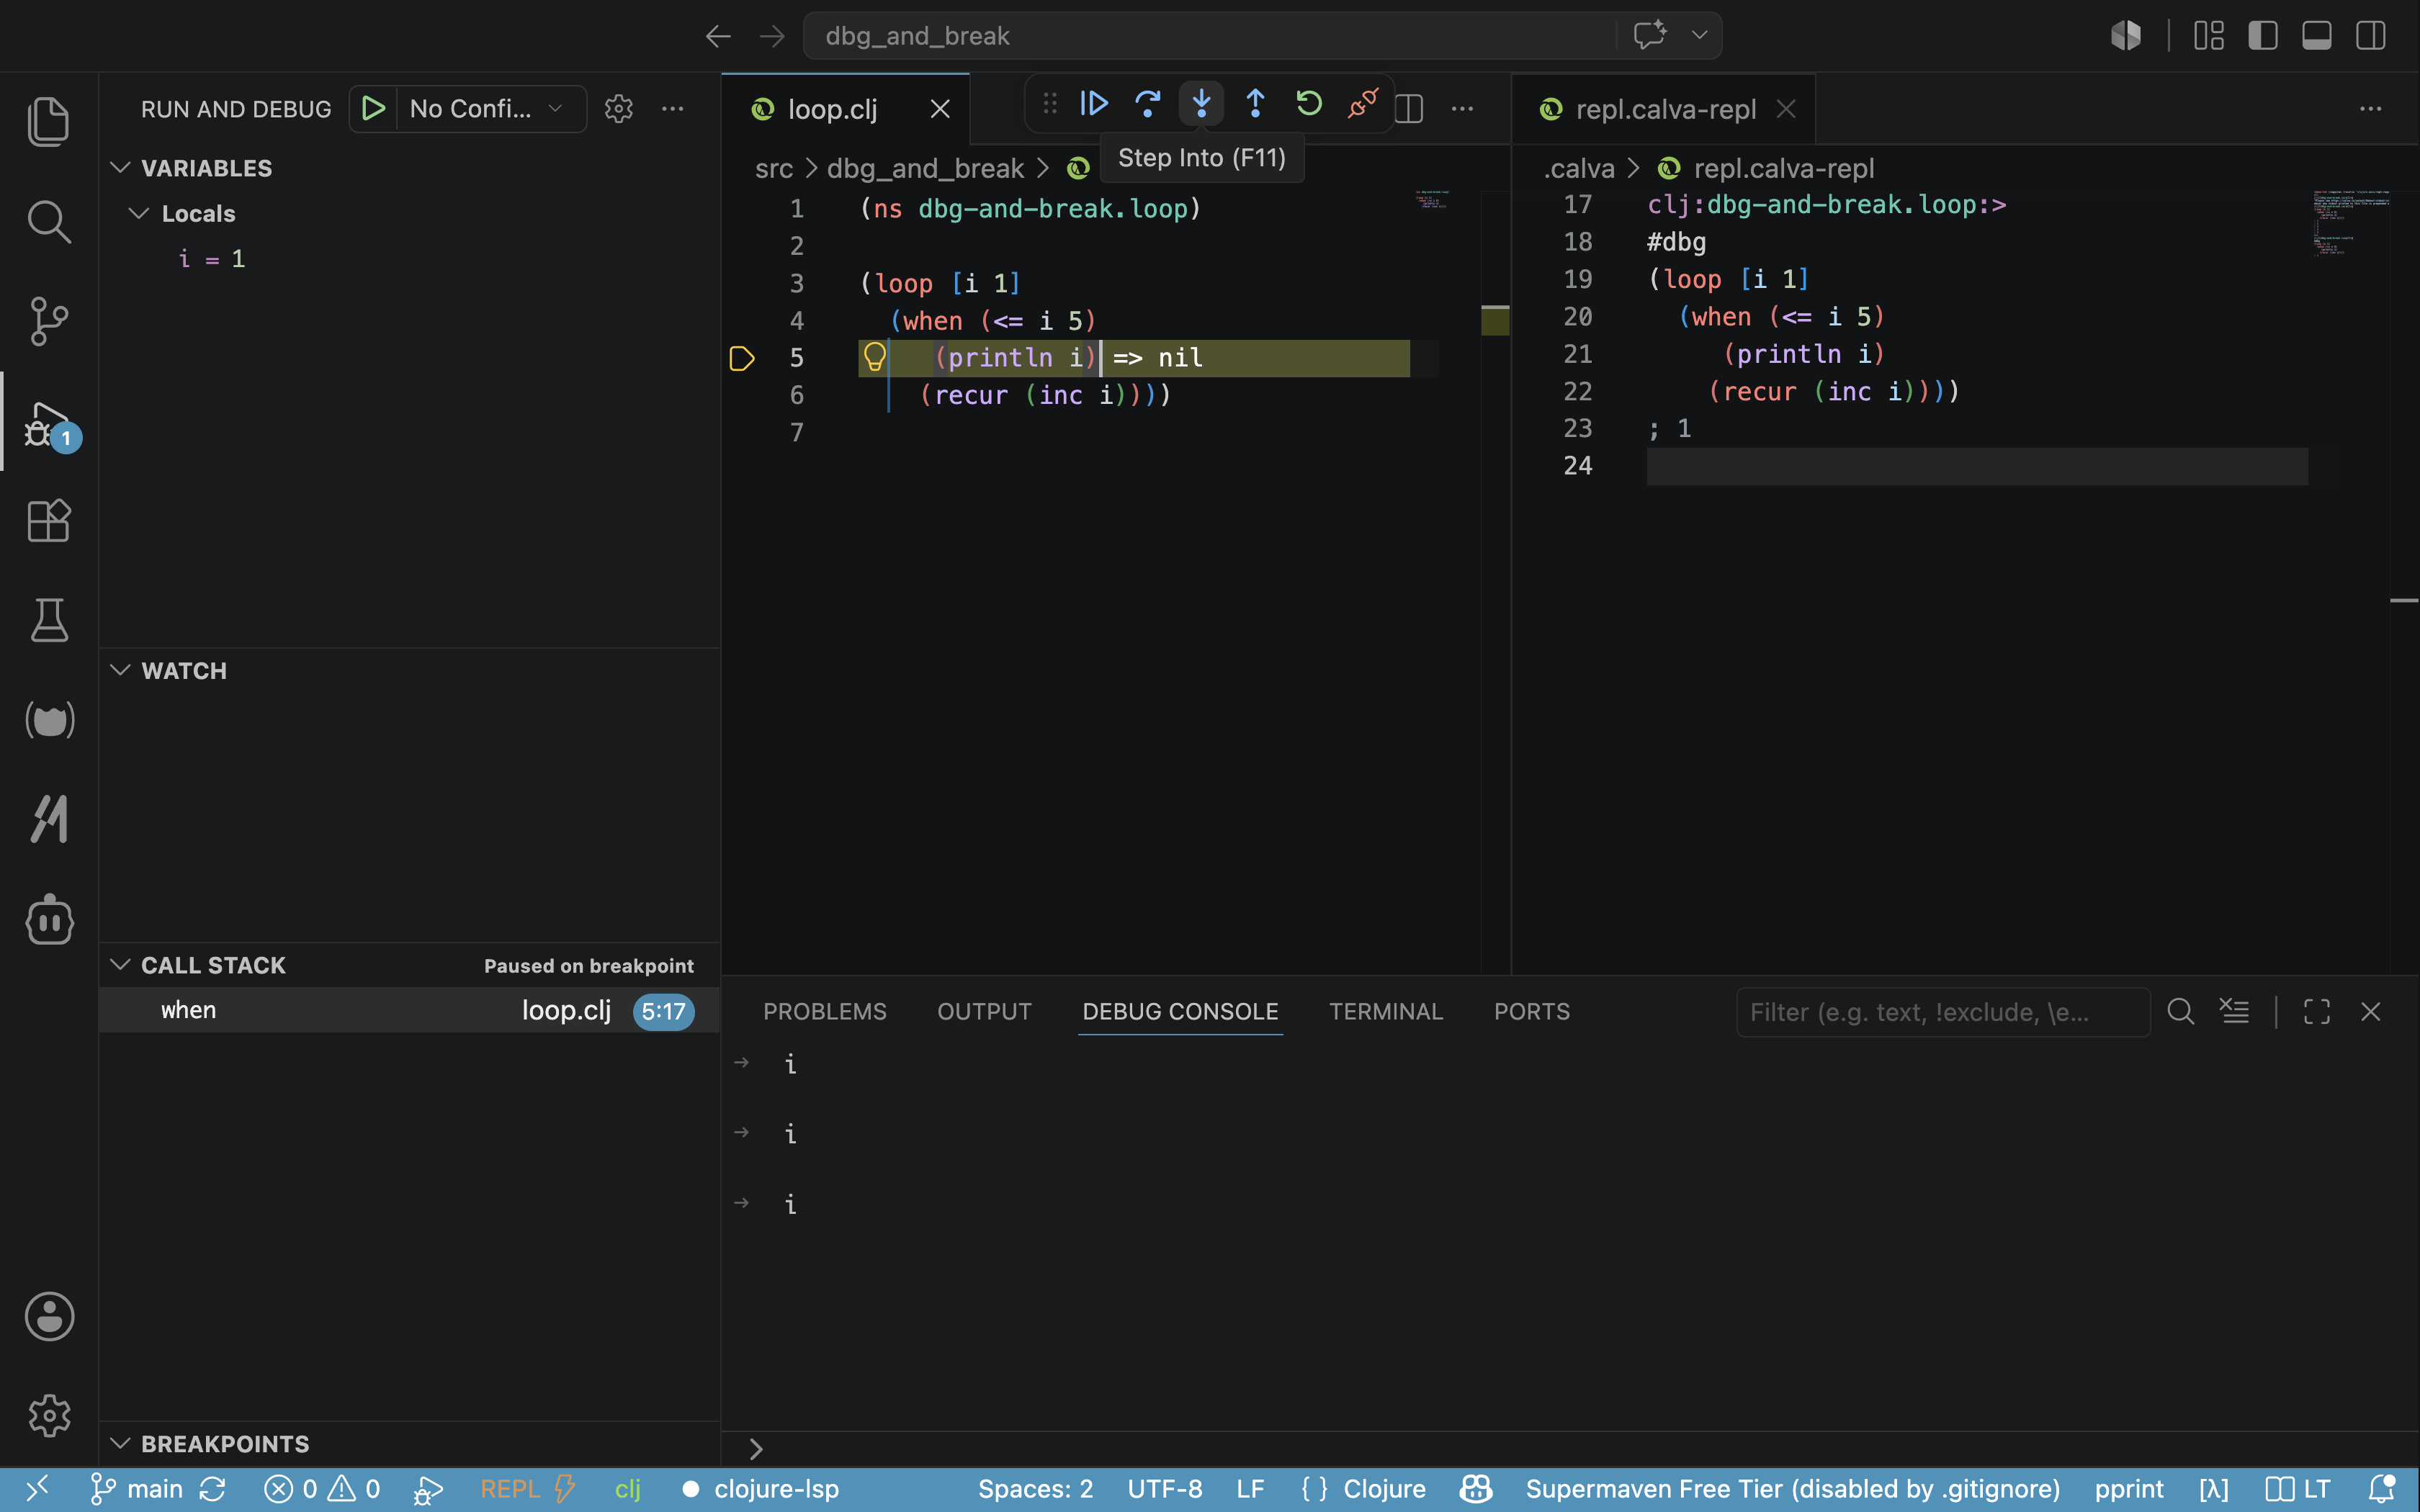
Press Step Into again, and the debugger will stop at the (recur (inc i)) line, with i still being 1.
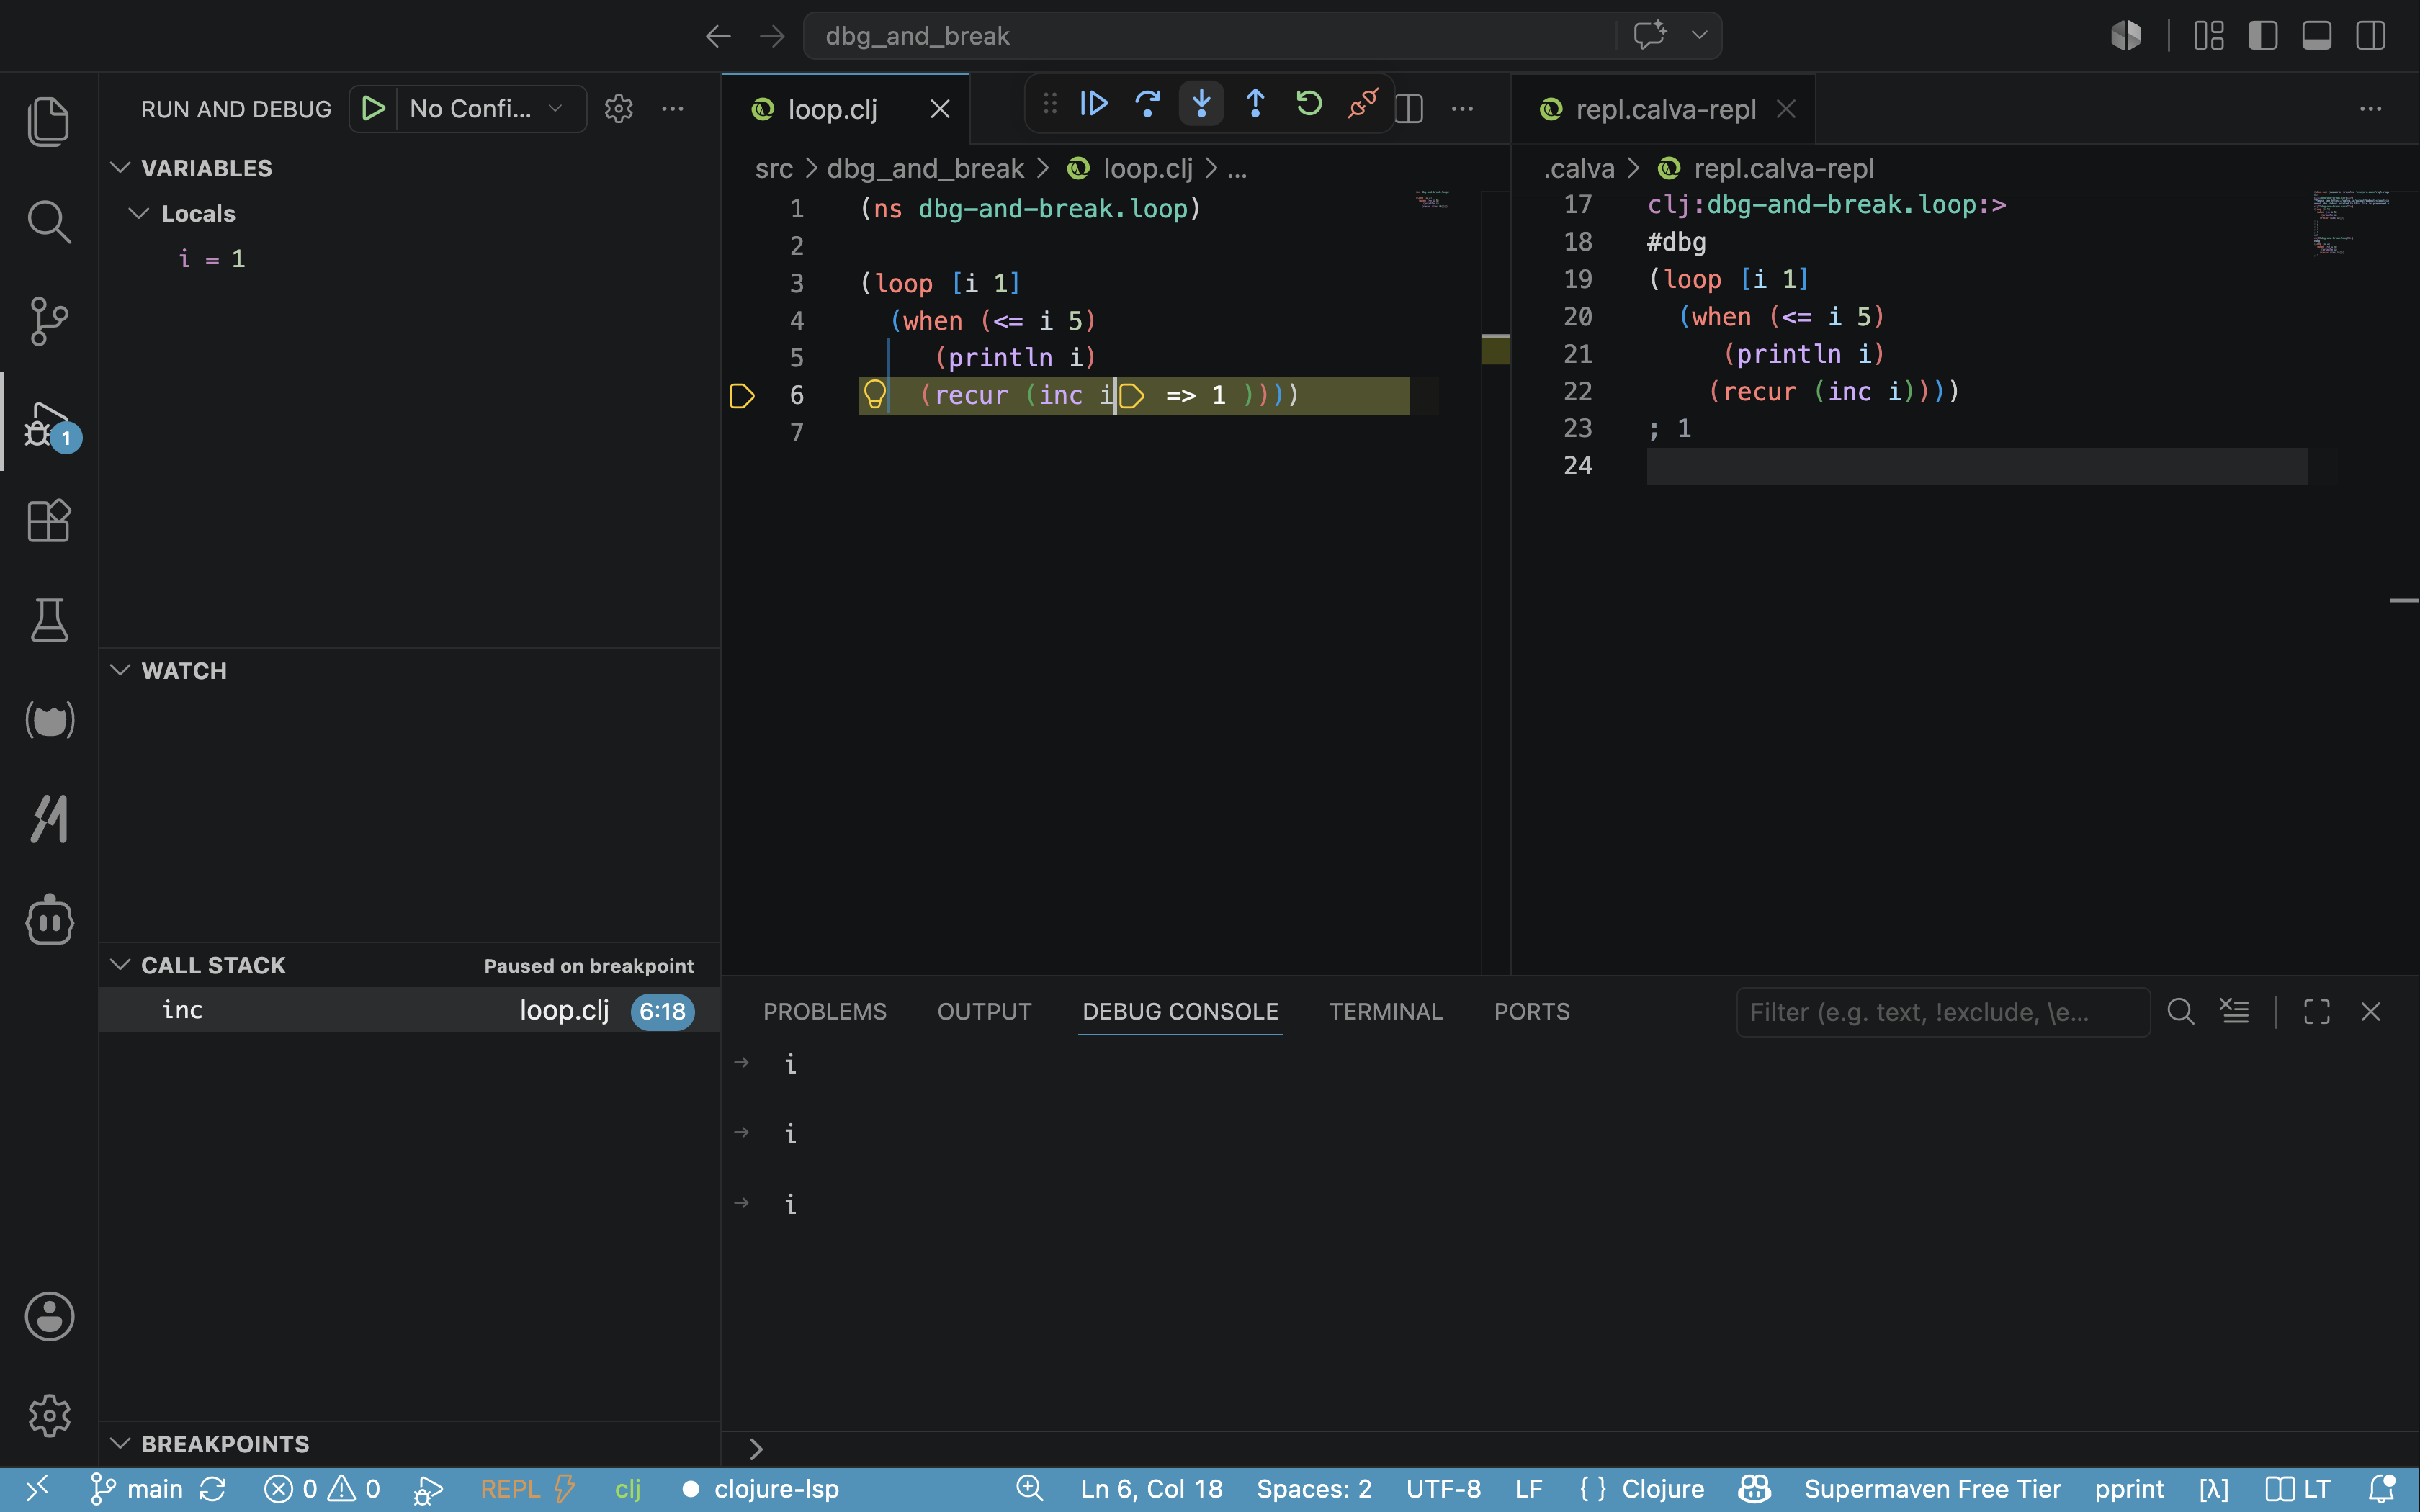
Press Step Into once more, and you will see that (inc i) returns 2, and the value of i becomes 2, as shown below:
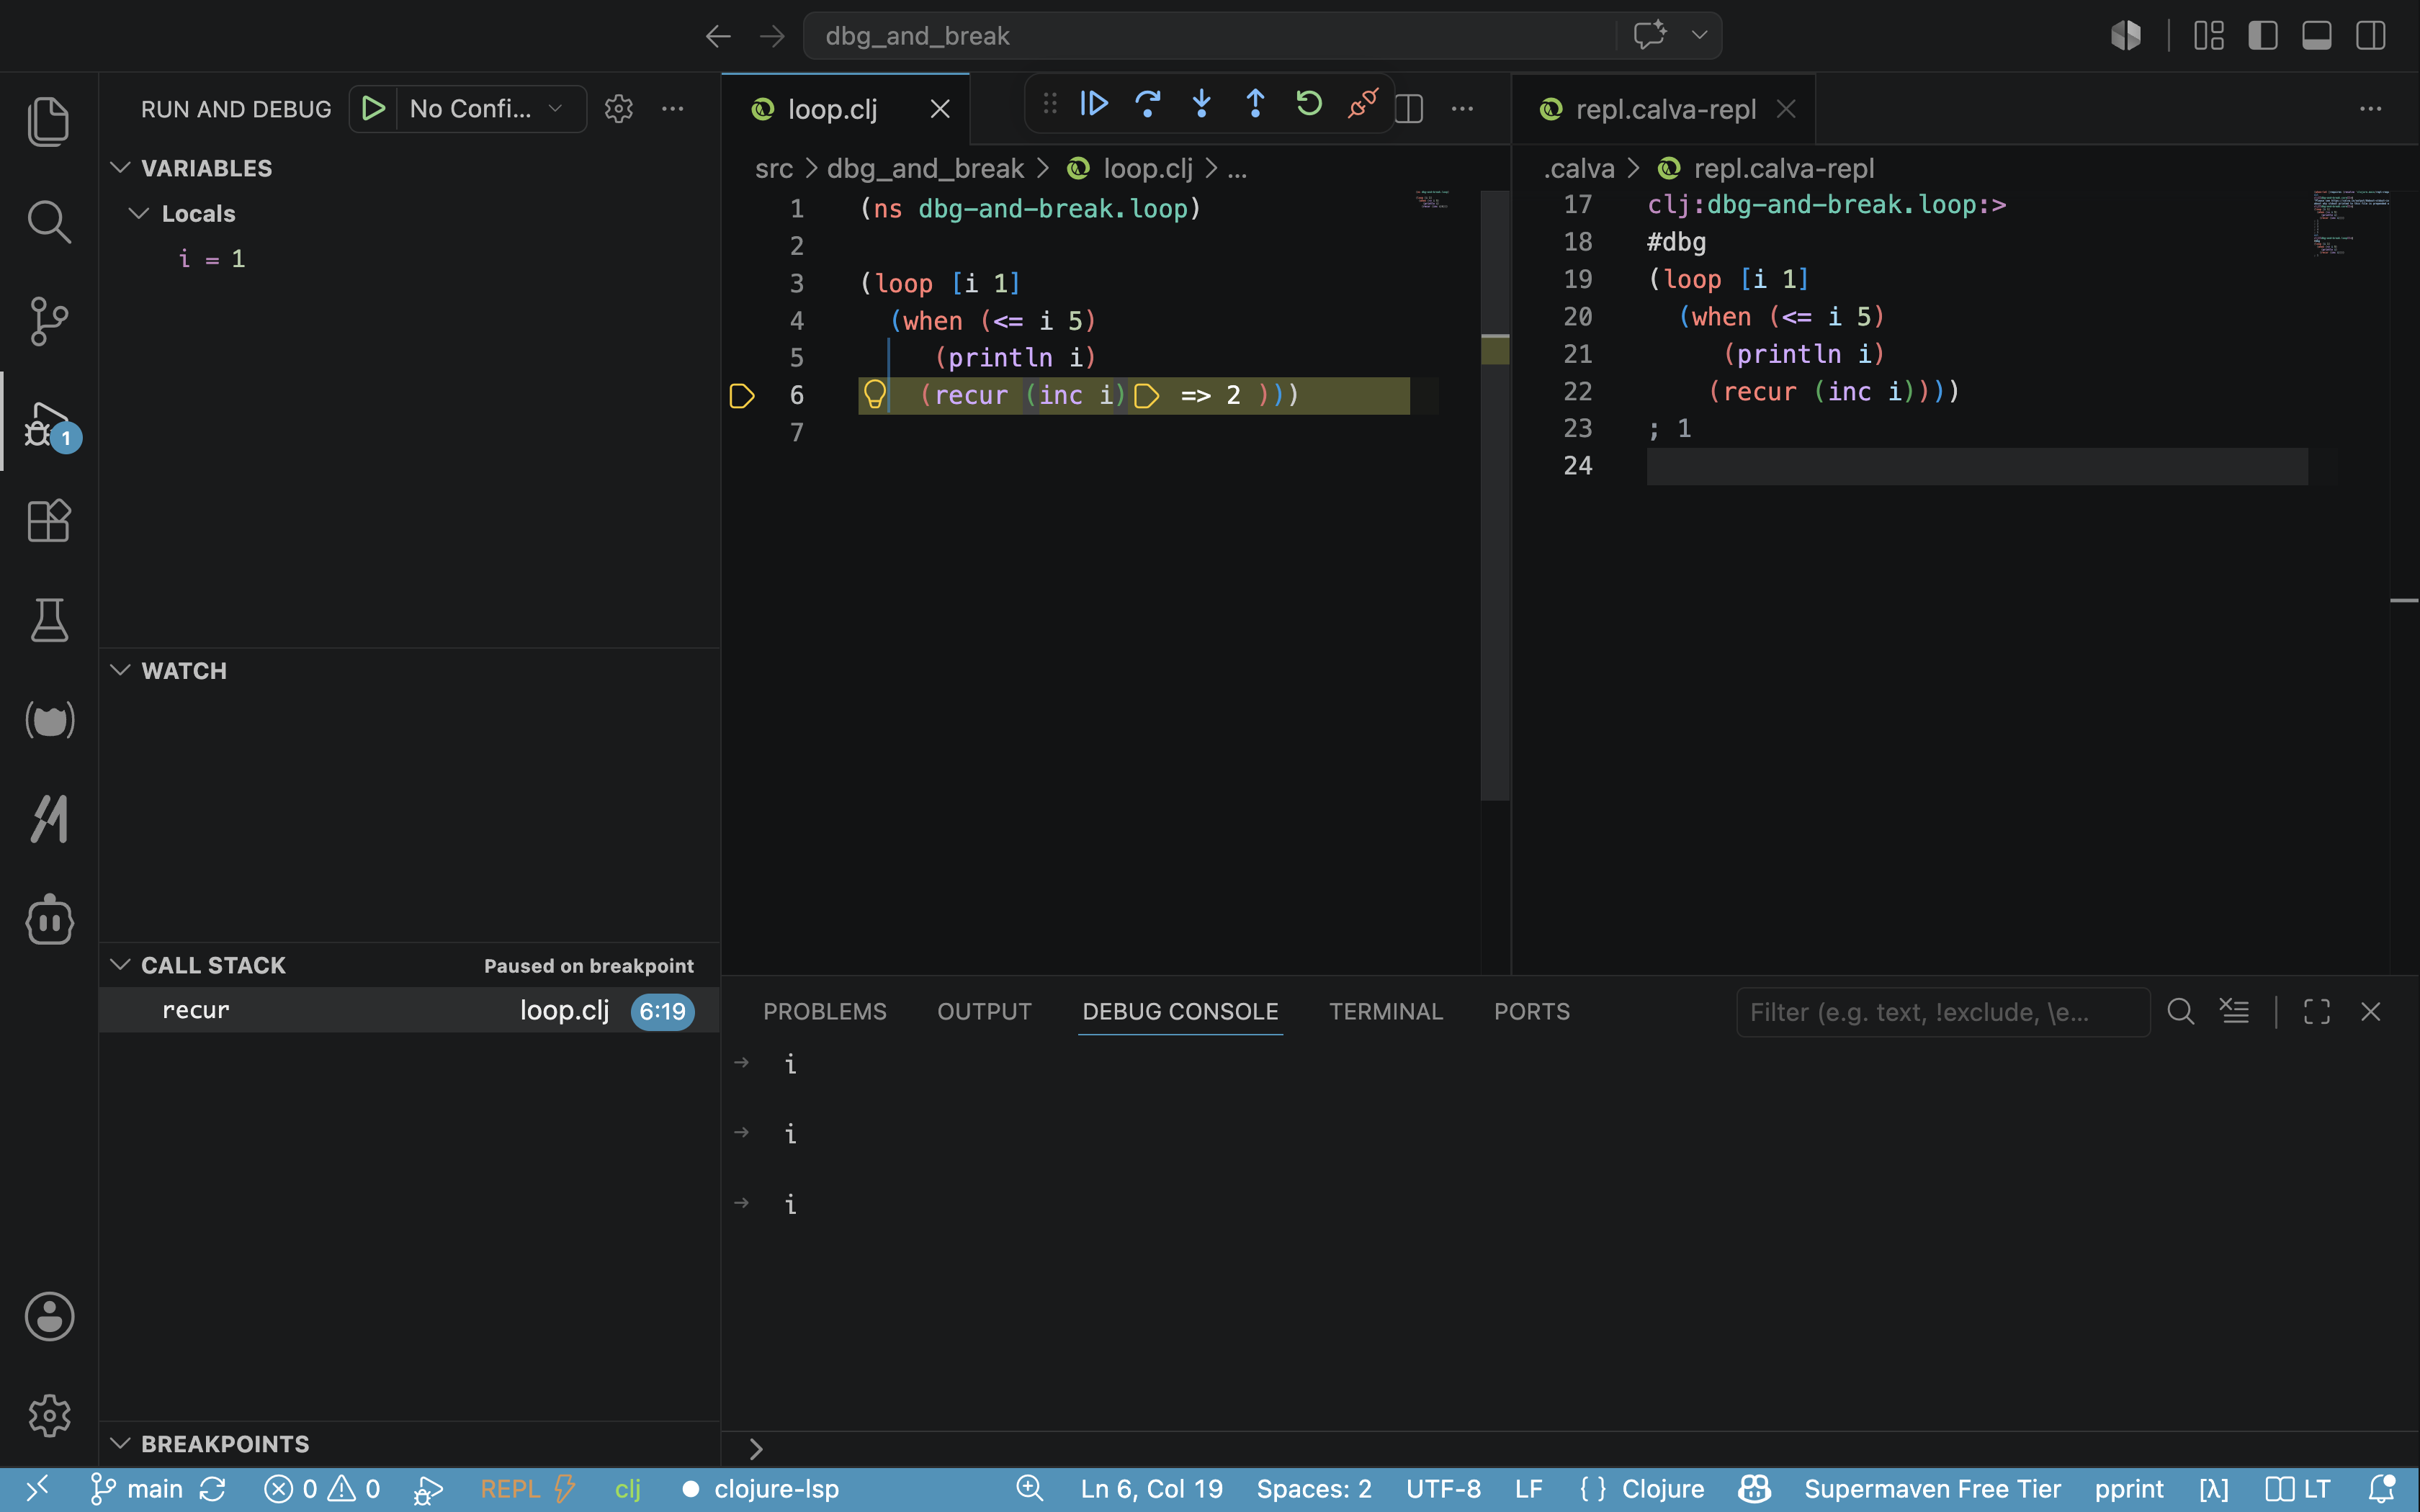
Press Step Into again, and after recur is executed, the program stops back at the (when (⇐ i 5)) line, and the value of i is now 2.
This is how you can step through your code to understand the data flow and debug your logic.
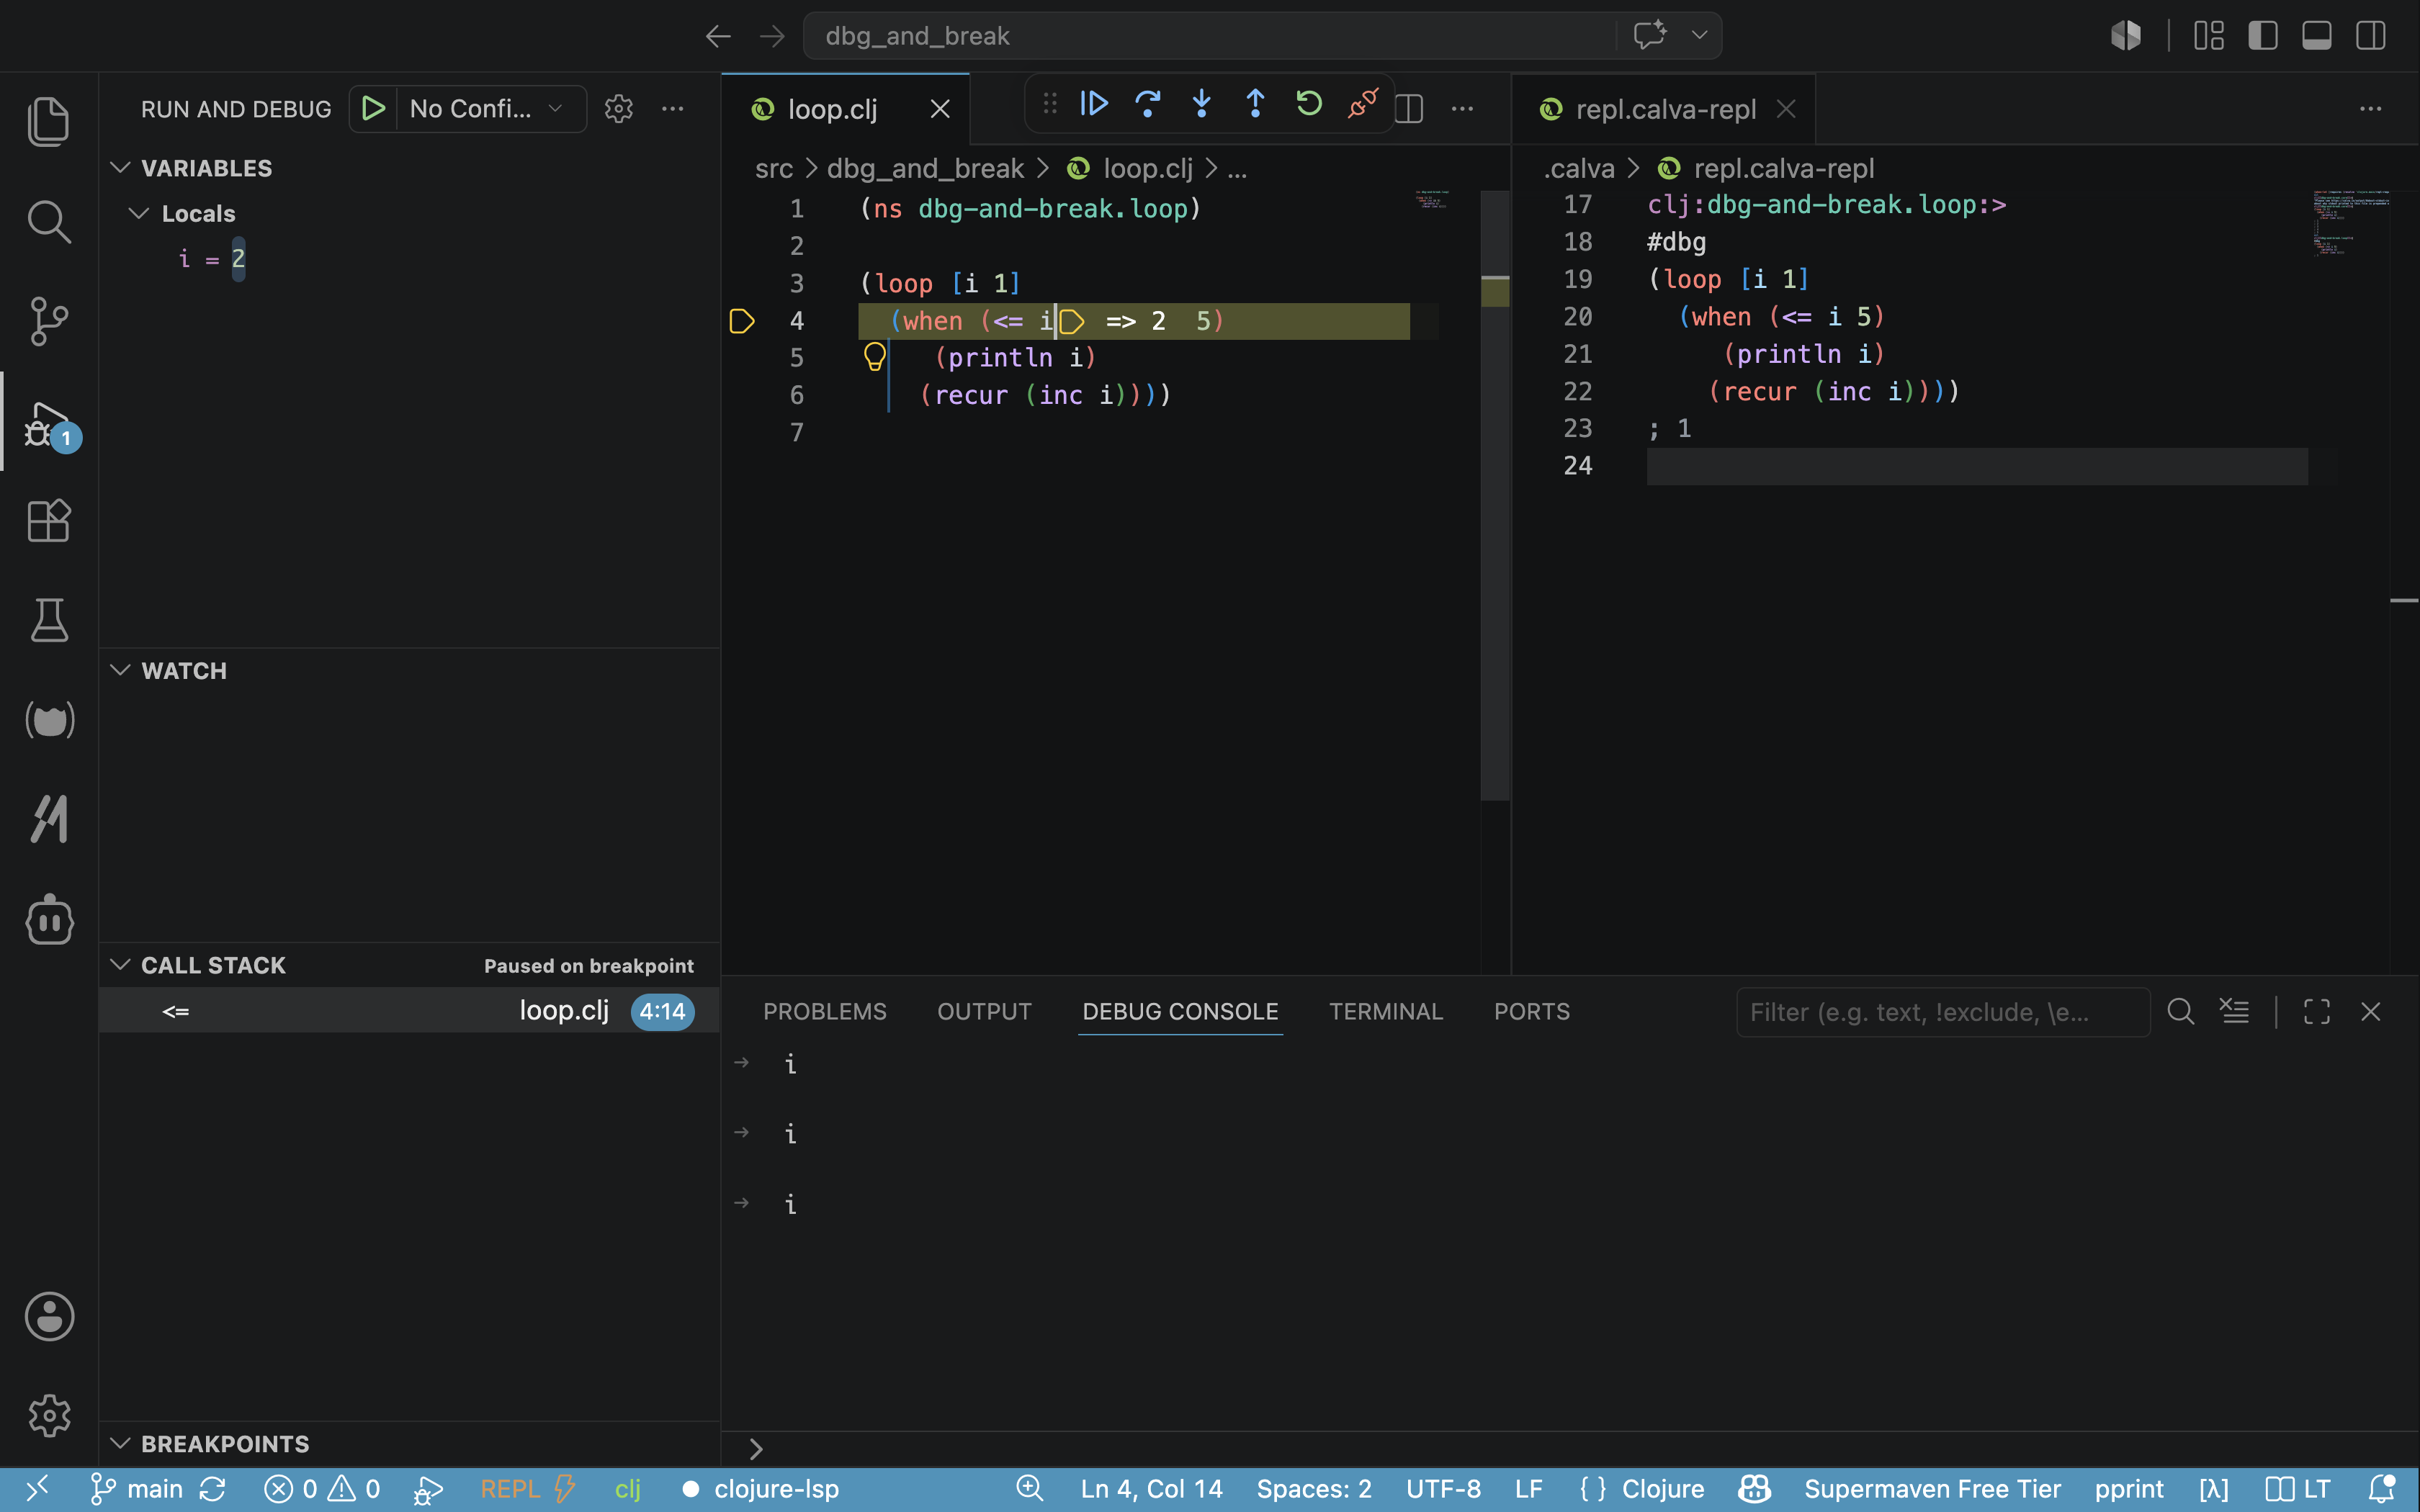
Instead of pressing Step Into, you can press the Continue button. The program will then stop at the (when (⇐ i 5)) line again, and the value of i will be 3.
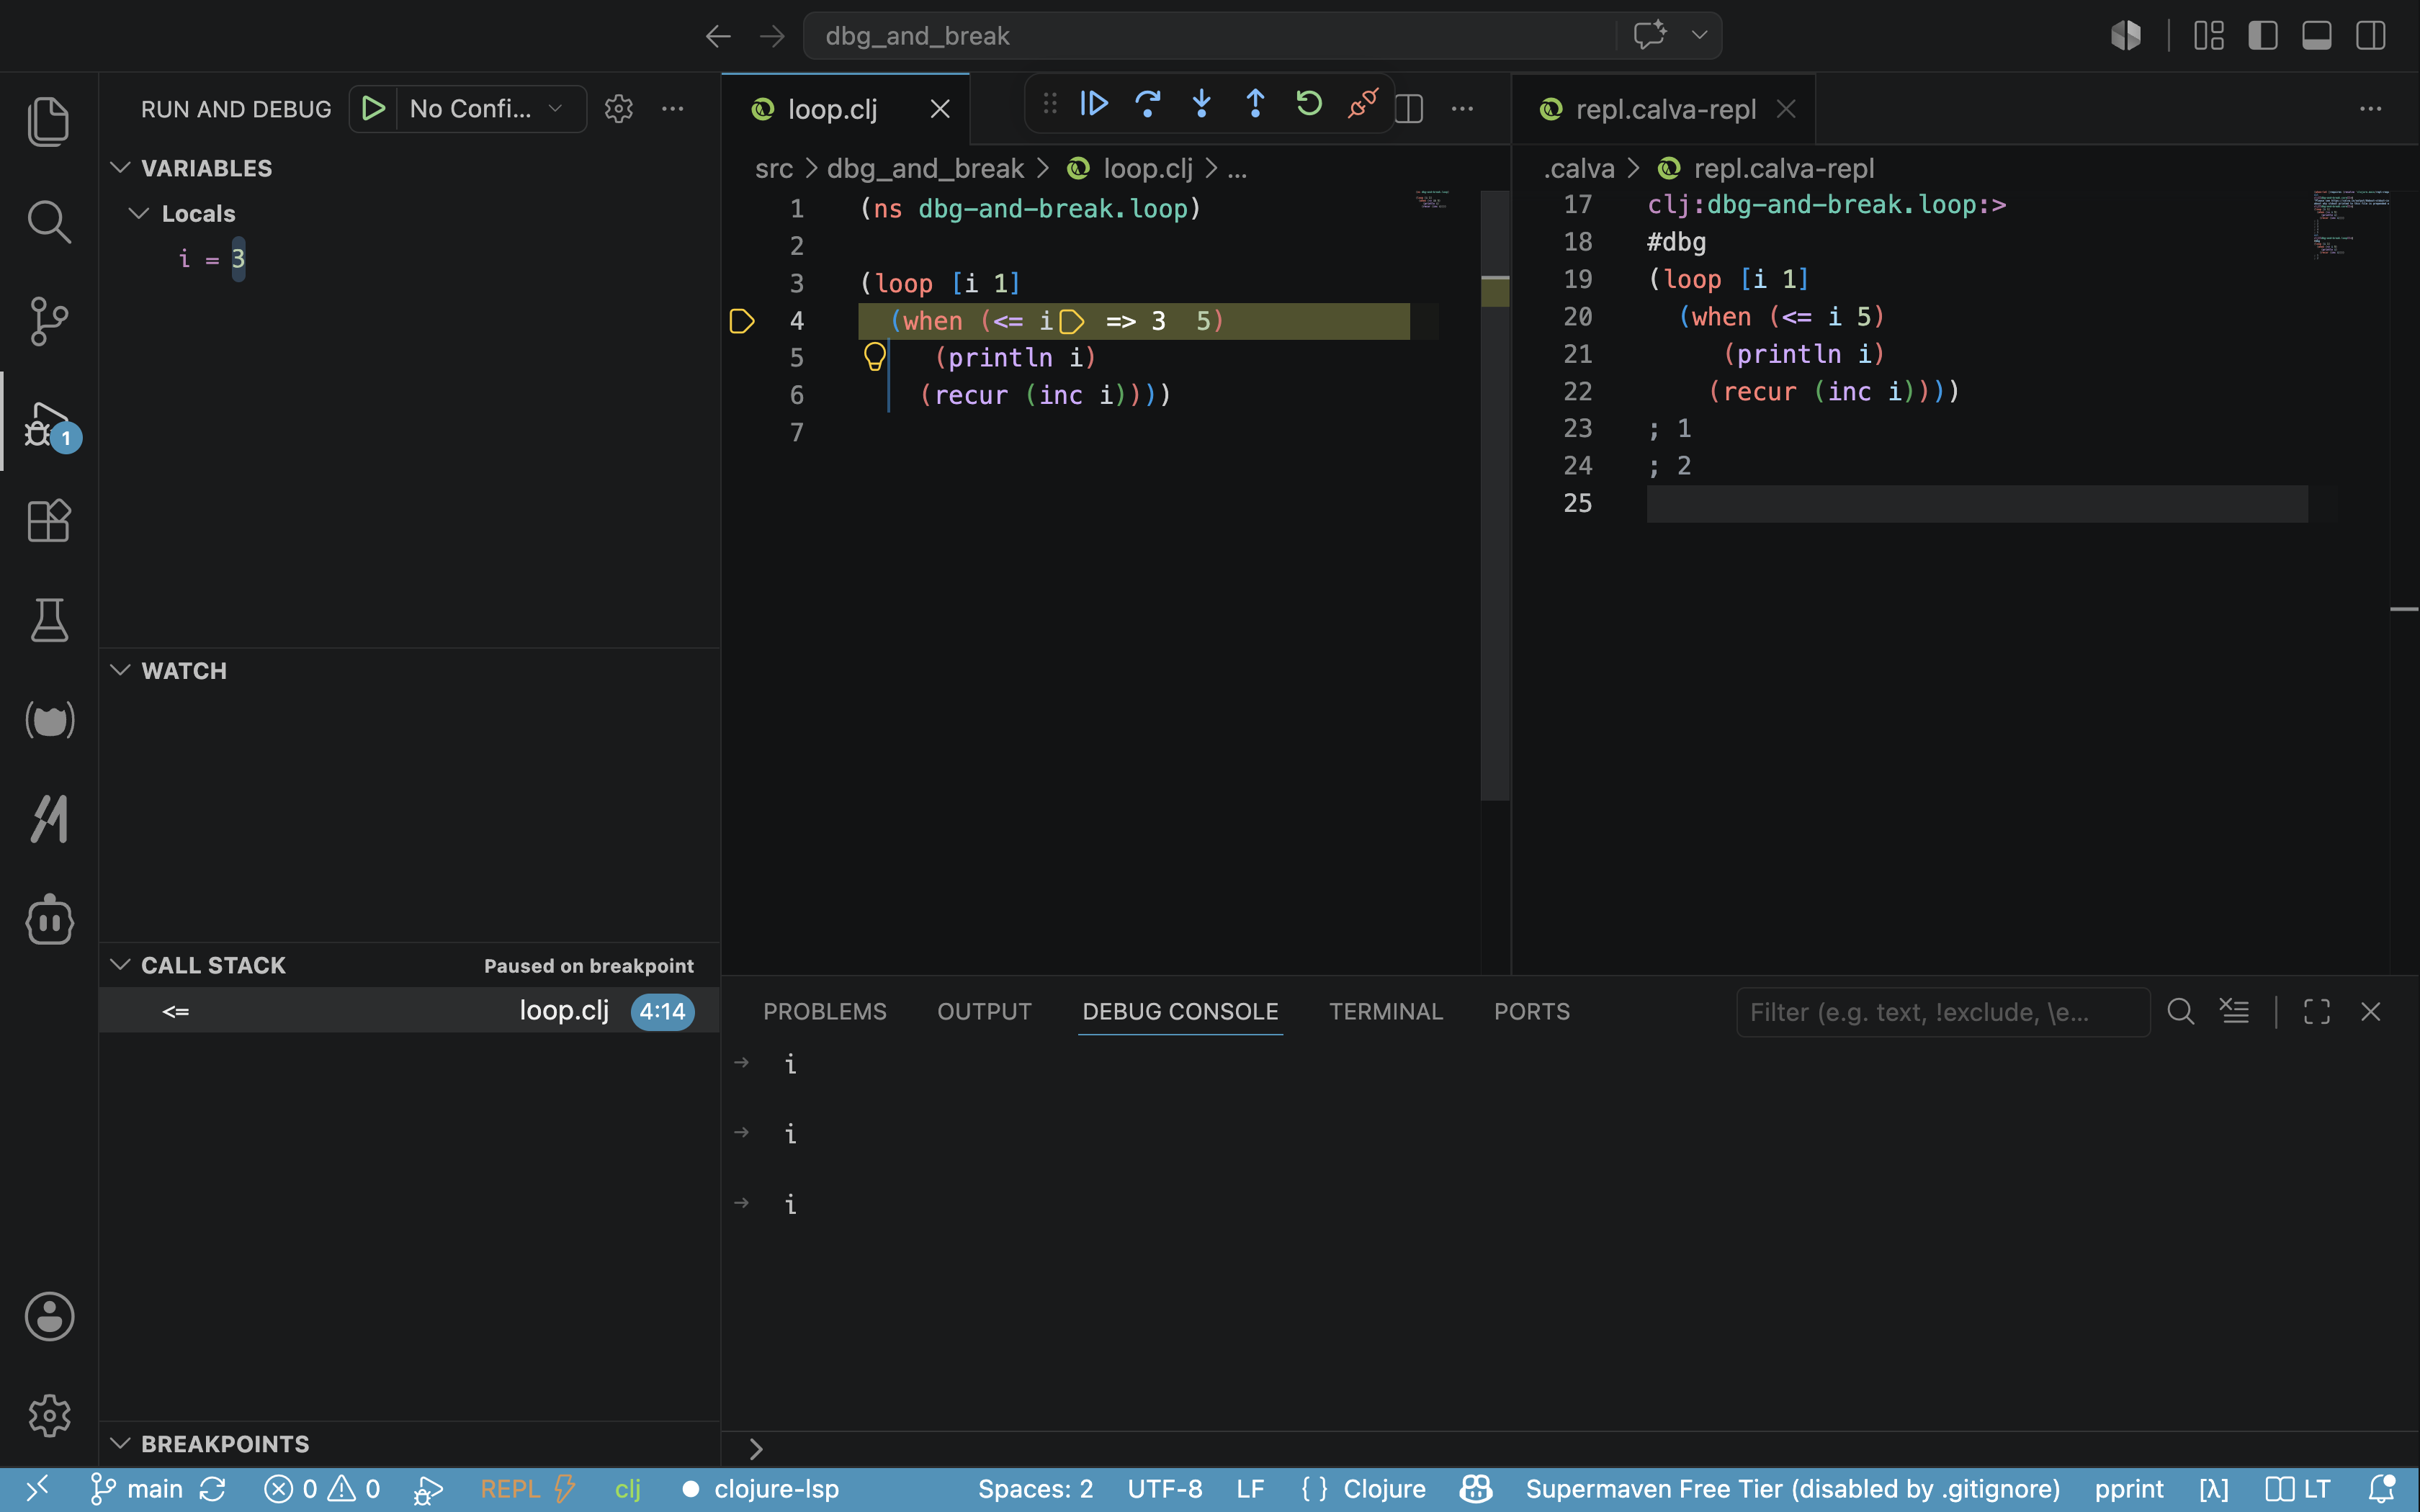
Continue pressing the Continue button until the program stops at the (when (⇐ i 5)) line and the value of i reaches 6.
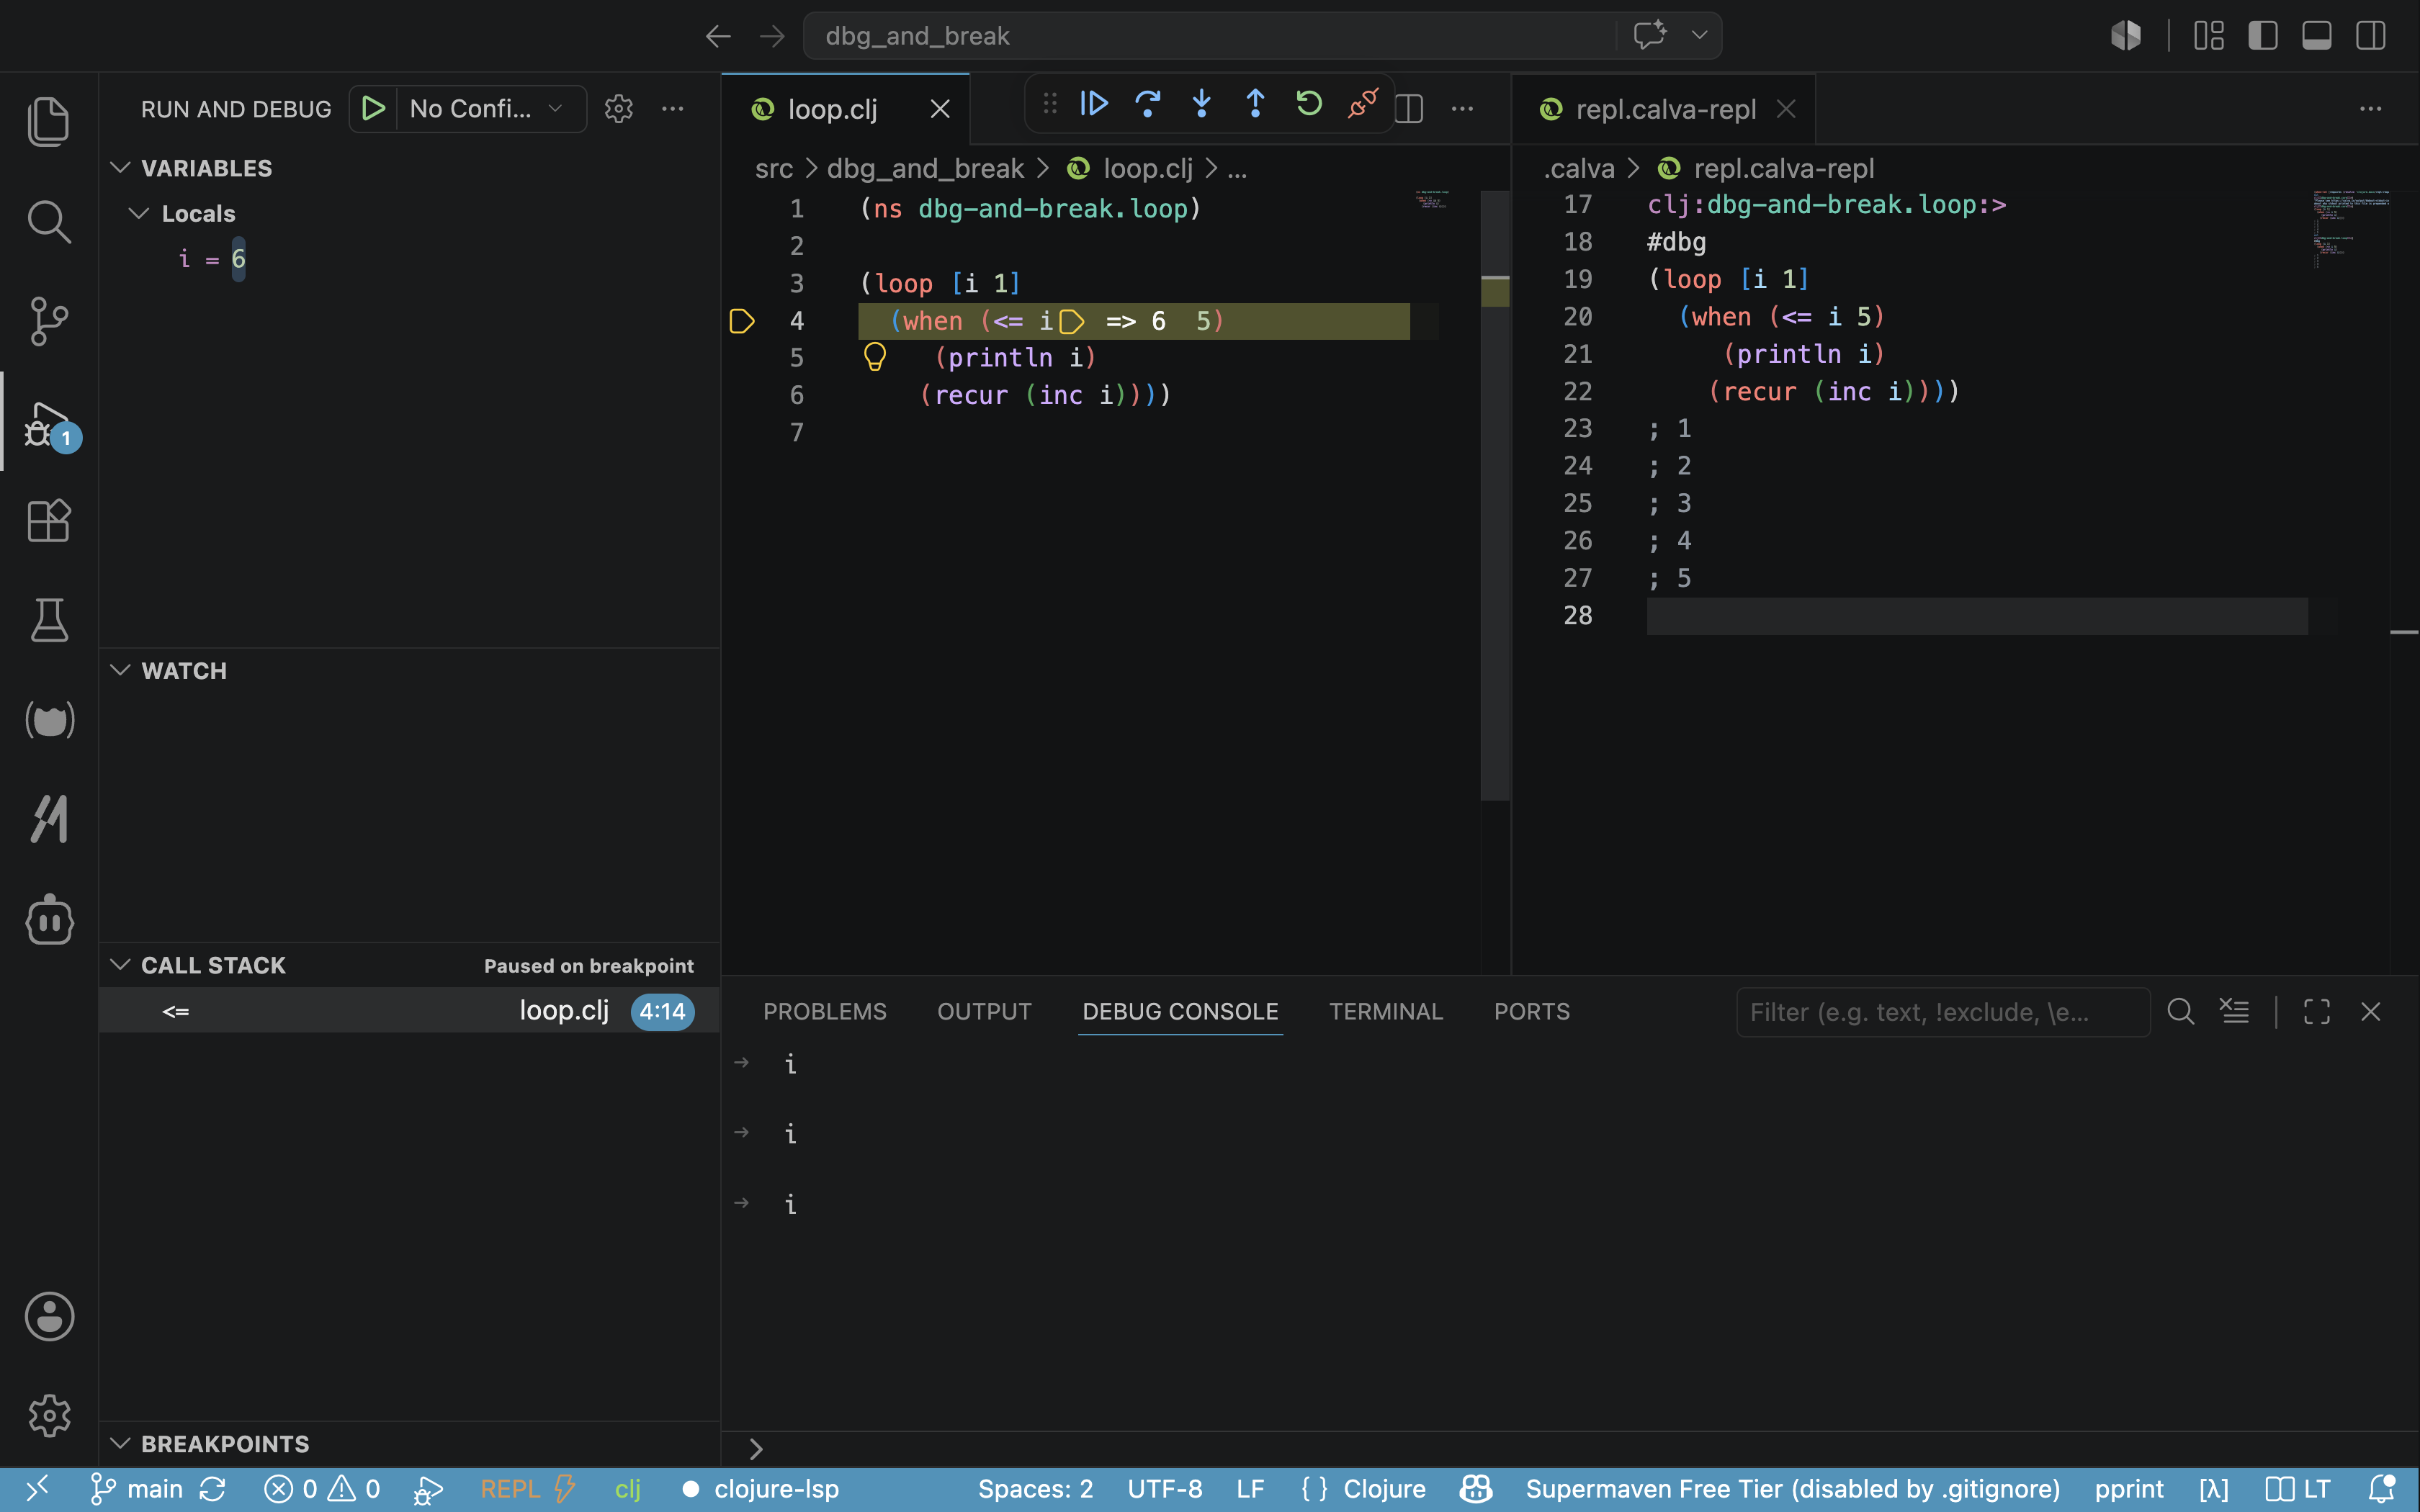
Press Continue one last time, and you will see that the loop form returns nil.
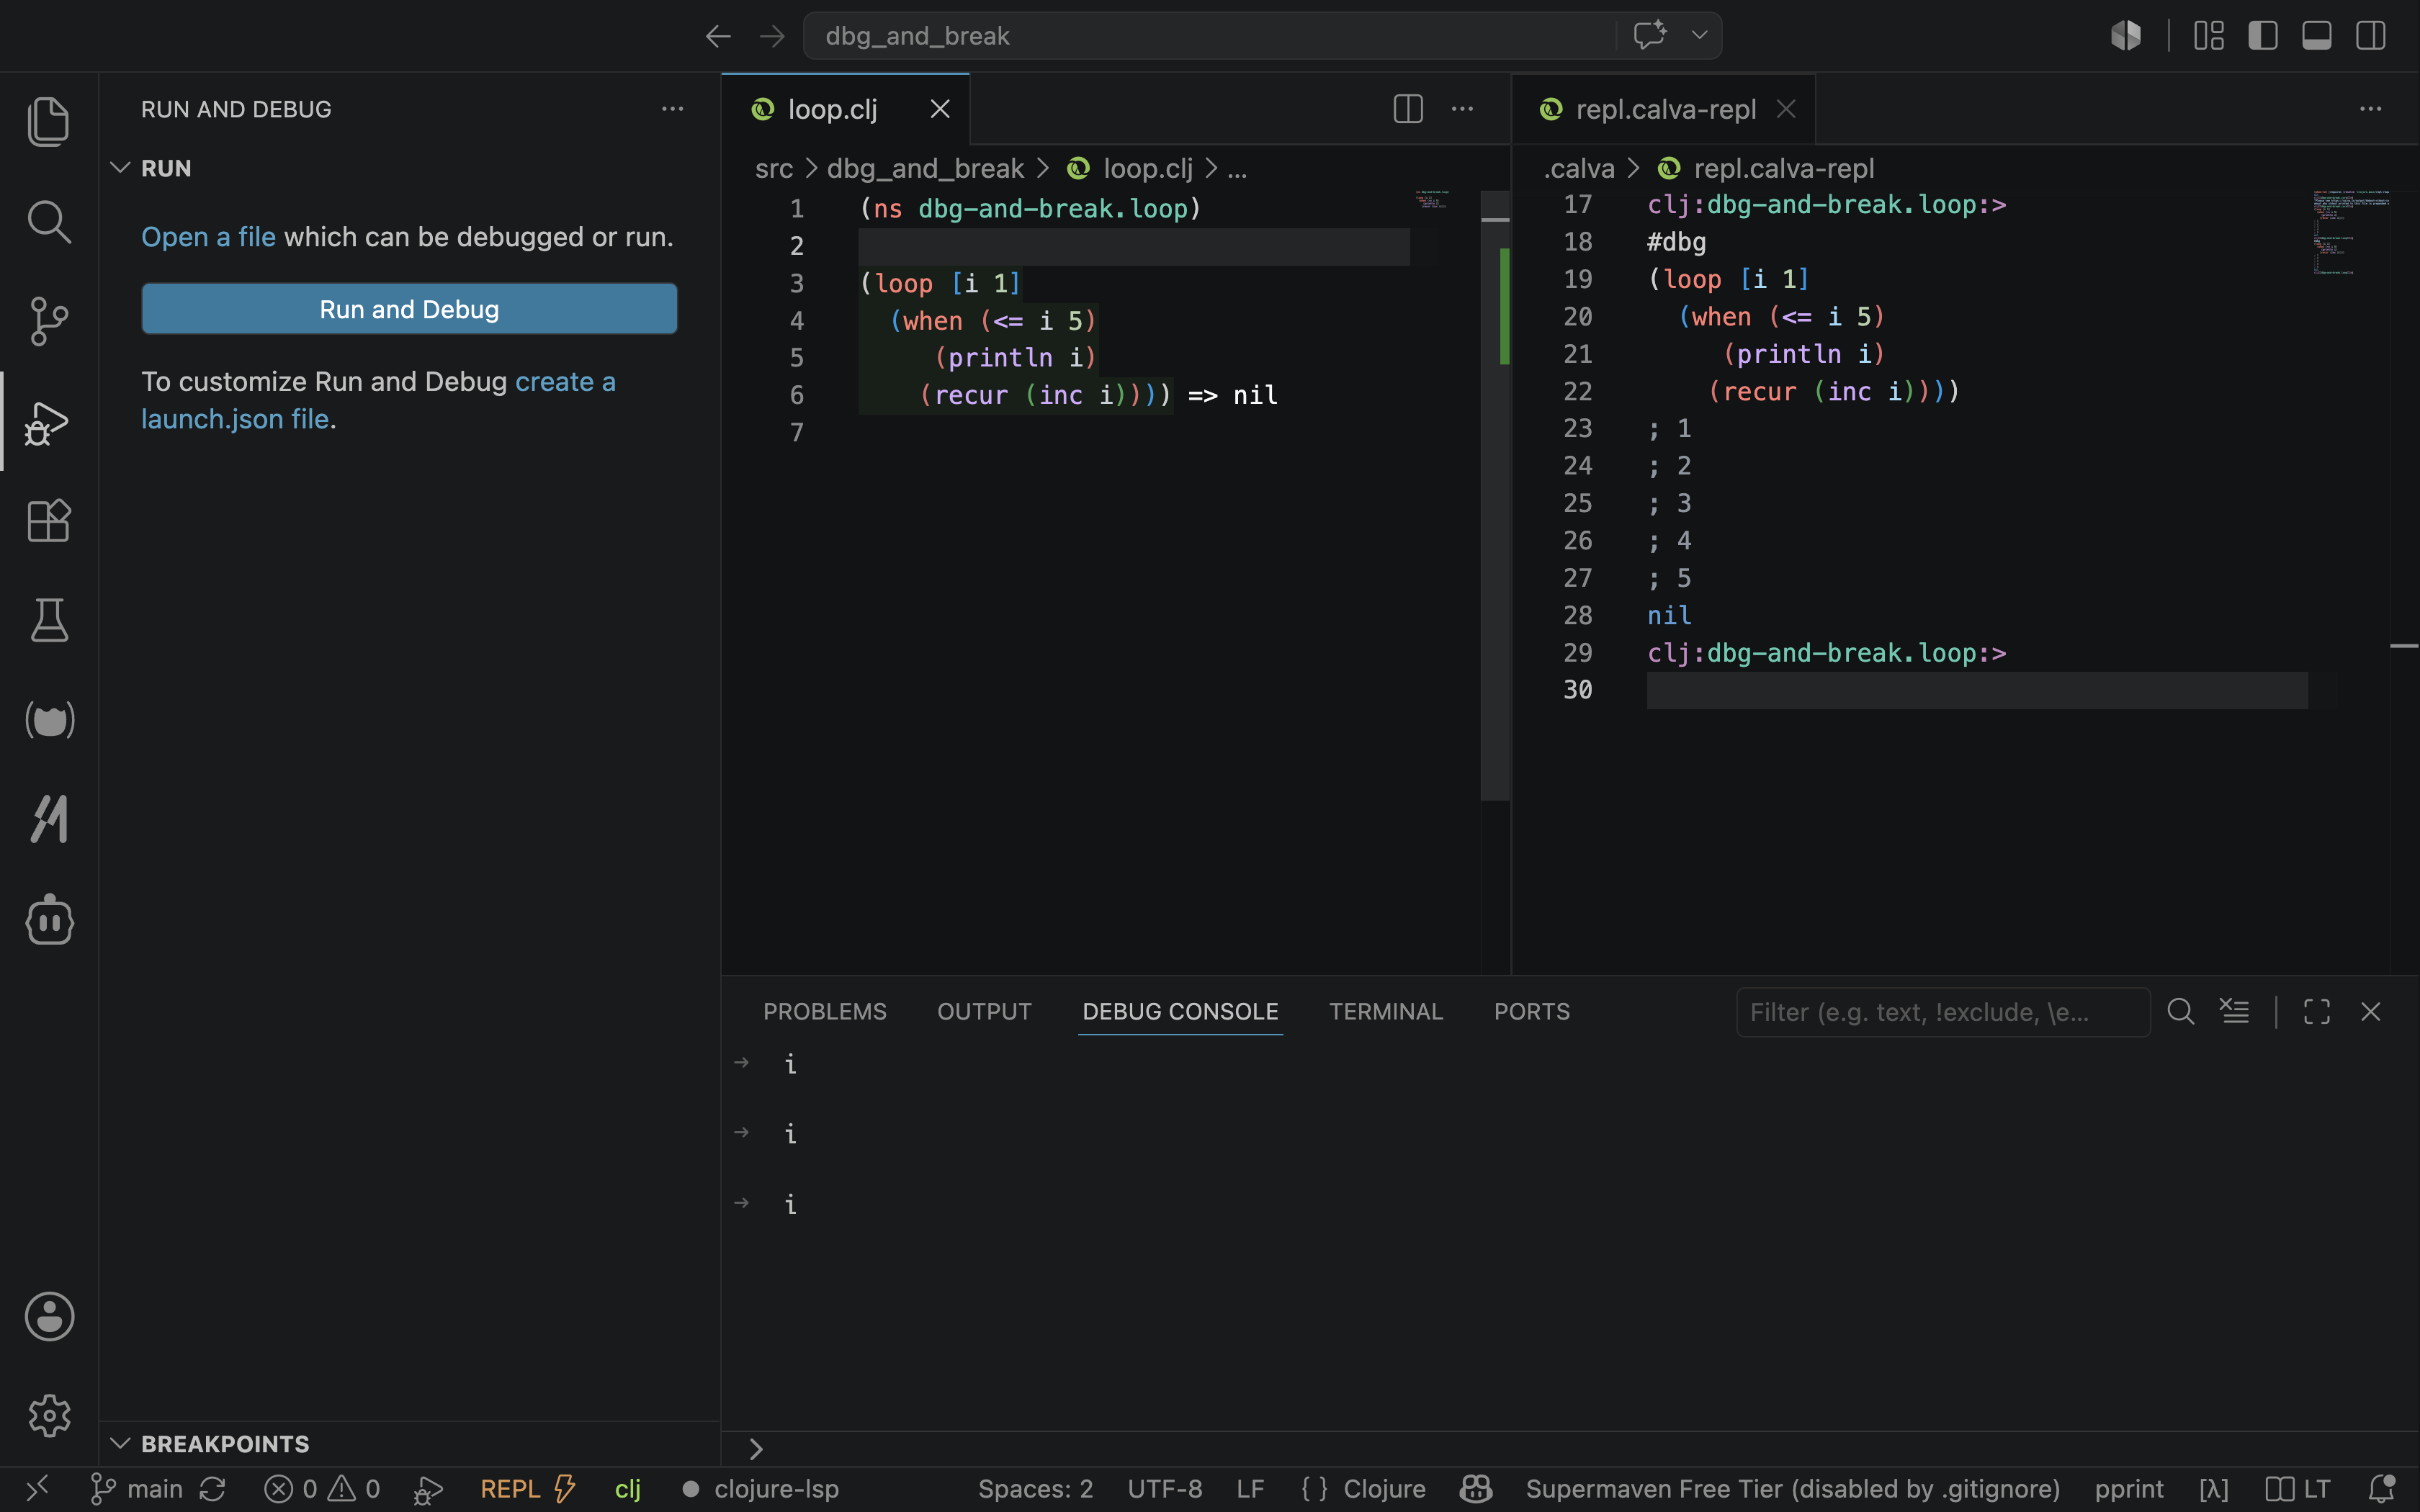
That is how you can debug your code using nREPL and Calva in a Leiningen project.
29.2. Quitting
To stop a debugging session, instrument the form again and press Continue until i reaches a value less than 6. Then, press the Disconnect button:
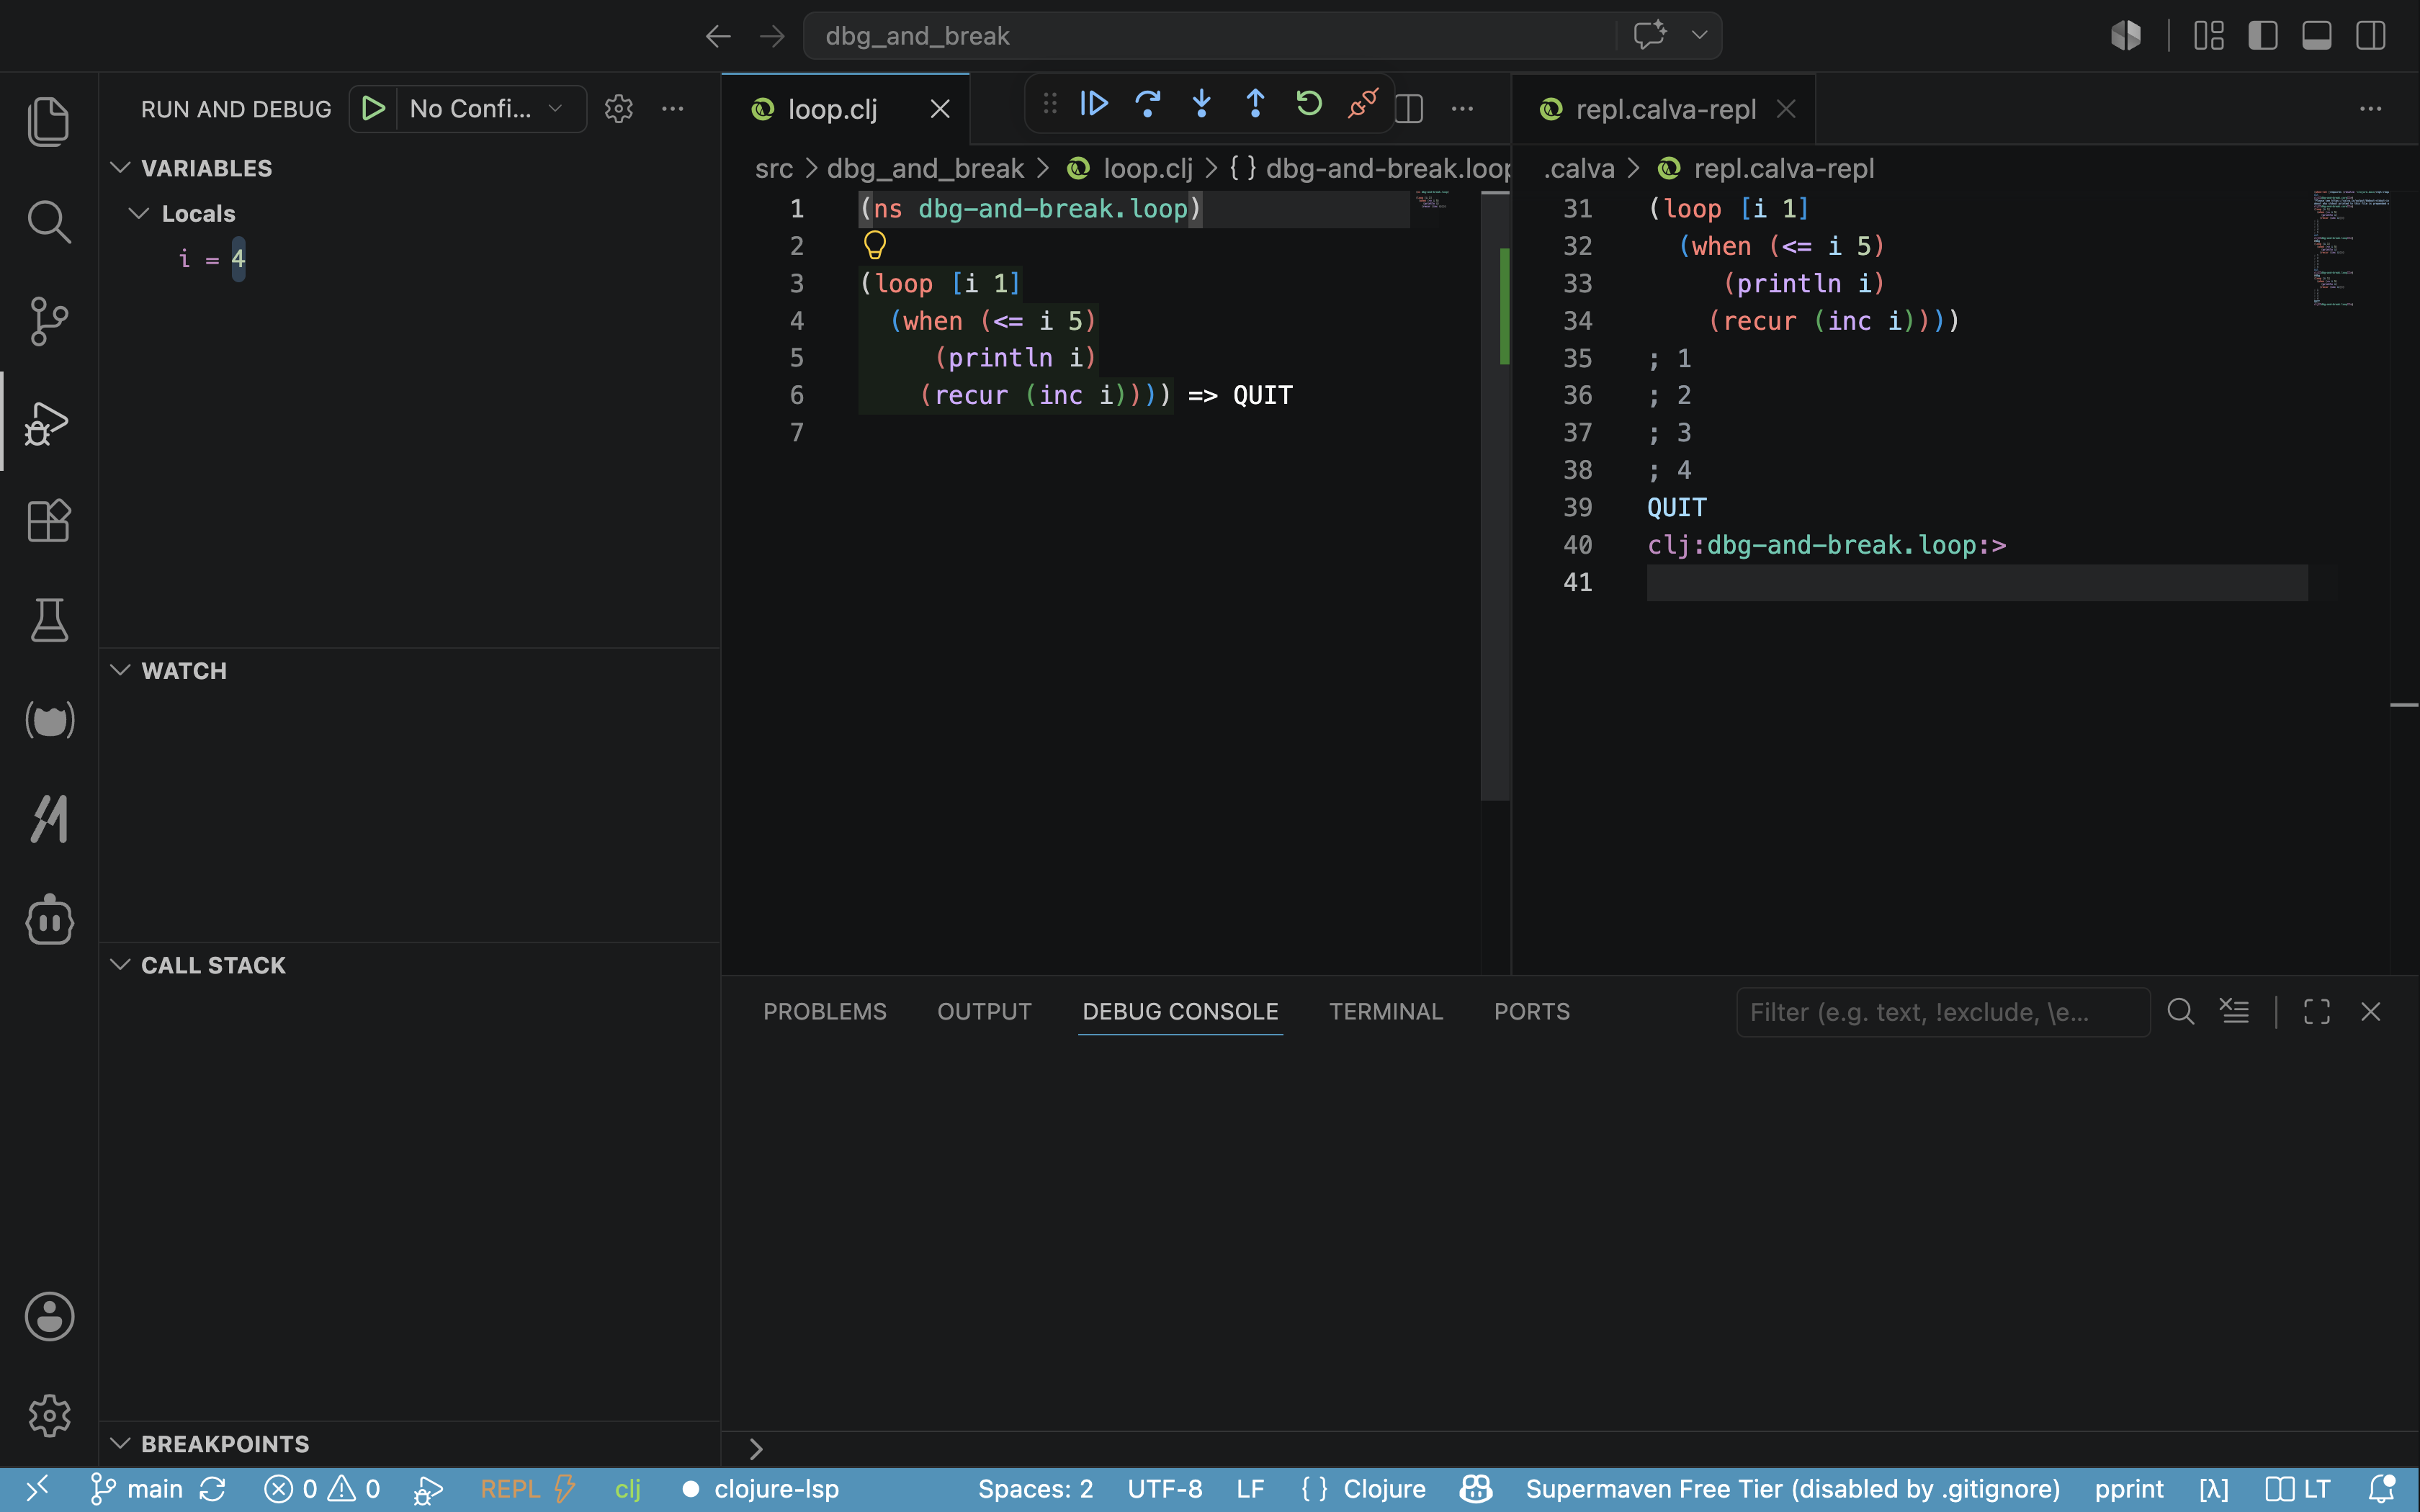
The program will quit. In this case, only values up to 4 were printed. The Disconnect button is very useful when you have finished debugging and want to stop the process.
29.3. Using explicit #dbg
Rather than using the VS Code menu to instrument a form, you can place #dbg directly in front of the form in your code:
(ns dbg-and-break.explicit-debug)
#dbg
(loop [i 1]
(when (<= i 5)
(println i)
(recur (inc i))))The debugging experience is identical to the previous method. After adding #dbg in front of the form, place your cursor within the form and press alt+enter or option+enter to start the debugger.
29.4. #break
I initially tried using #break in the program below, but it did not work. After consulting an AI, I found the following example:
(ns dbg-and-break.loop)
(loop [i 1]
(when (<= i 5)
#dbg ^{:break/when (= i 3)}
(println i)
(recur (inc i))))In the line #dbg ^{:break/when (= i 3)}, the metadata ^{:break/when (= i 3)} tells the debugger to break specifically when the value of i is 3, at which point the #dbg instrumentation kicks in.
Jack in, place your cursor in the form, and press alt+enter or option+enter. You should see the following:
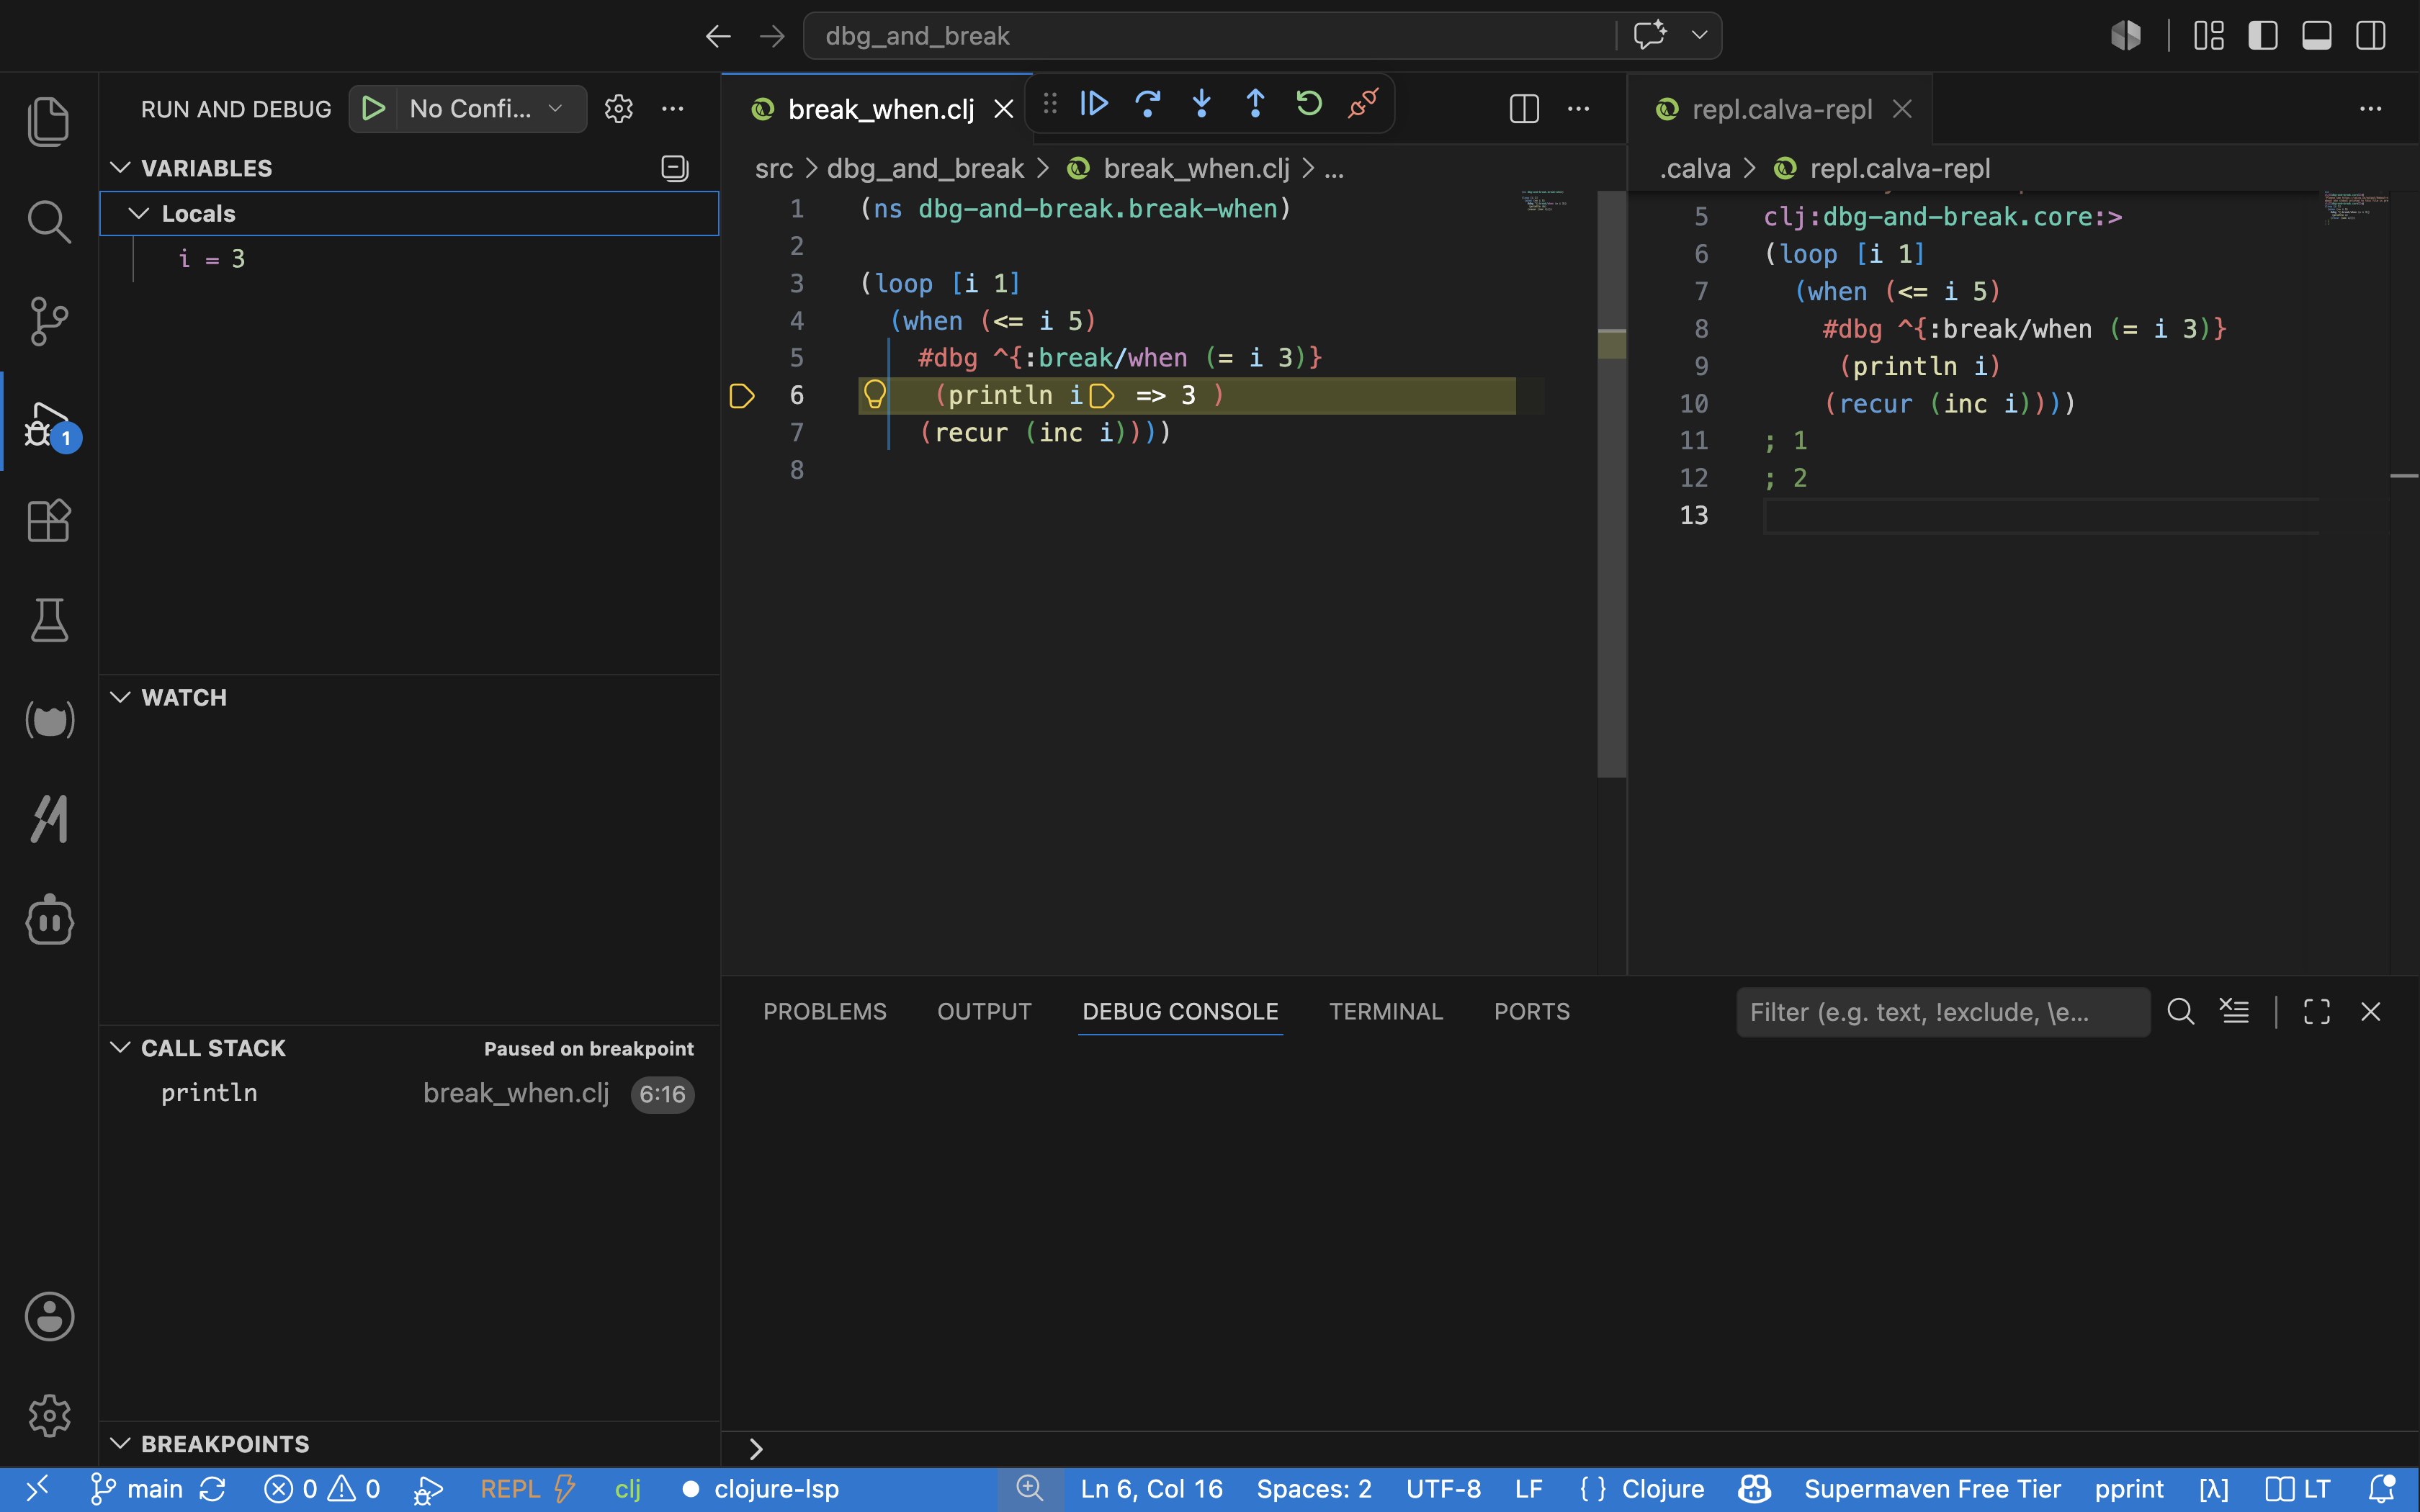
As shown in the image, 1 and 2 are printed, and the program stops when i is 3. Hit the Continue button, and it will run until i is 6, printing all values from 1 to 5.
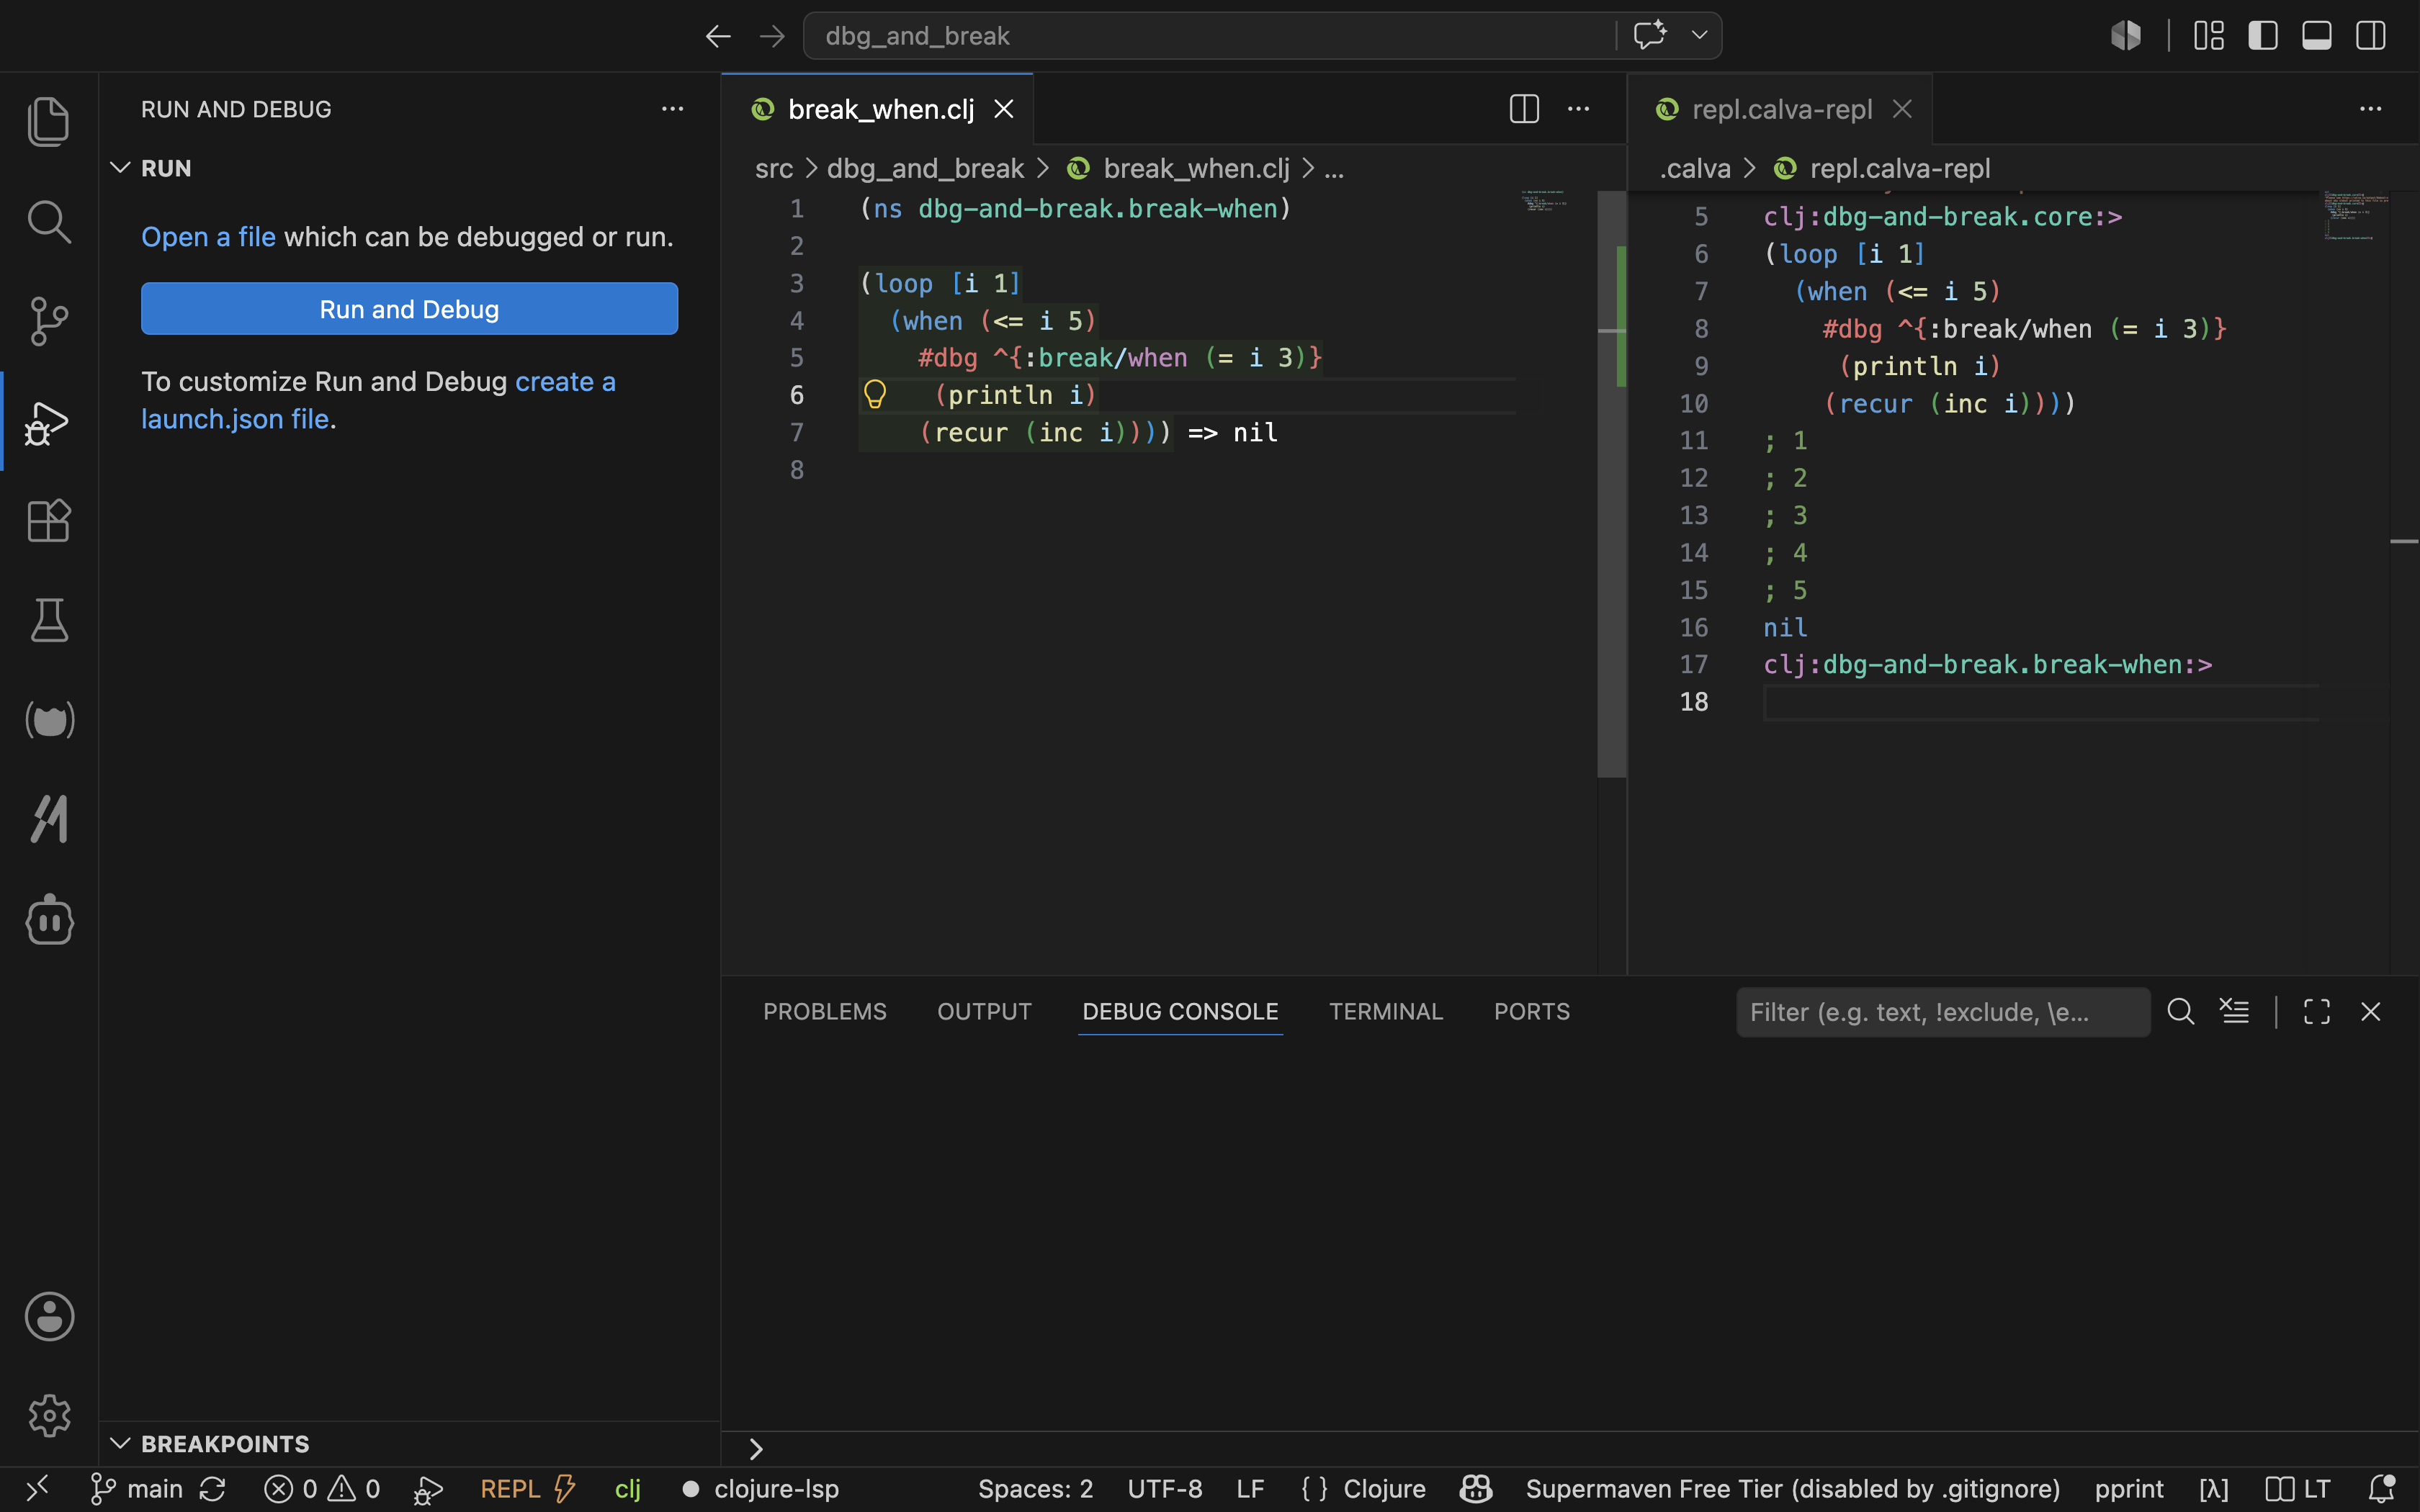
When the program breaks and #dbg is active, you can inspect the value of i and perform various debugging tasks. While this is a simple example, these types of conditional breaks are extremely helpful in complex programs dealing with many values.
To further demonstrate the use of break, consider this program:
(ns dbg-and-break.apply-discount)
(defn apply-discount [order]
(let [price (:price order)
qty (:qty order)
total (* price qty)
;; Bug: discount applies to price, not total
discount (* price 0.1)]
#break
(- total discount)))
(defn process-orders [orders]
(map apply-discount orders))
(process-orders [{:price 100 :qty 3}
{:price 50 :qty 5}])Jack in and load the apply-discount function into the REPL by placing the cursor in it and pressing alt+enter or option+enter. Do the same for process-orders.
Now, place the cursor in the (process-orders …) form and press alt+enter or option+enter. You will see the following:
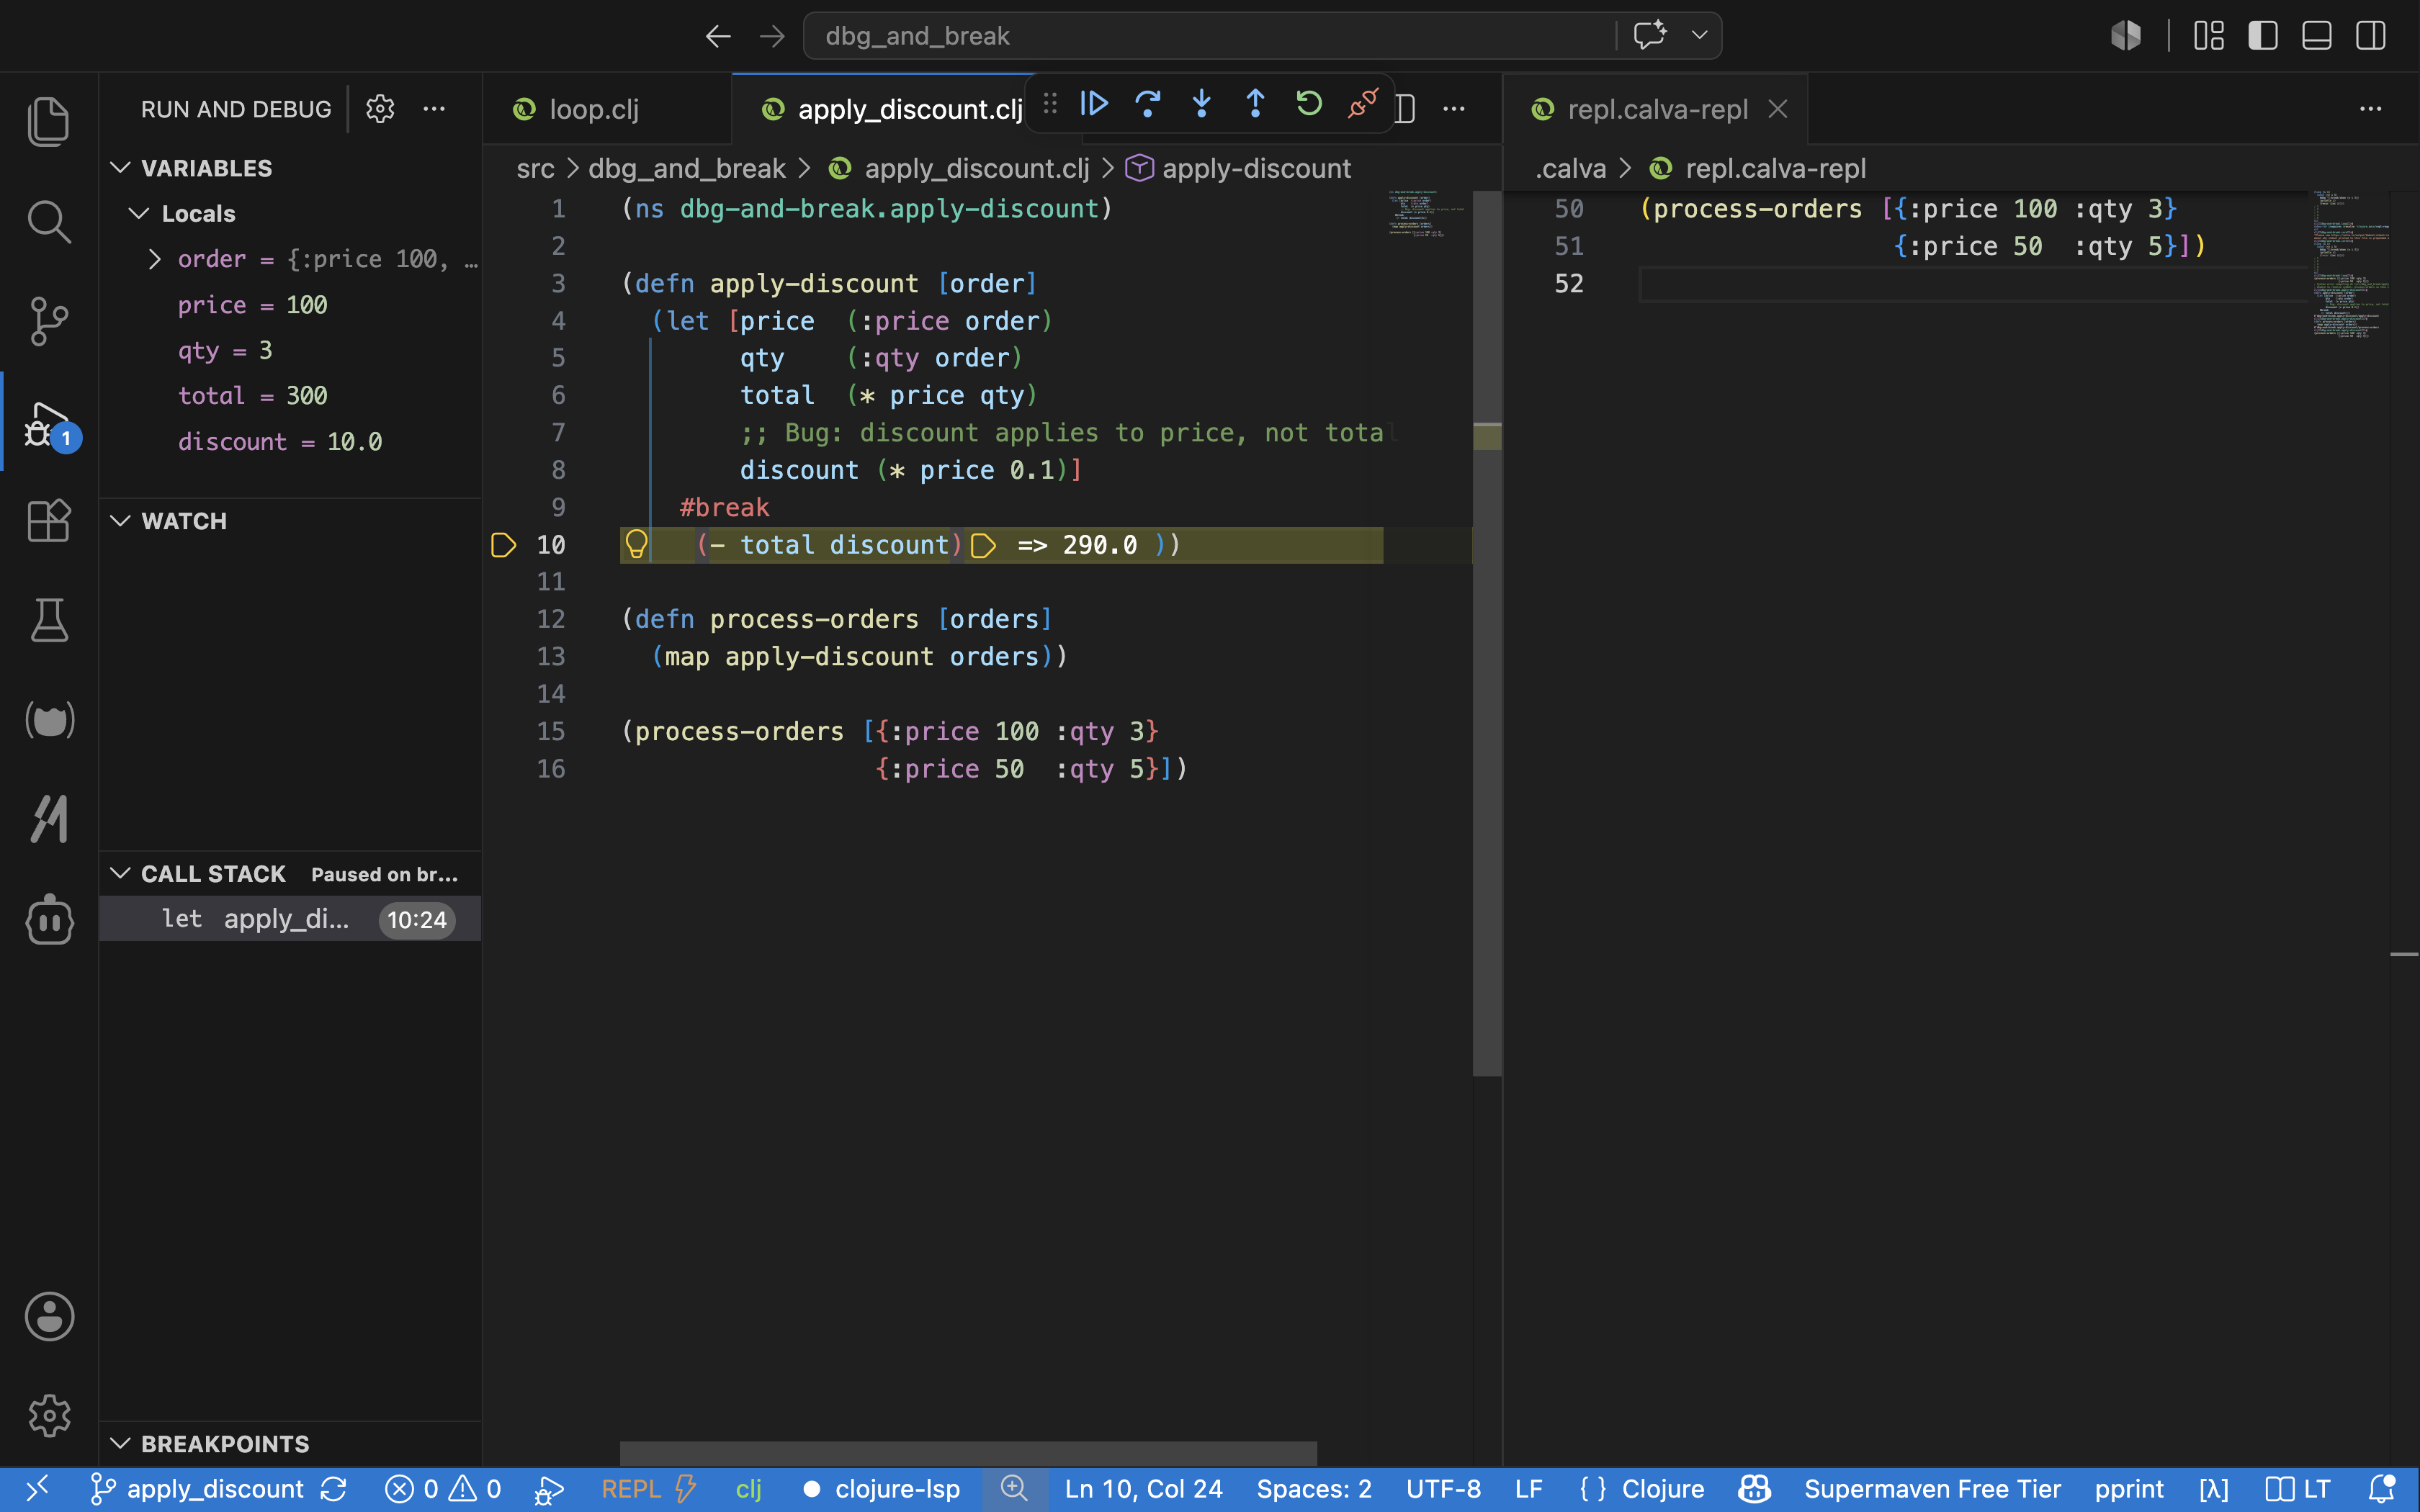
The debugger breaks at the (- total discount) line. You can see the values of total, discount, price, and qty on the left, as well as the order map. Notice that the (- total discount) line is highlighted in red, showing it has returned 290.
Hit the Continue button, and the program will stop again, and the value of (- total discount) will change from 290 to 245.
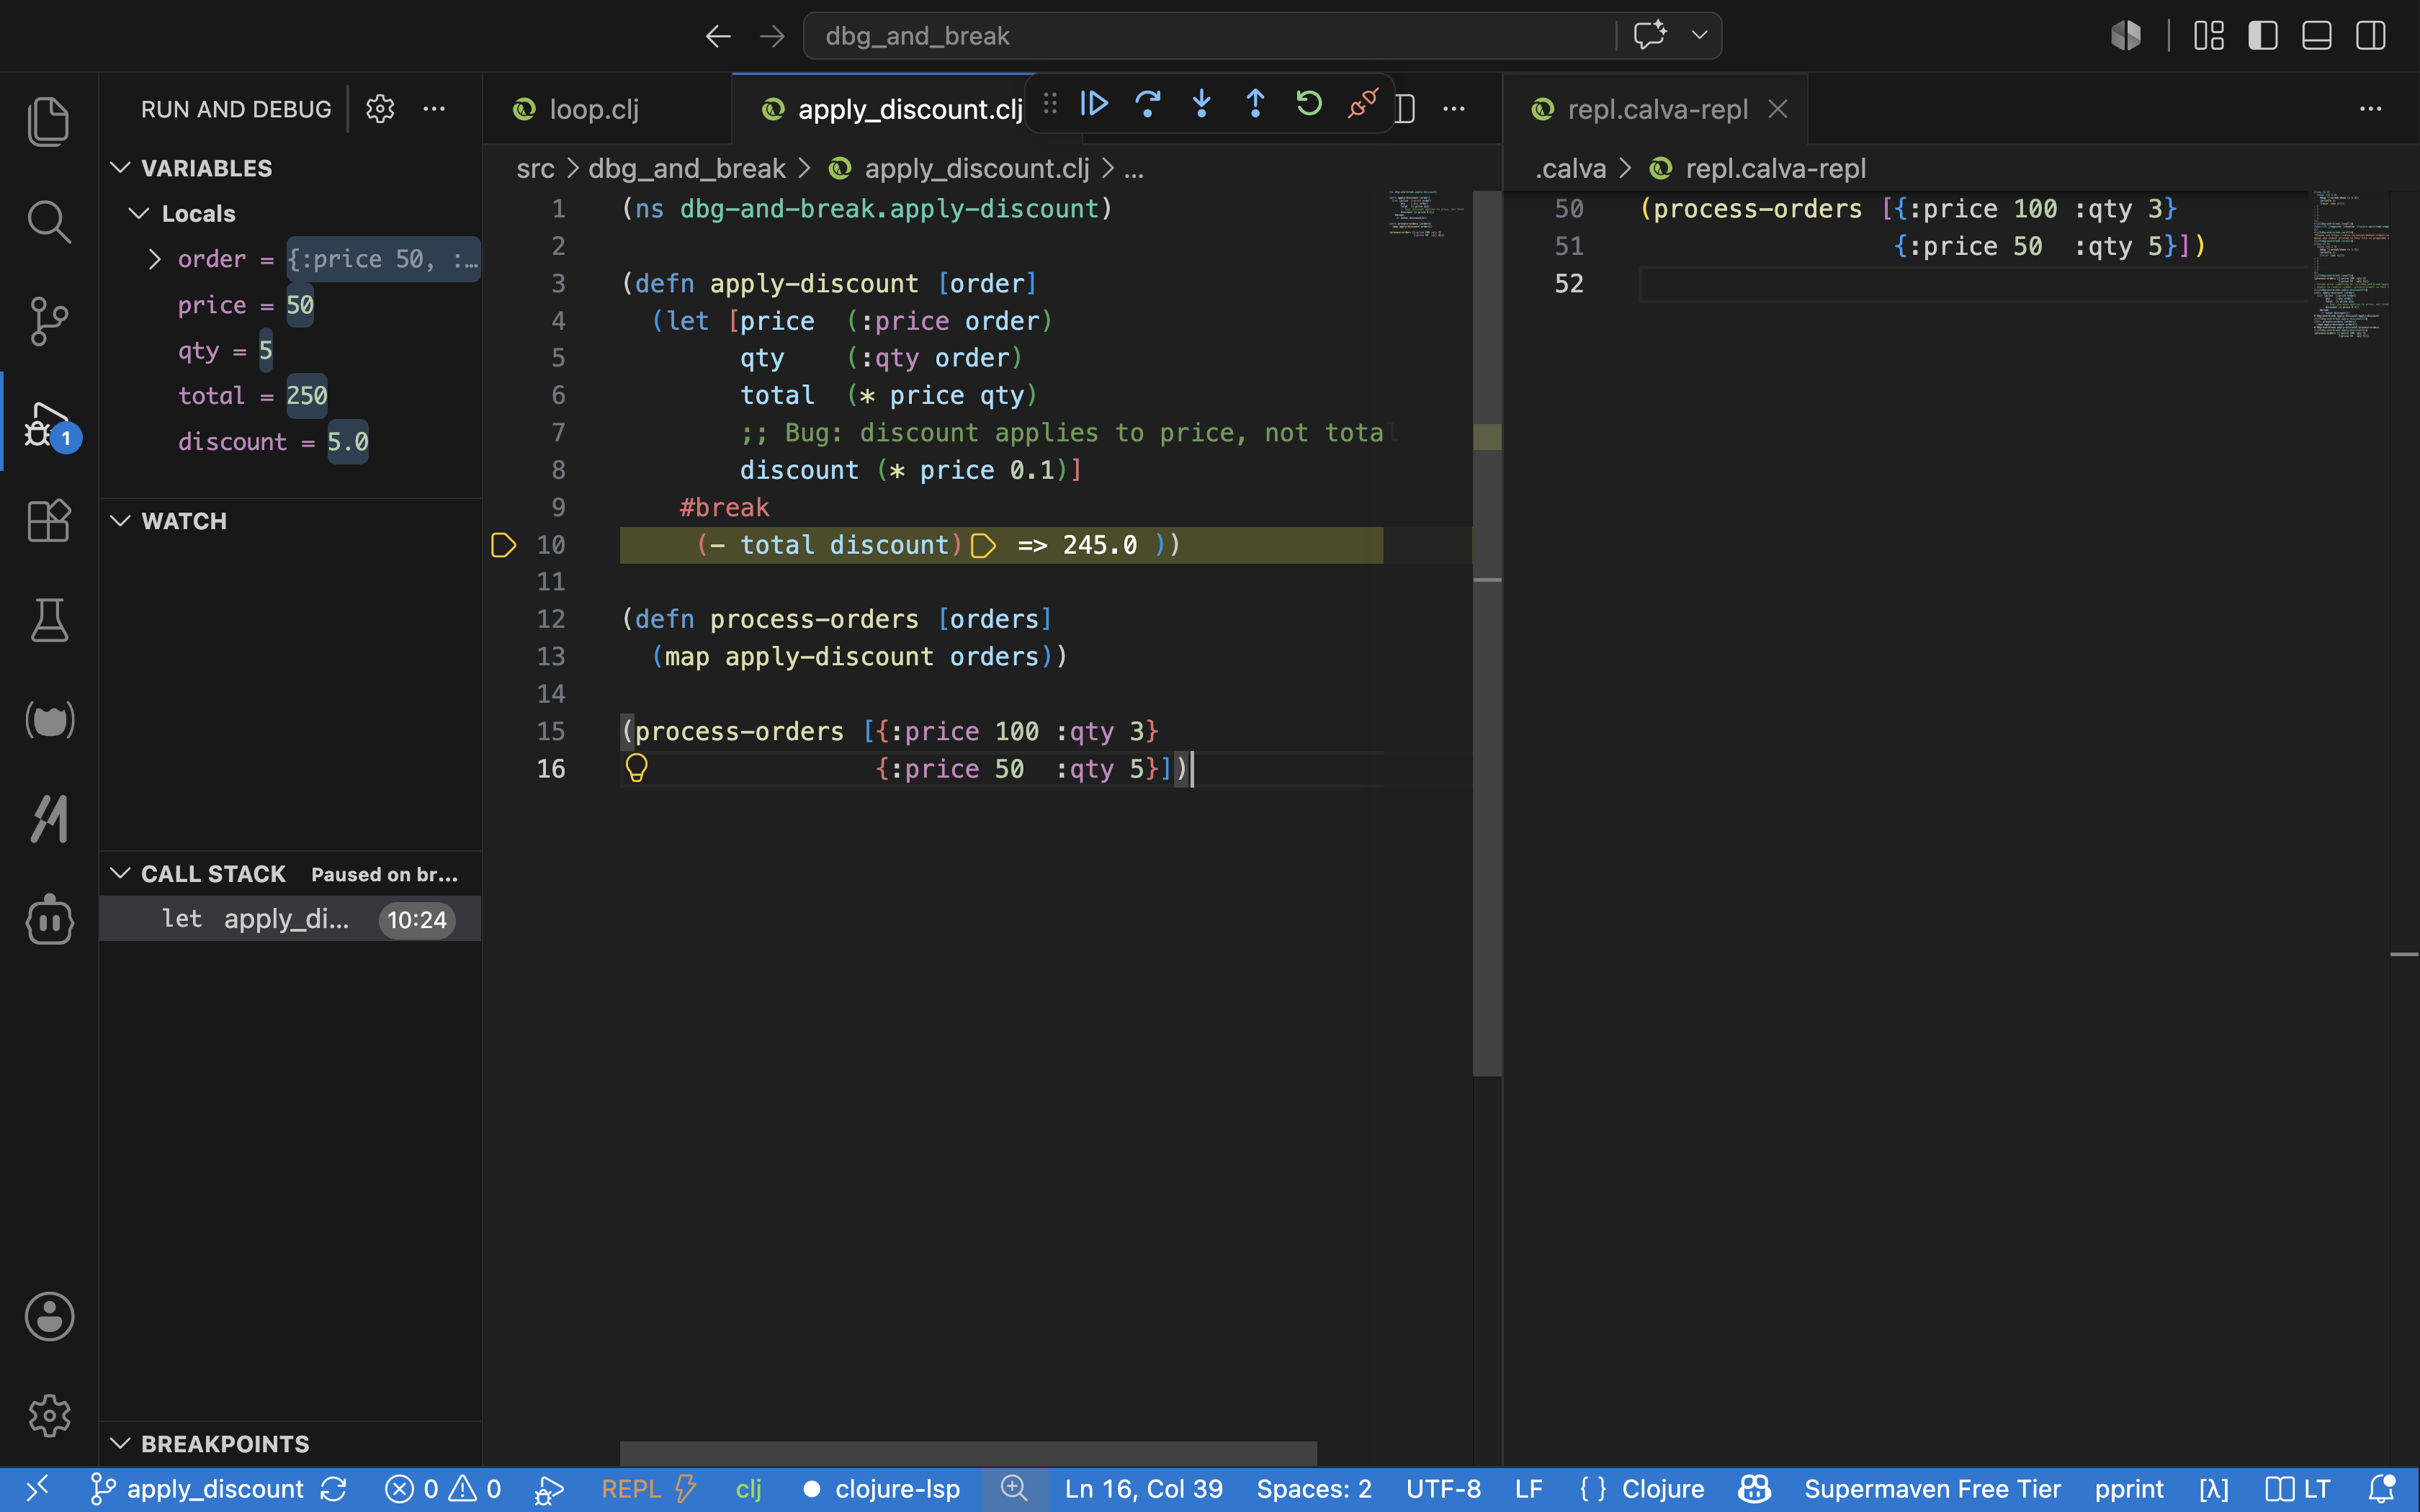
Hit Continue again, and the program will complete execution:
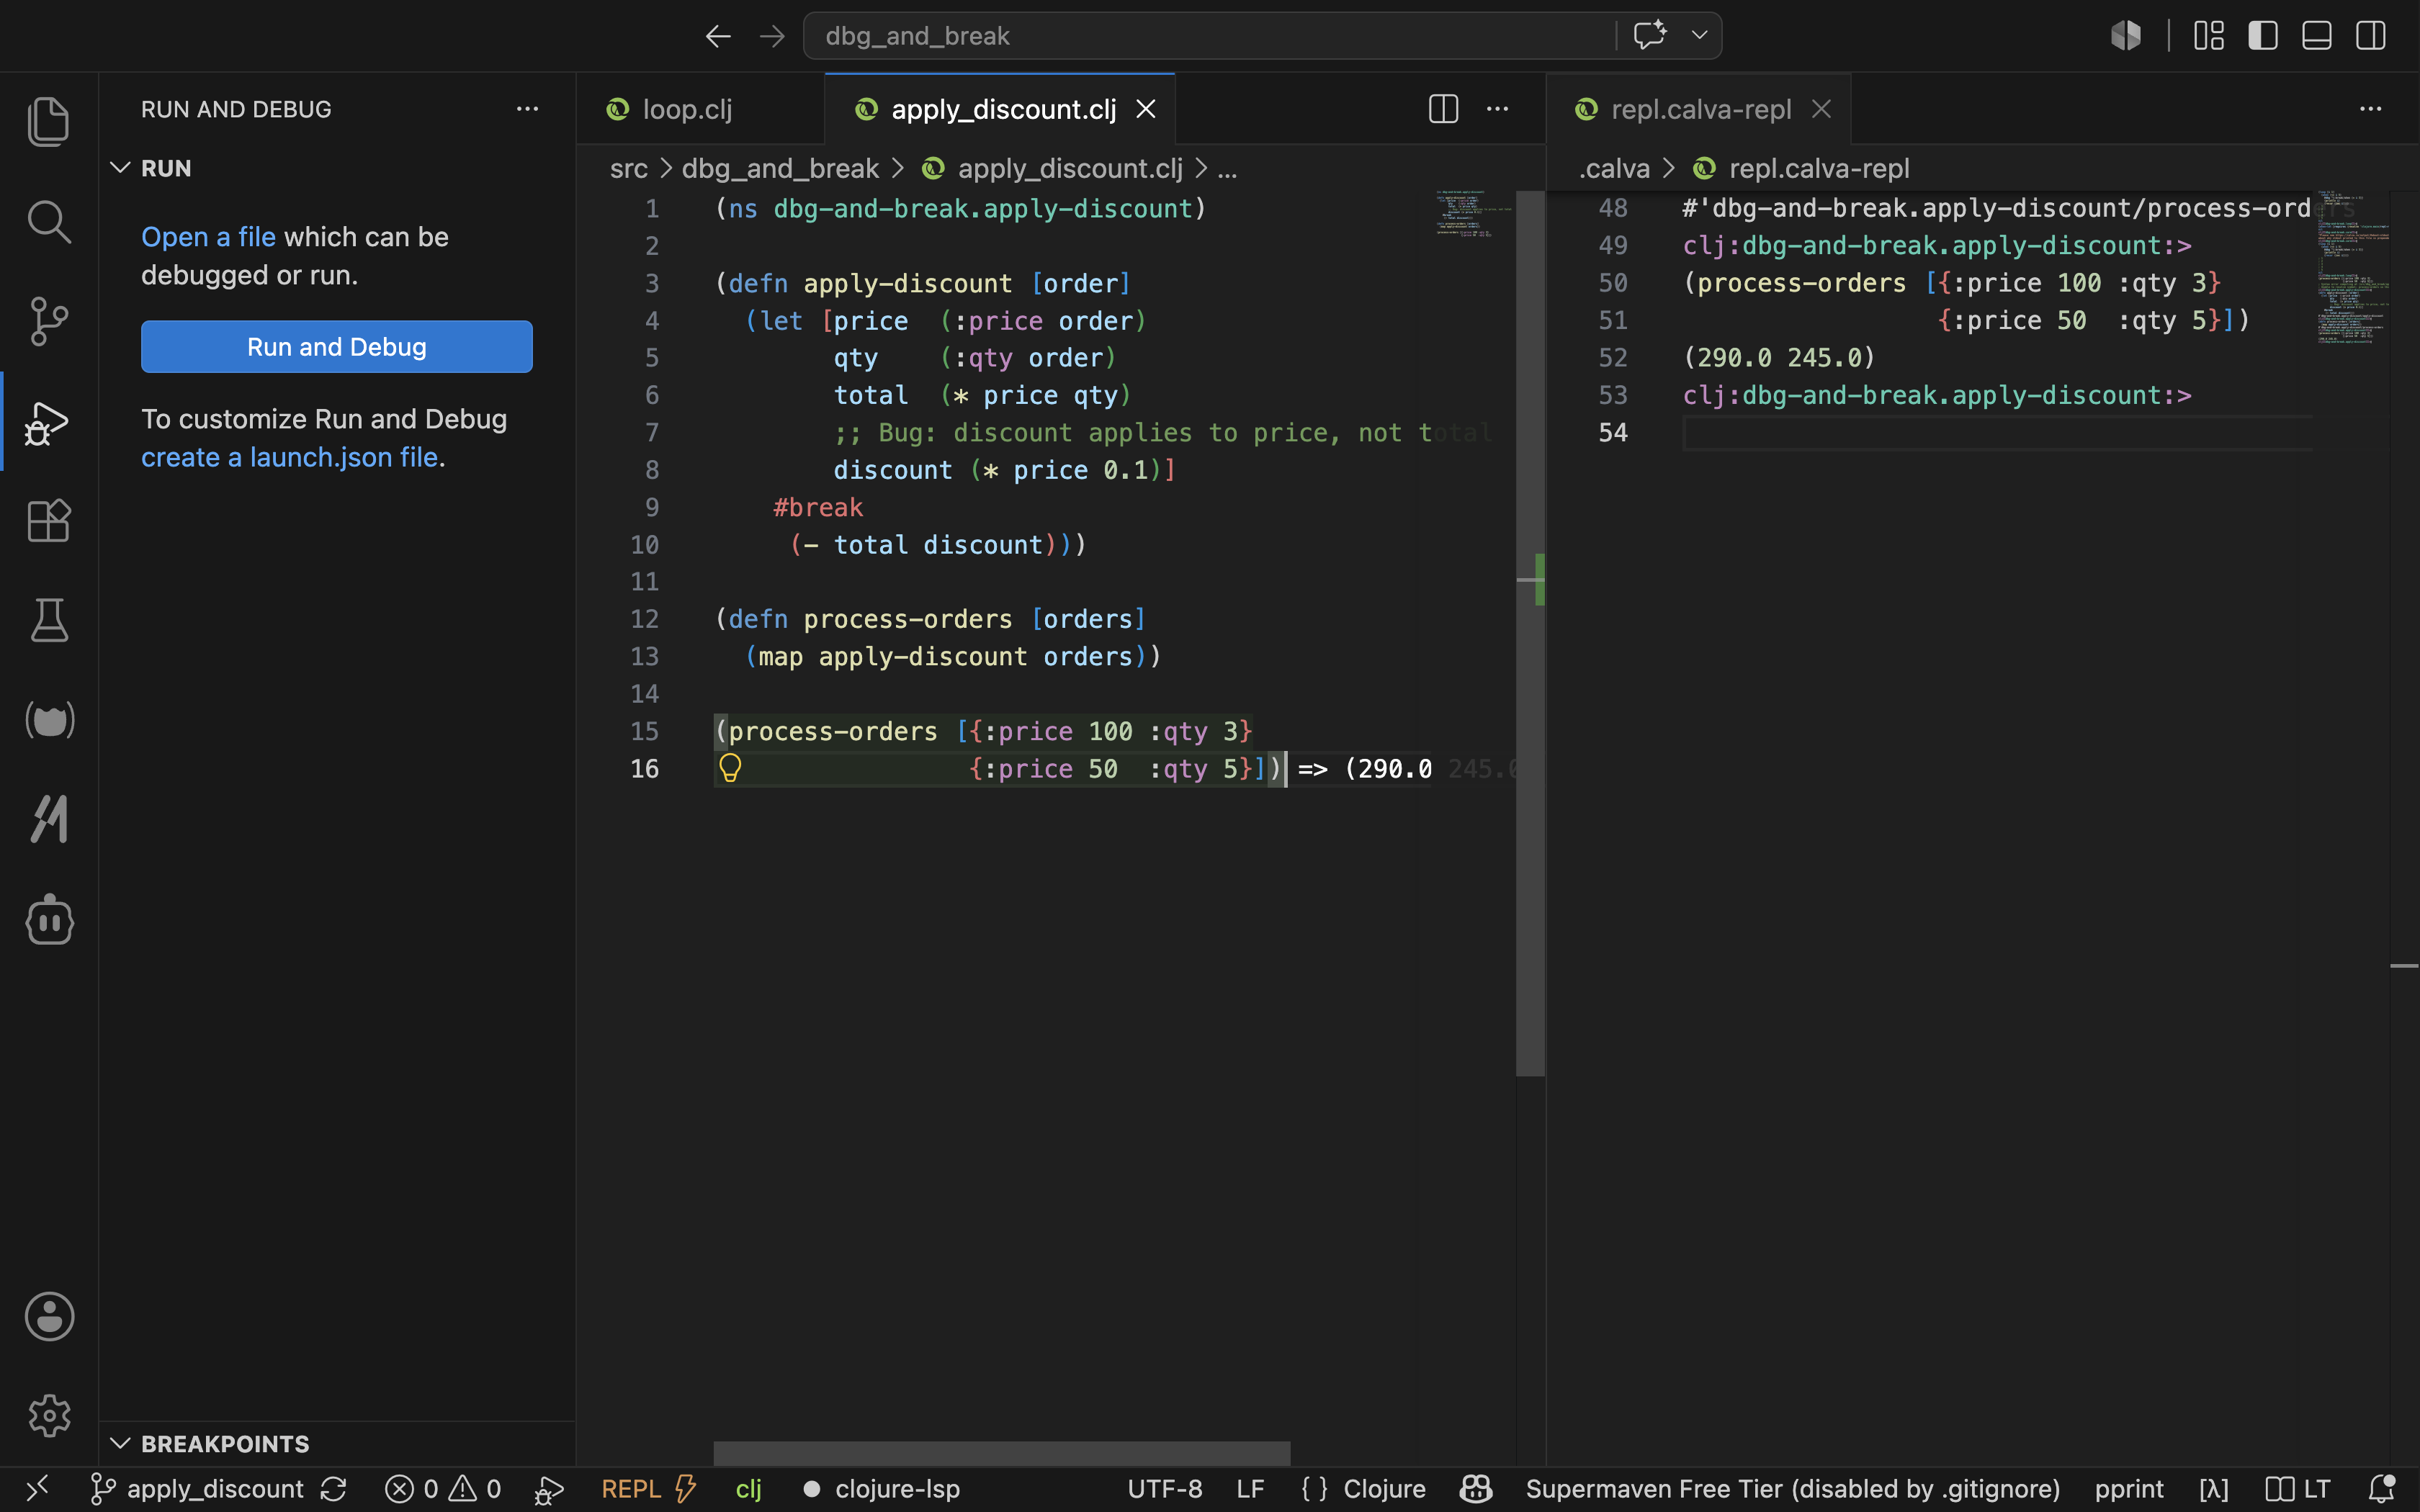
The output of
(process-orders [{:price 100 :qty 3}
{:price 50 :qty 5}])will be the list (290.0 245.0). You can see it in the REPL output at the right of the image above.
30. File Operations
In this section, let’s see how to deal with files in Clojure. We will also look at some popular file formats and how to handle them.
30.1. Text
Text files contain nothing other than plain text, letters, and numbers. They are among the easiest to deal with. Open an empty Clojure file, let’s call it text_files.clj, and execute the following:
(spit "hello.txt" "Hello World!")A file called hello.txt is created with the content Hello World!.
The function spit takes two arguments: the first is the filename and the second is the content to be written to the file. Once you execute it, you have a file with content. It is as simple as that.
spit is used for writing to a file and slurp for reading from one. Let’s now read the content of hello.txt and print it:
(println (slurp "hello.txt"))Output
Hello World!
(slurp "hello.txt") reads the content of hello.txt and returns it as a string, println prints it out as shown above.
Now if you want to add an extra line to the file, we can use :append true as shown below:
(spit "hello.txt" "\nHello Mars!" :append true)
(println (slurp "hello.txt"))Output
Hello World! Hello Mars!
Rather than the entire file being erased, "\nHello Mars!" is appended to the end of the file hello.txt.
Now let’s delete the file hello.txt:
(require '[clojure.java.io :as io])
(io/delete-file "hello.txt")To delete a file, we require the clojure.java.io library using (require '[clojure.java.io :as io]), and then we call the io/delete-file function with the filename as an argument: (io/delete-file "hello.txt").
The file hello.txt will be deleted.
The entire source code for this section is listed below, and you can get it from here https://gitlab.com/clojure-book/code/-/raw/master/text_files.clj
;; text_files.clj
(spit "hello.txt" "Hello World!")
(println (slurp "hello.txt"))
;; appending content to files
(spit "hello.txt" "\nHello Mars!" :append true)
(println (slurp "hello.txt"))
;; deleting files
(require '[clojure.java.io :as io])
(io/delete-file "hello.txt")30.2. edn
| Find the source code here https://gitlab.com/clojure-book/code/-/raw/master/edn_file.clj |
| Watch video for this section here https://yu7.in/clj-edn |
EDN, or Extensible Data Notation https://github.com/edn-format/edn, is the preferred way for Clojure to store and transfer data. Support for EDN is built into Clojure. To learn how to deal with EDN, let’s create a simple EDN file as shown below:
{1 "One" 2 "Two" 3 "Three"}Now let’s create a Clojure file to read and write this EDN file, let’s name it edn_file.clj. First, let’s require the Clojure EDN library:
(require '[clojure.edn :as edn])Output
nil
Now let’s read the EDN file spell_numbers.edn and store it in a variable named spell-numbers:
(def spell-numbers
(edn/read-string (slurp "spell_numbers.edn")))Output
#'user/spell-numbers
Now let’s print the spell-numbers variable:
(println spell-numbers)Output
{1 One, 2 Two, 3 Three}
Now let’s append a new value to the spell-numbers map; we will add the key 4 with the value "Four":
(assoc spell-numbers 4 "Four"))Convert it into a string:
(prn-str (assoc spell-numbers 4 "Four"))and write it into the spell_numbers.edn file:
(spit "spell_numbers.edn" (prn-str (assoc spell-numbers 4 "Four")))Now let’s see the content of the spell_numbers.edn file:
{1 "One", 2 "Two", 3 "Three", 4 "Four"}
As you can see 4 "Four" is added to the map.
Now let’s read the spell_numbers.edn file and store it in a variable named spell-numbers-appended:
(def spell-numbers-appended
(edn/read-string (slurp "spell_numbers.edn")))Output
#'user/spell-numbers-appended
Now let’s print the spell-numbers-appended variable:
(println spell-numbers-appended)Output
{1 One, 2 Two, 3 Three, 4 Four}
Now let’s overwrite the spell_numbers.edn file with the spell-numbers variable:
(spit "spell_numbers.edn" (prn-str spell-numbers))Output
nil
Now we are back to the original spell_numbers.edn file as shown below:
{1 "One", 2 "Two", 3 "Three"}
You can get the full code of edn_file.clj at https://gitlab.com/clojure-book/code/-/raw/master/edn_file.clj
;; edn_file.clj
(require '[clojure.edn :as edn])
(def spell-numbers
(edn/read-string (slurp "spell_numbers.edn")))
(println spell-numbers)
(spit "spell_numbers.edn" (prn-str (assoc spell-numbers 4 "Four")))
(def spell-numbers-appended
(edn/read-string (slurp "spell_numbers.edn")))
(println spell-numbers-appended)
(spit "spell_numbers.edn" (prn-str spell-numbers))30.3. CSV
| Find the project source here https://gitlab.com/clojure-book/file-ops/-/tree/csv_ops |
| Watch the video for this section here https://yu7.in/clj-csv |
CSV stands for Comma-Separated Values. It is a very common file format for storing tabular data. In Clojure, we use the data.csv library to read from and write to CSV files. You can find the library here: https://github.com/clojure/data.csv
Let’s first create a Leiningen project named file-ops:
$ lein new app file-opsIn project.clj:
(defproject file-ops "0.1.0-SNAPSHOT"
:description "FIXME: write description"
:url "http://example.com/FIXME"
:license {:name "EPL-2.0 OR GPL-2.0-or-later WITH Classpath-exception-2.0"
:url "https://www.eclipse.org/legal/epl-2.0/"}
:dependencies [[org.clojure/clojure "1.11.1"]
[org.clojure/data.csv "1.1.0"]]
:repl-options {:init-ns file-ops.core})Add the line [org.clojure/data.csv "1.1.0"] to the :dependencies vector as shown above.
Now let’s create a file called in-file.csv with the following content:
name, profession
Karthikeyan, Clojure Programmer
Pari, Data EngineerNow, let’s create a file named src/file_ops/csv_ops.clj in the project and add this content:
(ns file-ops.csv-ops
(:require [clojure.data.csv :as csv]
[clojure.java.io :as io]))clojure.data.csv is used for handling CSV content and is imported as csv. clojure.java.io is used for file I/O and is imported as io.
Now jack-in and add this function:
(defn csv-reader [filename]
(with-open [reader (io/reader filename)]
(doall
(csv/read-csv reader))))To understand how this works, let’s break it down. First, we define a function named csv-reader:
(defn csv-reader [])We make it accept an argument named filename:
(defn csv-reader [filename])We open the file:
(defn csv-reader [filename]
(with-open [reader (io/reader filename)]))We read the file using csv/read-csv:
(defn csv-reader [filename]
(with-open [reader (io/reader filename)]
(csv/read-csv reader)))Since read-csv is lazy, we wrap it with doall to ensure the file is read before the reader is closed by with-open:
(defn csv-reader [filename]
(with-open [reader (io/reader filename)]
(doall
(csv/read-csv reader))))Load it into the REPL by pressing Alt+Enter or Option+Enter. Now let’s read our CSV:
(csv-reader "in-file.csv")Output:
(["name" "profession"] ["Karthikeyan" "Clojure Programmer"] ["Pari" "Data Engineer"])
As you can see, instead of reading the CSV as a plain text file, we get a sequence of vectors, which is much easier to work with.
Similarly, we can write CSV files using the csv/write-csv function. Let’s define a writer function below:
(defn csv-writer [filename data]
(with-open [writer (io/writer filename)]
(doall
(csv/write-csv writer data))))Now let’s write a CSV:
(csv-writer "out-file.csv"
[["name" "profession"]
["Karthikeyan" "Clojure Programmer"]
["Pari" "Data Engineer"]
["Bill Gates" "Shackles you up"]
["Richard M Stallman" "Unshackles you"]])Examining out-file.csv, we have:
name,profession
Karthikeyan,Clojure Programmer
Pari,Data Engineer
Bill Gates,Shackles you up
Richard M Stallman,Unshackles youClojure programmers are often more comfortable working with maps than sequences of vectors, so let’s write a function to convert CSV data into maps.
First, we define a function named csv-data→maps:
(defn csv-data->maps [])This function should take csv-data as an argument:
(defn csv-data->maps [csv-data])The first row of the CSV is the header:
(defn csv-data->maps [csv-data]
(first csv-data))Let’s convert the first row to keywords:
(defn csv-data->maps [csv-data]
(->> (first csv-data) ;; First row is the header
(map keyword) ;; Remove this line if you prefer string keys
))Now we repeat the header for each data row:
(defn csv-data->maps [csv-data]
(->> (first csv-data) ;; First row is the header
(map keyword) ;; Remove this line if you prefer string keys
repeat))Now let’s get the rest of the data using (rest csv-data):
(defn csv-data->maps [csv-data]
(->> (first csv-data) ;; First row is the header
(map keyword) ;; Remove this line if you prefer string keys
repeat)
(rest csv-data))Now let’s zipmap the header with the rest of the data:
(defn csv-data->maps [csv-data]
(map zipmap
(->> (first csv-data) ;; First row is the header
(map keyword) ;; Remove this line if you prefer string keys
repeat)
(rest csv-data)))And we are done. Now let’s test it:
(csv-data->maps (csv-reader "in-file.csv"))Output:
({:name "Karthikeyan", :profession "Clojure Programmer"} {:name "Pari", :profession "Data Engineer"})Now we have a nice sequence of maps, which is a format Clojure programmers are familiar with.
The full code for this section is available here: https://gitlab.com/clojure-book/file-ops/-/raw/csv_ops/src/file_ops/csv_ops.clj
;; csv_ops.clj
;; https://github.com/clojure/data.csv
(ns file-ops.csv-ops
(:require [clojure.data.csv :as csv]
[clojure.java.io :as io]))
(defn csv-reader [filename]
(with-open [reader (io/reader filename)]
(doall
(csv/read-csv reader))))
(csv-reader "in-file.csv")
(defn csv-writer [filename data]
(with-open [writer (io/writer filename)]
(doall
(csv/write-csv writer data))))
(csv-writer "out-file.csv"
[["name" "profession"]
["Karthikeyan" "Clojure Programmer"]
["Pari" "Data Engineer"]
["Bill Gates" "Shackles you up"]
["Richard M Stallman" "Unshackles you"]])
(defn csv-data->maps [csv-data]
(map zipmap
(->> (first csv-data) ;; First row is the header
(map keyword) ;; Remove this line if you prefer string keys
repeat)
(rest csv-data)))
(csv-data->maps (csv-reader "in-file.csv"))30.4. JSON
| Find the project source here https://gitlab.com/clojure-book/file-ops/-/tree/json_ops/ |
| Watch video for this section here https://yu7.in/clj-json |
JSON stands for JavaScript Object Notation. It is a lightweight data-interchange format and a subset of JavaScript. As a text format, JSON is completely language-independent and is widely used to transfer data between a server and a web page. In this section, we will see how to use JSON in Clojure.
Let’s create a file called numbers.json with the content as shown below:
{
"one": 1,
"two": 2,
"three": 3
}Add [org.clojure/data.json "2.5.1"] to project.clj as shown below. This line will pull the library needed to use JSON in our project.
(defproject file-ops "0.1.0-SNAPSHOT"
:description "FIXME: write description"
:url "http://example.com/FIXME"
:license {:name "EPL-2.0 OR GPL-2.0-or-later WITH Classpath-exception-2.0"
:url "https://www.eclipse.org/legal/epl-2.0/"}
:dependencies [[org.clojure/clojure "1.11.1"]
[org.clojure/data.csv "1.1.0"]
[org.clojure/data.json "2.5.1"]]
:repl-options {:init-ns file-ops.core})Restart the REPL o that the new dependency is loaded.
Create a file called src/file_ops/json_ops.clj and require the JSON library as shown below:
(ns file-ops.json-ops
(:require [clojure.data.json :as json]))Let’s read the content of the numbers.json file as shown below:
(def numbers
(json/read-str (slurp "numbers.json")))
numbersOutput
{"one" 1, "two" 2, "three" 3}As you can see, (slurp "numbers.json") reads the content of numbers.json, which is then passed to json/read-str to convert it into a map. We store this result in a variable named numbers using (def numbers (json/read-str (slurp "numbers.json"))).
Now, let’s add a new key-value pair to the numbers map:
(def more-numbers (assoc numbers "four" 4))
more-numbersOutput
{"one" 1, "two" 2, "three" 3, "four" 4}We have added the pair "four" 4 to the map and stored the result in a variable named more-numbers.
Now, let’s write the more-numbers map to a file called more-numbers.json:
(spit "more-numbers.json" (json/write-str more-numbers))When we open the more-numbers.json file, we can see the content as shown below:
{"one":1,"two":2,"three":3,"four":4}The entire source code for this section is listed below, and you can get it from here https://gitlab.com/clojure-book/file-ops/-/raw/json_ops/src/file_ops/json_ops.clj
;; json_ops.clj
;; https://github.com/clojure/data.json
(ns file-ops.json-ops
(:require [clojure.data.json :as json]))
(def numbers
(json/read-str (slurp "numbers.json")))
numbers
(def more-numbers (assoc numbers "four" 4))
more-numbers
(spit "more-numbers.json" (json/write-str more-numbers))30.5. YAML
| Find the project source here https://gitlab.com/clojure-book/file-ops/-/tree/yaml_ops |
| Watch the video here https://yu7.in/clj-yaml |
YAML is a lighter form of JSON and is often used for configuration files. In this section, we will see how to use YAML in Clojure. First, let’s add the clj-yaml library to our project, as shown in the line [clj-commons/clj-yaml "1.0.29"].
(defproject file-ops "0.1.0-SNAPSHOT"
:description "FIXME: write description"
:url "http://example.com/FIXME"
:license {:name "EPL-2.0 OR GPL-2.0-or-later WITH Classpath-exception-2.0"
:url "https://www.eclipse.org/legal/epl-2.0/"}
:dependencies [[org.clojure/clojure "1.11.1"]
[org.clojure/data.csv "1.1.0"]
[org.clojure/data.json "2.5.1"]
[clj-commons/clj-yaml "1.0.29"]]
:repl-options {:init-ns file-ops.core})This will pull the necessary library for using YAML in our project.
Now, let’s create a file called yaml_ops.clj with the content shown below:
(ns file-ops.yaml-ops
(:require [clj-yaml.core :as yaml]))The line (:require [clj-yaml.core :as yaml]) requires the YAML library, which can then be referenced using the name yaml.
Rather than reading YAML content from a file, let’s use it as a variable. We’ll create a variable called some-yaml with the following content:
(def some-yaml "
todo:
issues:
- name: Fix all the things
responsible:
name: Rita
")Now, let’s convert the content of some-yaml to a map using (yaml/parse-string some-yaml):
(def some-data (yaml/parse-string some-yaml))
some-dataOutput
{:todo {:issues [{:name "Fix all the things", :responsible {:name "Rita"}}]}}As you can see above, all the keys are keywords. If you prefer string keys, pass :keywords false as shown below:
(yaml/parse-string some-yaml :keywords false)Output
{"todo" {"issues" ({"name" "Fix all the things", "responsible" {"name" "Rita"}})}}This will get the keys as strings, as shown above.
Now, let’s print the data in YAML format using (println (yaml/generate-string some-data)):
(println (yaml/generate-string some-data :dumper-options {:indent 2
:flow-style :block}))Output
todo:
issues:
- name: Fix all the things
responsible:
name: RitaNote that we have set the indentation to 2 and the flow-style to block, so that the output is neat and human-readable. Without these options, the output would look like this:
(println (yaml/generate-string some-data))Output
todo:
issues:
- name: Fix all the things
responsible: {name: Rita}The entire YAML operation sequence is listed below. You can find the file here: https://gitlab.com/clojure-book/file-ops/-/raw/yaml_ops/src/file_ops/yaml_ops.clj
;; yaml_ops.clj
;; https://github.com/clj-commons/clj-yaml/blob/master/doc/01-user-guide.adoc
(ns file-ops.yaml-ops
(:require [clj-yaml.core :as yaml]))
(def some-yaml "
todo:
issues:
- name: Fix all the things
responsible:
name: Rita
")
(def some-data (yaml/parse-string some-yaml))
some-data
(yaml/parse-string some-yaml :keywords false)
(println (yaml/generate-string some-data :dumper-options {:indent 2
:flow-style :block}))
(println (yaml/generate-string some-data))31. Java Files in Clojure Project
| Find the video for this section here: https://yu7.in/java-files-in-clojure-project |
| Find the source for this section here: https://yu7.in/W9qT0X |
Clojure runs on top of Java, so it’s easy to use Java programs in Clojure. To see how to do this, let’s create a Leiningen project named my-mixed-project.
$ lein new app my-mixed-projectNow, move into the project directory:
$ cd my-mixed-projectEnsure that the structure of my-mixed-project is as shown below. We will now look at the contents of project.clj, core.clj, and MyJavaClass.java.
my-mixed-project/
├── project.clj
├── src/
│ ├── clojure/
│ │ └── my_mixed_project/core.clj
│ └── java/
│ └── my_mixed_project/MyJavaClass.javaFirst, let’s examine MyJavaClass.java.
package my_mixed_project;
public class MyJavaClass {
public static String greet(String name) {
return "Hello from Java, " + name + "!";
}
}If you aren’t familiar with Java, don’t worry—you can skip this section and everything will still work. For those who know Java, this file defines a package named my_mixed_project, a class named MyJavaClass, and a static method named greet that takes a String parameter named name.
Now, look at the project.clj file below. Note the line :java-source-paths ["src/java"]; this tells Leiningen that our Java source files are located in the src/java folder.
(defproject my-mixed-project "0.1.0-SNAPSHOT"
:description "A Leiningen project with both Clojure and Java"
:dependencies [[org.clojure/clojure "1.11.1"]]
:source-paths ["src/clojure"]
:java-source-paths ["src/java"]
:main my-mixed-project.core)Similarly, the line :source-paths ["src/clojure"] tells Leiningen that our Clojure source files are located in the src/clojure folder.
Now, in the src/clojure/my_mixed_project folder, create a file named core.clj and add the following code.
(ns my-mixed-project.core
(:import [my_mixed_project MyJavaClass]))
(defn -main [& args]
(println (MyJavaClass/greet "Clojure Developer")))Let’s break down the code in core.clj step-by-step. First, we define the namespace:
(ns my-mixed-project.core)Next, we specify that we want to import from the my_mixed_project Java package:
(ns my-mixed-project.core
(:import [my_mixed_project]))Then, we import the specific MyJavaClass:
(ns my-mixed-project.core
(:import [my_mixed_project MyJavaClass]))Now, let’s define the main function:
(ns my-mixed-project.core
(:import [my_mixed_project MyJavaClass]))
(defn -main [& args])Inside the main function, we call the MyJavaClass/greet method:
(ns my-mixed-project.core
(:import [my_mixed_project MyJavaClass]))
(defn -main [& args]
(MyJavaClass/greet))Now, we pass the argument "Clojure Developer" to it:
(ns my-mixed-project.core
(:import [my_mixed_project MyJavaClass]))
(defn -main [& args]
(MyJavaClass/greet "Clojure Developer"))Finally, we wrap the call in a println function to print the output:
(ns my-mixed-project.core
(:import [my_mixed_project MyJavaClass]))
(defn -main [& args]
(println (MyJavaClass/greet "Clojure Developer")))Now, let’s run the project:
$ lein run
Hello from Java, Clojure Developer!The output Hello from Java, Clojure Developer! is printed to the console.
We have successfully written a Java file and integrated it into a Clojure project.
32. JAR files in Clojure project
| Find video for this section here https://yu7.in/jar-files-in-clojure-project |
In this section, we will see how to include JAR files in Clojure projects.
32.1. Creating a JAR file
| Find source code for this section here https://gitlab.com/clojure-book/create_jar_file |
If you would like to know how to create your own JAR files, read this section; otherwise, skip to the next. Let’s create a directory called create_jar.
$ mkdir create_jar
Move into the directory:
$ cd create_jar
Create a folder named myjar and a file named HelloPrinter.java in it. The folder structure should be as shown below:
.
└── myjar
└── HelloPrinter.java
Now add the following code to HelloPrinter.java:
// HelloPrinter.java
package myjar;
public class HelloPrinter {
public static void printHello() {
System.out.println("Hello, World from the jar!");
}
}In the code above, we use a package called myjar, which matches the name of the folder where HelloPrinter.java is located. Next, we have the class HelloPrinter. This class has a method called printHello which prints the message "Hello, World from the jar!".
Let’s compile this file using javac:
$ javac -d java-classes myjar/HelloPrinter.java
Once compiled, you will see that the folder java-classes/myjar/ has been created, with a class file named HelloPrinter.class in it. This .class file contains the Java bytecode.
.
├── java-classes
│ └── myjar
│ └── HelloPrinter.class
└── myjar
└── HelloPrinter.java
Now we need to convert this into a JAR file. To do that, use the following command:
$ jar cf hello-printer.jar -C java-classes .
The resulting file structure will look like this:
.
├── hello-printer.jar
├── java-classes
│ └── myjar
│ └── HelloPrinter.class
└── myjar
└── HelloPrinter.java
Notice that the hello-printer.jar file has been created; this is the file we will use.
32.2. Using the JAR file
| Find source code for this section here https://gitlab.com/clojure-book/hello_jar_clj |
To use the JAR file, let’s create a Leiningen project:
$ lein new hello-jar-clj
The project structure should look like this:
hello-jar-clj/
├── CHANGELOG.md
├── doc
│ └── intro.md
├── lib
│ └── hello-printer.jar
├── LICENSE
├── project.clj
├── README.md
├── resources
├── src
│ └── hello_jar_clj
│ └── core.clj
├── target
└── test
└── hello_jar_clj
└── core_test.clj
Now, copy the JAR file you created into the lib folder. Then, notice the :classpath value in project.clj:
(defproject hello-jar-clj "0.1.0-SNAPSHOT"
:description "Demo using Java jar in Clojure"
:dependencies [[org.clojure/clojure "1.11.1"]]
:classpath ["lib/hello-printer.jar"]
:main hello-jar-clj.core)We specify the exact location of the JAR file. Now, add the following code to src/hello_jar_clj/core.clj:
(ns hello-jar-clj.core
(:import [myjar HelloPrinter]))
(defn -main [& args]
(HelloPrinter/printHello))Let’s explain the code. First, we define the namespace hello-jar-clj.core.
(ns hello-jar-clj.core)Next, we import the HelloPrinter class from the myjar package.
(ns hello-jar-clj.core
(:import [myjar HelloPrinter]))Then, we define the main function:
(ns hello-jar-clj.core
(:import [myjar HelloPrinter]))
(defn -main [& args])Inside the main function, we call the HelloPrinter/printHello method.
(ns hello-jar-clj.core
(:import [myjar HelloPrinter]))
(defn -main [& args]
(HelloPrinter/printHello))Now, let’s run the project:
$ lein run
And we get the output:
Hello, World from the jar!
33. Creating Your Own Libraries
| Watch video for this section here: https://youtu.be/QWhpISM-d5Q |
In this section, we are going to create a small Leiningen project, upload it to Clojars, pull that library into another project, and use it.
33.1. Creating a Clojure Project
| Get the code for this section here: https://gitlab.com/clojure-book/printline |
First, let’s create a small project called printline:
$ lein new printline
Now, cd into the printline directory and change the file src/printline/core.clj to have this content:
(ns printline.core)
(defn print-line
([char length]
(println (apply str (repeat length char))))
([length-or-char]
(if (int? length-or-char)
(print-line \- length-or-char)
(print-line length-or-char 80))))Jack into the project (see [11]), and in the REPL, let’s try out the print-line function:
(print-line "*")
; ********************************************************************************
nil(print-line "$" 20)
; $$$$$$$$$$$$$$$$$$$$
nil(print-line 30)
; ------------------------------
nil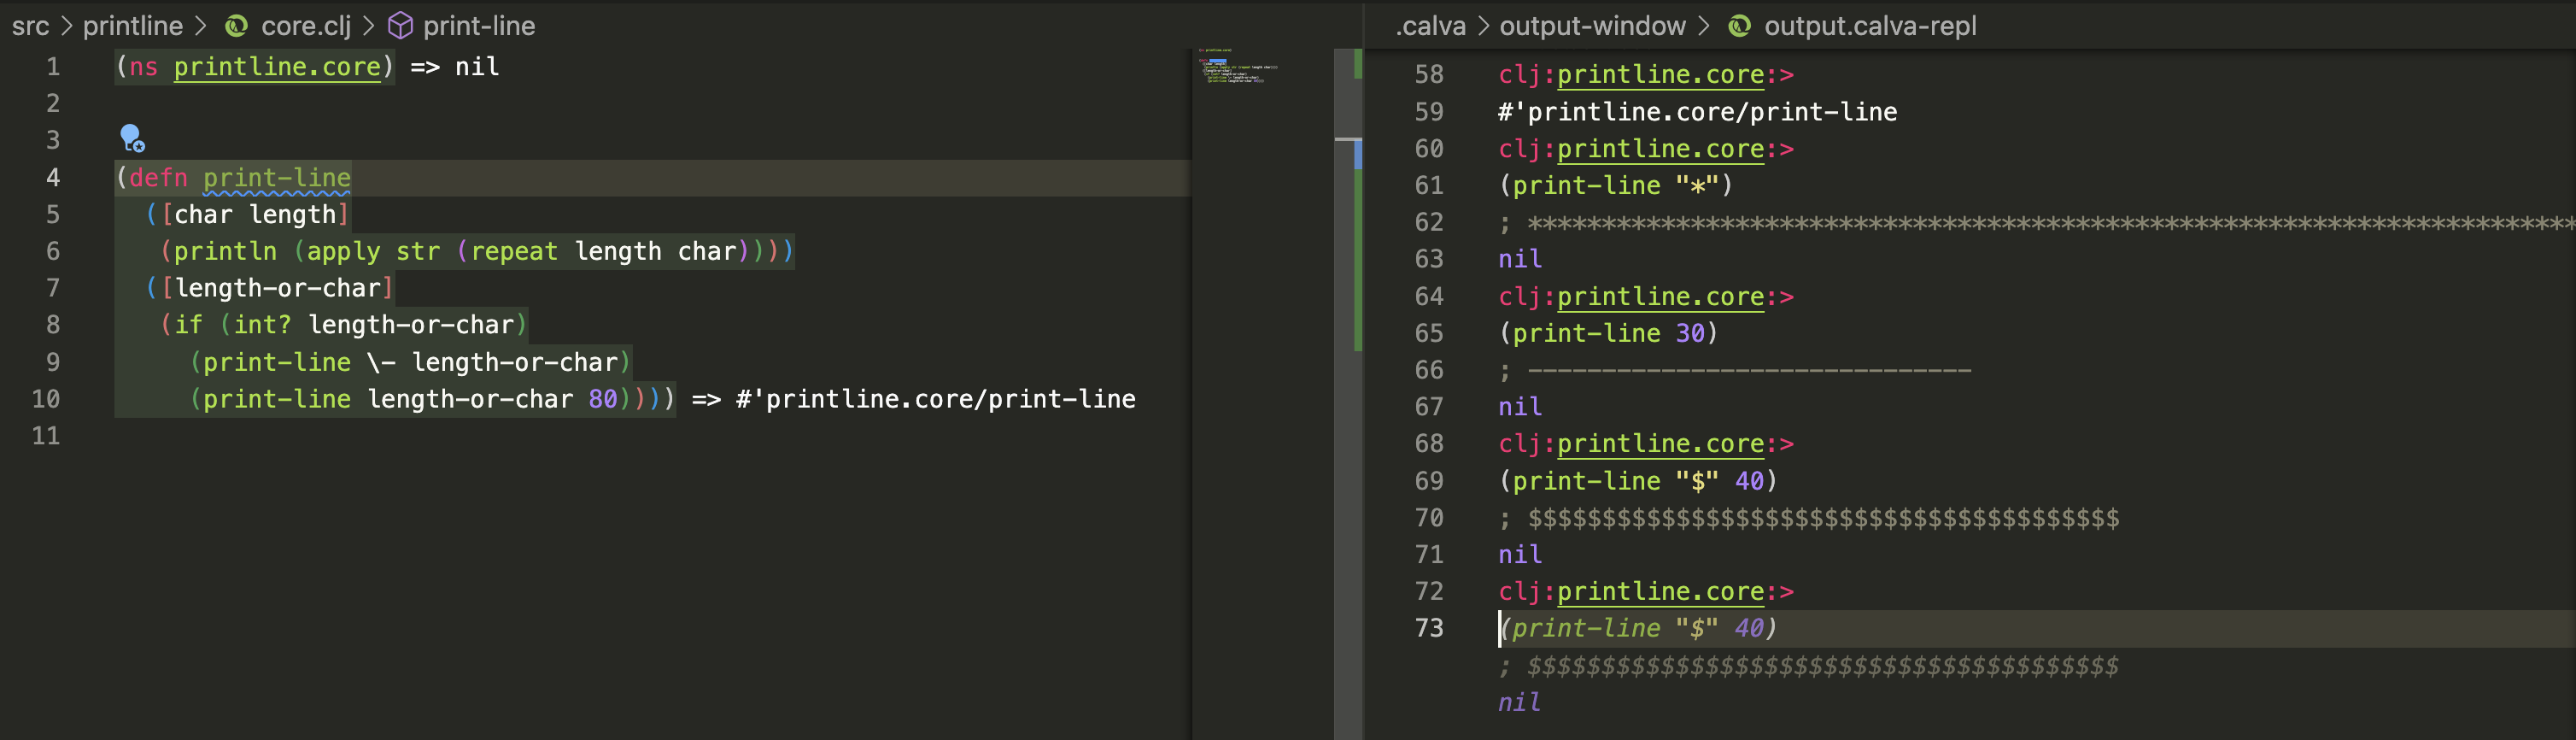
It seems to work. Now, let’s register ourselves on Clojars, a place where Clojure libraries can be hosted.
33.2. Clojars
Visit https://clojars.org/. You should see a page like this:

At the top right, you should see a link called Register; click it.
33.2.1. Registering
You will now see the Clojars registration page; fill in your details.

Since I have already registered and logged in, the image below shows what my dashboard looks like.
Once you reach your dashboard, look at the top in the grey navigation bar. You will see a menu called 'Group Verification'; click it.
33.2.2. Creating a group
You will be taken to the Group Verification page. The easiest way to verify a group is to use Verification by Parent Group.
I have already been assigned a parent group named org.clojars.mindaslab, where mindaslab is my username. Now, in the Group name field, I need to create a subgroup called printline, so I fill it with org.clojars.mindaslab.printline. Then click the Verify Group button.
You will see a yellow notification stating that my group org.clojars.mindaslab.printline is verified, as shown below.
Now in the grey navbar at the top, you should see a menu called DEPLOY TOKENS. Click it.
33.2.3. Getting a deployment token
In the Deploy Tokens section, as shown below:
Give the token a name that you can remember; I have used "Printline Deploy Token". For the scope, I have selected org.clojars.mindaslab.printline. I want this token to never expire, which I have specified in the "Expires in" field. Then click Create Token.
You will see a screen like this:
Copy the token Clojars….. shown in the yellow strip. You will use this token to deploy the project.
33.3. Uploading to Clojars
Now, in your printline project, in project.clj, add this:
:repositories [["clojars" {:url "https://clojars.org/groups/org.clojars.mindaslab.printline"
:sign-releases false}]]This tells Clojars which namespace you are pushing your library to. Your project.clj should look like this:
(defproject printline "0.1.0-SNAPSHOT"
:description "FIXME: write description"
:url "http://example.com/FIXME"
:license {:name "EPL-2.0 OR GPL-2.0-or-later WITH Classpath-exception-2.0"
:url "https://www.eclipse.org/legal/epl-2.0/"}
:dependencies [[org.clojure/clojure "1.11.1"]]
:repl-options {:init-ns printline.core}
:repositories [["clojars" {:url "https://clojars.org/groups/org.clojars.mindaslab.printline"
:sign-releases false}]])Now, let’s change the project name from printline to org.clojars.mindaslab.printline in project.clj:
(defproject org.clojars.mindaslab.printline "0.1.0-SNAPSHOT"
:description "FIXME: write description"
:url "http://example.com/FIXME"
:license {:name "EPL-2.0 OR GPL-2.0-or-later WITH Classpath-exception-2.0"
:url "https://www.eclipse.org/legal/epl-2.0/"}
:dependencies [[org.clojure/clojure "1.11.1"]]
:repl-options {:init-ns printline.core}
:repositories [["clojars" {:url "https://clojars.org/groups/org.clojars.mindaslab.printline"
:sign-releases false}]])Now, in the project root directory, run this command:
$ lein deploy clojars
It will prompt you for username, provide it.
$ lein deploy clojars WARNING: please set :description in project.clj. WARNING: please set :url in project.clj. No credentials found for clojars See `lein help deploying` for how to configure credentials to avoid prompts. Username: mindaslab
Then it will prompt you for password, provide the token you obtained from Clojars.
❯ lein deploy clojars
WARNING: please set :description in project.clj.
WARNING: please set :url in project.clj.
No credentials found for clojars
See `lein help deploying` for how to configure credentials to avoid prompts.
Username: mindaslab
Password:
Created /Users/mindaslab/author/clojure/projects/printline/target/org.clojars.mindaslab.printline-0.1.0-SNAPSHOT.jar
Wrote /Users/mindaslab/author/clojure/projects/printline/pom.xml
Could not find metadata org.clojars.mindaslab.printline:org.clojars.mindaslab.printline:0.1.0-SNAPSHOT/maven-metadata.xml in clojars (https://repo.clojars.org/)
Sending org/clojars/mindaslab/printline/org.clojars.mindaslab.printline/0.1.0-SNAPSHOT/org.clojars.mindaslab.printline-0.1.0-20251015.115436-1.jar (9k)
to https://repo.clojars.org/
Sending org/clojars/mindaslab/printline/org.clojars.mindaslab.printline/0.1.0-SNAPSHOT/org.clojars.mindaslab.printline-0.1.0-20251015.115436-1.pom (2k)
to https://repo.clojars.org/
Could not find metadata org.clojars.mindaslab.printline:org.clojars.mindaslab.printline/maven-metadata.xml in clojars (https://repo.clojars.org/)
Sending org/clojars/mindaslab/printline/org.clojars.mindaslab.printline/0.1.0-SNAPSHOT/maven-metadata.xml (1k)
to https://repo.clojars.org/
Sending org/clojars/mindaslab/printline/org.clojars.mindaslab.printline/maven-metadata.xml (1k)
to https://repo.clojars.org/
A few seconds later, the library is deployed.
Now, you can visit https://clojars.org/org.clojars.mindaslab.printline, and Clojars tells you how to use it.
33.4. Using Your Library
| Get code for this section here https://gitlab.com/clojure-book/try_printline |
In this section, let’s see how to use our library. Let’s create a new project called try_printline.
Copy the dependency [org.clojars.mindaslab.printline "0.1.0-SNAPSHOT"] shown on the page: https://clojars.org/org.clojars.mindaslab.printline
Now let’s create a new Leiningen project called try_printline.
$ lein new try_printline
In project.clj, add [org.clojars.mindaslab.printline "0.1.0-SNAPSHOT"] to the :dependencies vector. It should look like this:
(defproject try_printline "0.1.0-SNAPSHOT"
:description "FIXME: write description"
:url "http://example.com/FIXME"
:license {:name "EPL-2.0 OR GPL-2.0-or-later WITH Classpath-exception-2.0"
:url "https://www.eclipse.org/legal/epl-2.0/"}
:dependencies [[org.clojure/clojure "1.11.1"]
[org.clojars.mindaslab.printline "0.1.0-SNAPSHOT"]]
:repl-options {:init-ns try-printline.core})Jack into the try_printline project and change the file src/try_printline/core.clj to have this content:
(ns try-printline.core
(:require [printline.core :as pl]))
(pl/print-line "*")
(pl/print-line 30)
(pl/print-line "$", 40)See how we are requiring printline.core in this statement (:require [printline.core :as pl]).
Run the following code:
(ns try-printline.core
(:require [printline.core :as pl]))It should return nil. Now run:
(pl/print-line "*")You should see the following output in the REPL:
; ********************************************************************************
nilRun:
(pl/print-line 30)You should see this:
; ------------------------------
nilAnd finally run:
(pl/print-line "$", 40)You should see this:
; $$$$$$$$$$$$$$$$$$$$$$$$$$$$$$$$$$$$$$$$
nilSo we have successfully created a library, added it to Clojars, required it in our project, and used it. Happy publishing to Clojars!!
34. Metadata
| Get the source for this section here https://yu7.in/XkFT5d |
| Watch the video for this section here https://yu7.in/5U0vRr |
In Clojure, there are two ways to declare a function private: one with defn-, as shown:
(defn- private-function []
"private function")Or you can use the defn with the metadata as shown:
(defn ^:private private-function []
"private function")Metadata is data you can assign to a definition so that the compiler, or the program that uses the definition, can get hints about it. As you have seen with the ^:private metadata, it is a boolean value that, when set to true, prevents the function from being accessed from other namespaces.
Let’s dive deeper into metadata in this section.
In the code below, we are defining a variable named some-var-with-meta, and we are assigning the metadata ^:boo to it.
(def ^:boo some-var-with-meta 7)
;; => #'user/some-var-with-metaNow let’s declare another variable called some-var without any metadata.
(def some-var 7)
;; => #'user/some-varLet’s compare these two variables.
(= some-var some-var-with-meta)
;; => trueThough metadata is assigned to some-var-with-meta, it is still equal to some-var. Metadata in Clojure does not affect the normal operation of the variable.
Now let’s extract metadata of some-var-with-meta:
(meta #'some-var-with-meta)
;; => {:boo true, :line 1, :column 1, :file "/Users/mindaslab/author/clojure/code/meta_data.clj", :name some-var-with-meta, :ns #object[clojure.lang.Namespace 0xf7f1972 "user"]}As you can see above, we get the metadata as a map, where the symbol :boo is true. You might wonder what the #' in #'some-var-with-meta means. It is a reader macro that refers to the variable some-var-with-meta, rather than its value 7.
It’s not the case that only one piece of metadata can be assigned to a definition; you can assign a map with lots of keys and values:
(def ^{:a 1 :b 2 :c 3} lots-of-meta 42)
;; => #'user/lots-of-metaNow when we query the metadata of lots-of-meta, we get:
(meta #'lots-of-meta)
;; => {:a 1, :b 2, :c 3, :line 13, :column 1, :file "/Users/mindaslab/author/clojure/code/meta_data.clj", :name lots-of-meta, :ns #object[clojure.lang.Namespace 0xf7f1972 "user"]}Note apart from :a, :b, and :c there are other keys in the map, but we will not go into detail about them.
In previous examples, calling meta gave a lot of information about the variable, but declaring a variable with with-meta avoids a lot of clutter:
(def my-list (with-meta '(1 2 3) {:secret "meta"}))
;; => #'user/my-listIn the above example we define a variable:
(def my-list)Then we use the with-meta function:
(def my-list (with-meta ....))Add the definition value as first argument to with-meta
(def my-list (with-meta '(1 2 3) ....))Add the metadata as second argument to with-meta:
(def my-list (with-meta '(1 2 3) {:secret "meta"}))That’s it.
Now let’s check the value of my-list:
my-list
;; => (1 2 3)Now let’s check the metadata of my-list:
(meta my-list)
;; => {:secret "meta"}It’s cleaner while querying metadata.
Have you noticed? We use meta on my-list and not on #'my-list. The reason is that the function with-meta attaches metadata to the value of my-list (which is '(1 2 3)) and not to the entity that holds the name my-list and its value '(1 2 3).
We have seen before that ^:private can be attached to a function, making it private and only accessible in the defined namespace. In a similar way, any keyword can be attached as metadata to a Clojure function. Below we attach {:something true} to a function:
(defn ^:something my-function []
"some function")
;; => #'user/my-functionWe call my-function:
(my-function)
;; => "some function"It works as expected. But as you can see below, when we query its metadata, the keyword :something has the value true attached to it.
(meta #'my-function)
;; => {:something true, :arglists ([]), :line 29, :column 1, :file "/Users/mindaslab/author/clojure/code/meta_data.clj", :name my-function, :ns #object[clojure.lang.Namespace 0xf7f1972 "user"]}Docstrings are metadata too, the below function has a docstring.
(defn function-with-doc
"This is a function with doc string"
[]
(println "some function"))
;; => #'user/function-with-docNow, if you query the meta (meta #'function-with-doc) and pull out the value associated with the keyword :doc, as shown below:
(:doc (meta #'function-with-doc))
;; => "This is a function with doc string"You will get the docstring as output.
The same effect can be achieved by setting the keyword :doc as metadata for a function, as shown below.
(defn ^{:doc "This is another function with doc string"} another-function-with-doc
[]
(println "some function"))
;; => #'user/another-function-with-doc
(:doc (meta #'another-function-with-doc))
;; => "This is another function with doc string"A map can be assigned as metadata to a function, with lots of keywords and values, as shown below.
(defn ^{:a 1 :b 2 :c 3} lots-of-meta-my-function []
"some function")
;; => #'user/los-of-meta-my-functionWhen we query its meta, we get those keywords and values, along with other metadata Clojure sets implicitly, as shown below.
(meta #'lots-of-meta-my-function)
;; => {:ns #object[clojure.lang.Namespace 0xf7f1972 "user"], :name los-of-meta-my-function, :file "/Users/mindaslab/author/clojure/code/meta_data.clj", :column 1, :c 3, :line 52, :b 2, :arglists ([]), :a 1}Bibliography
-
Clojure for the brave and true https://www.braveclojure.com/
-
Getting Clojure https://amzn.to/3ABmVup
-
Programming Clojure https://amzn.to/3c2aAFe
-
Professional Clojure https://amzn.to/3ARddo7
-
Practicalli https://practical.li/
-
Clojure Cookbook: Recipes for Functional Programming https://amzn.to/3TMkuLn
-
The Joy of Clojure https://amzn.to/3hOwJtN
-
Mastering Clojure Macros https://amzn.to/3KWoXdF
-
Clojure Script Unravelled https://funcool.github.io/clojurescript-unraveled/